Challenge No. 39 – Apple (not Winberry) Pie

Have you every heard of winberries? Well I hadn’t until about 18 months ago when Dave mentioned to me that he used to love having winberry pie when he would stay with his Grandma and Grandad.  I thought he was going a bit crazy until I mentioned it to someone at work and they knew all about winberry pies! So when I was asking for suggestions for this blog, Dave suggested I make his old favourite.  However, try as I might, I just couldn’t find any winberries in the shops! I even tried the fruit market in town but with no luck 😦 so instead, I decided to make another fruit pie.  Dave loves apple pie so it seemed like a perfect alternative.

I thought making apple pie might be a bit easy so I looked for a recipe to make homemade custard too.  I soon found this recipe by Ed Baines.

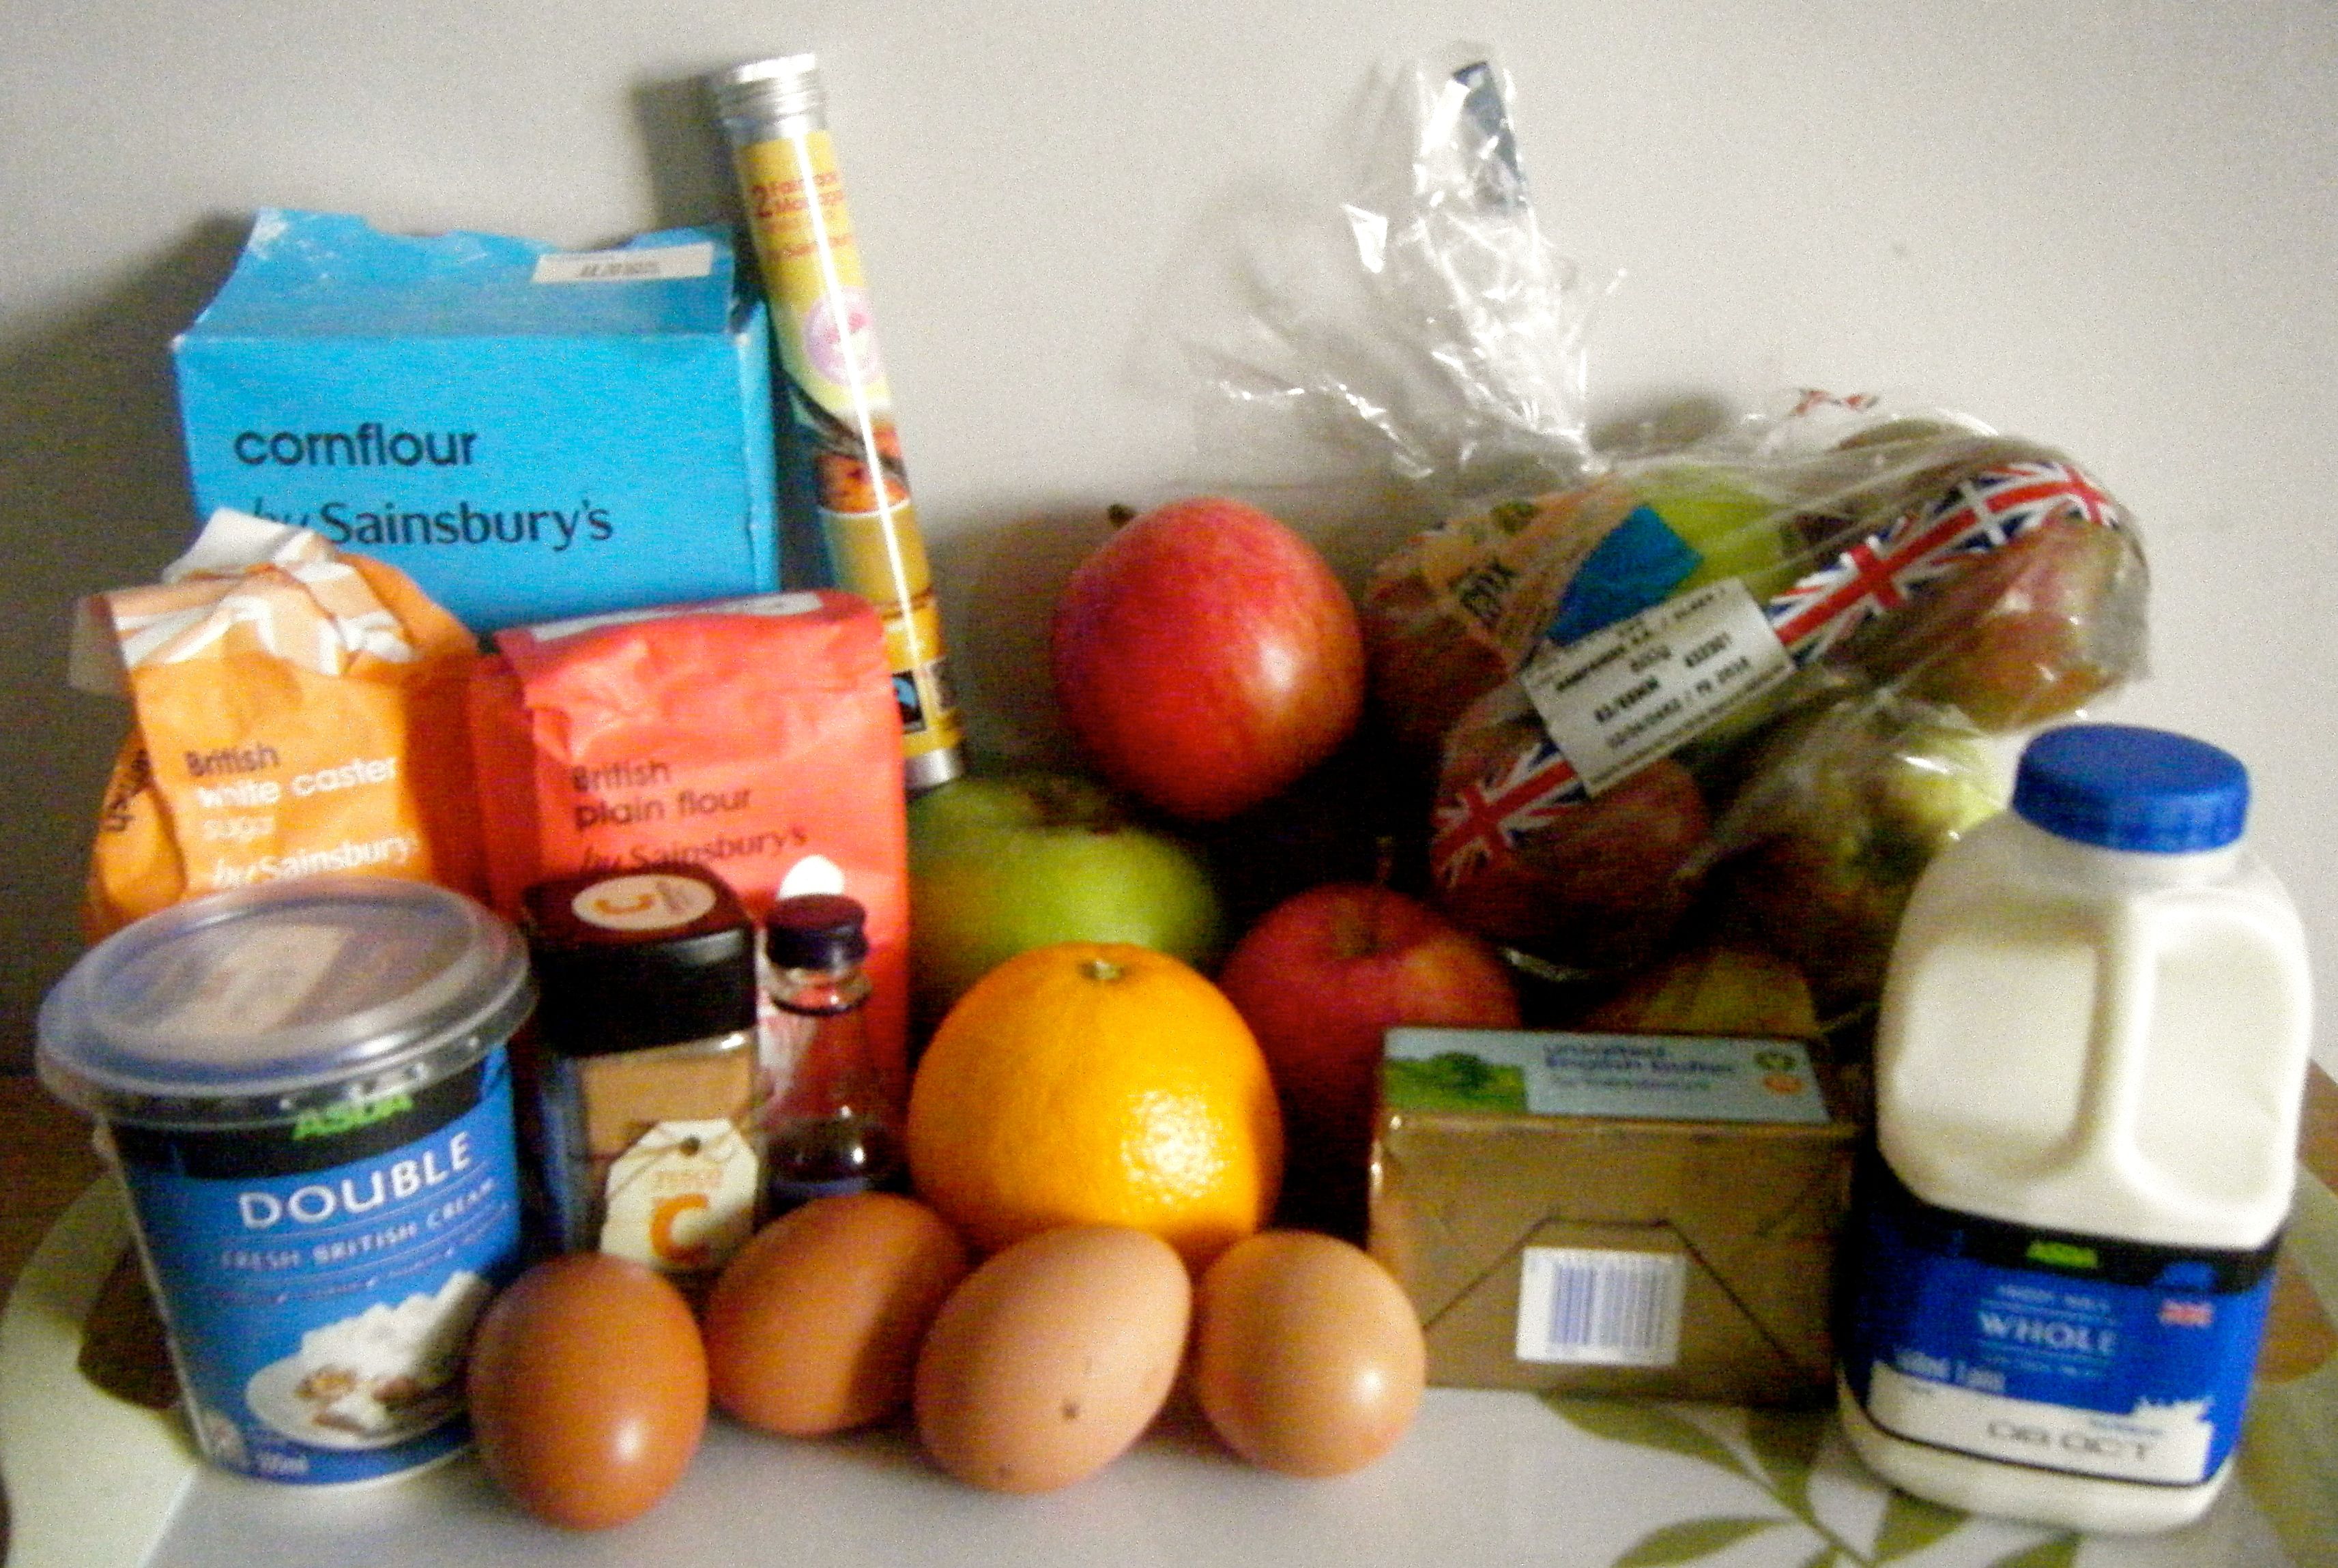
For the recipe you will need the following ingredients:-

  • For the pastry
    • 250g/9oz plain flour, plus extra for dusting
    • 125g/4½oz unsalted butter, chilled, cut into cubes
    • 1 orange, zest only
    • 75g/2½oz caster sugar
    • pinch salt
    • 2 free-range egg yolks
  • For the filling
    • 1kg/2lb 4oz Cox apples, peeled, cored and cut into large chunks
    • 250g/9oz Bramley apples, peeled, cored and cut into large chunks
    • 250g/9oz Royal Gala apples, peeled, cored and cut into large chunks
    • 200g/7oz caster sugar
    • 1 tbsp cornflour
    • 2 tsp vanilla extract
    • 1 tsp ground cinnamon
  • For the custard
    • 250ml/9fl oz whole milk
    • 250ml/9fl oz double cream
    • 1 vanilla pod, split lengthways and seeds scraped out
    • 2 free-range egg yolks
    • 50g/1¾oz caster sugar

Edited - ingredients

I went to the supermarket on Sunday morning to buy my ingredients and it was only once I got home that I realised I’d got my apple quantities wrong.  I accidentally bought too few Cox apples and too many Gala apples.  I didn’t think it would matter too much so ended up making the recipe with a bit more of a random mixture of weights but I made sure the total amount of apple was 1.5kg.

I started by making the pastry.  I put the flour, unsalted butter, orange zest, sugar and salt into my mini food processor and gave it a good blitz until it resembled fine breadcrumbs.   It was a tight squeeze and in hindsight, it may have been better to rub the ingredients by hand.  But I just about managed it in my mini processor.

Edited - breadcrumbs

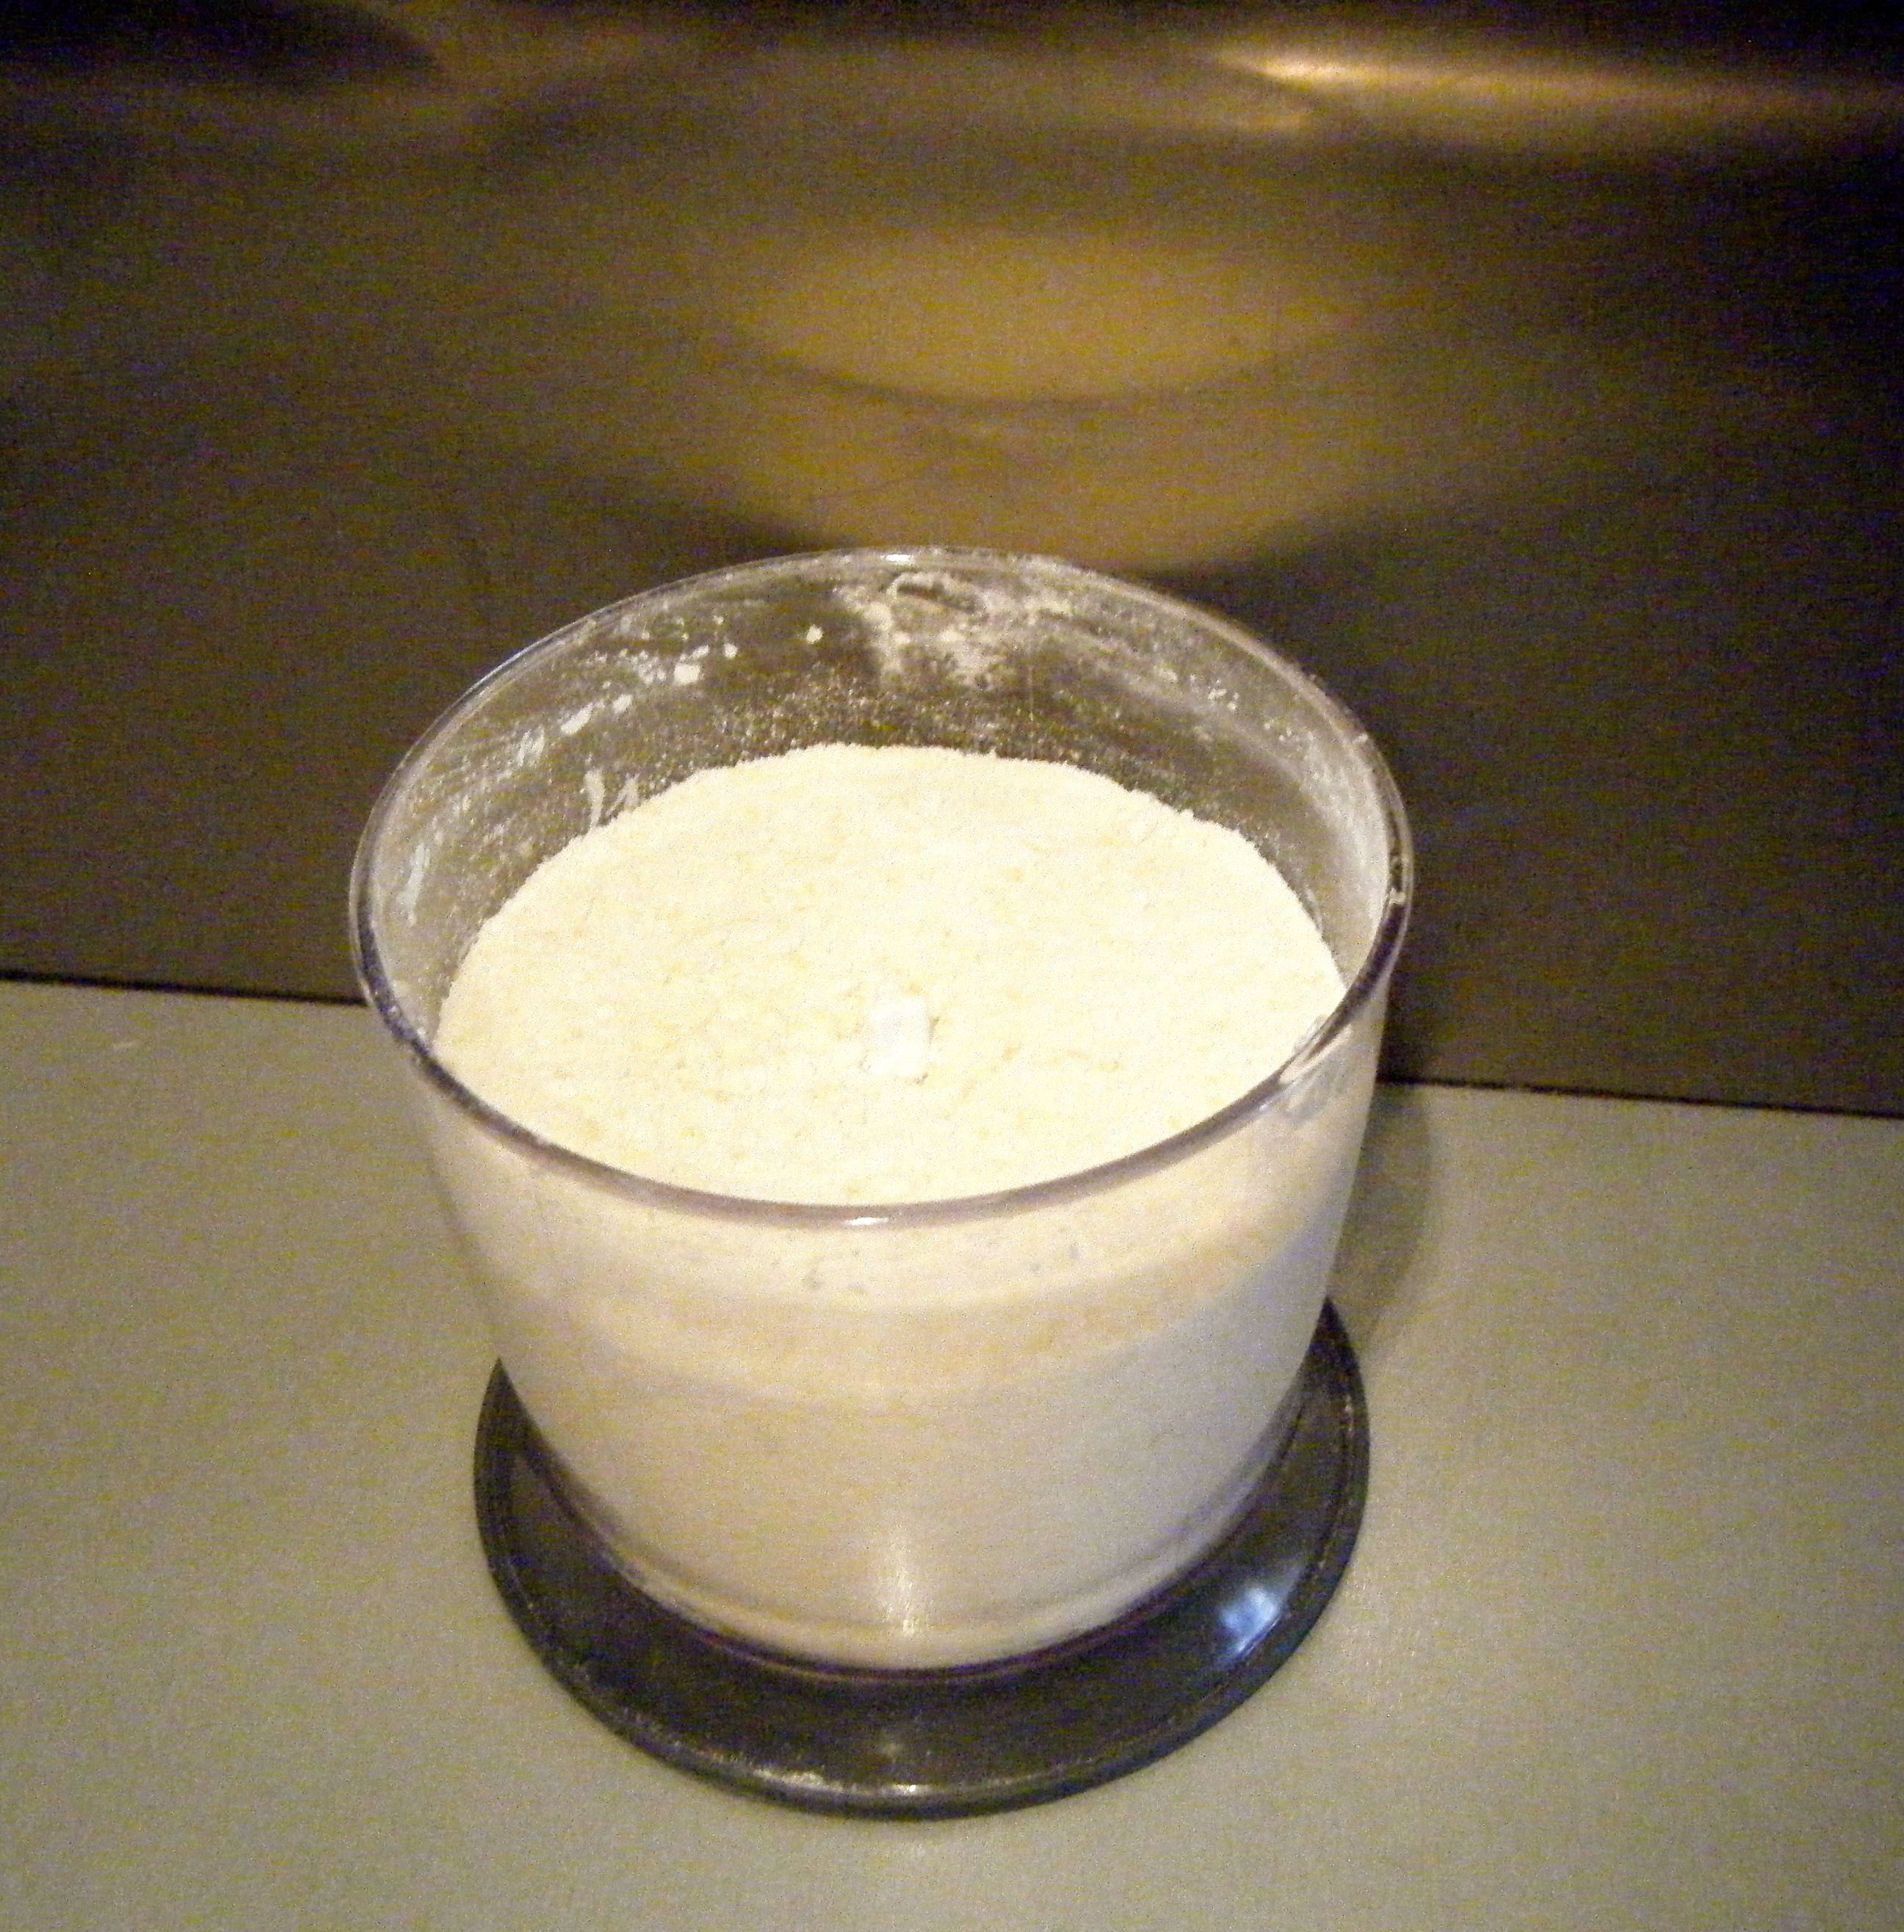
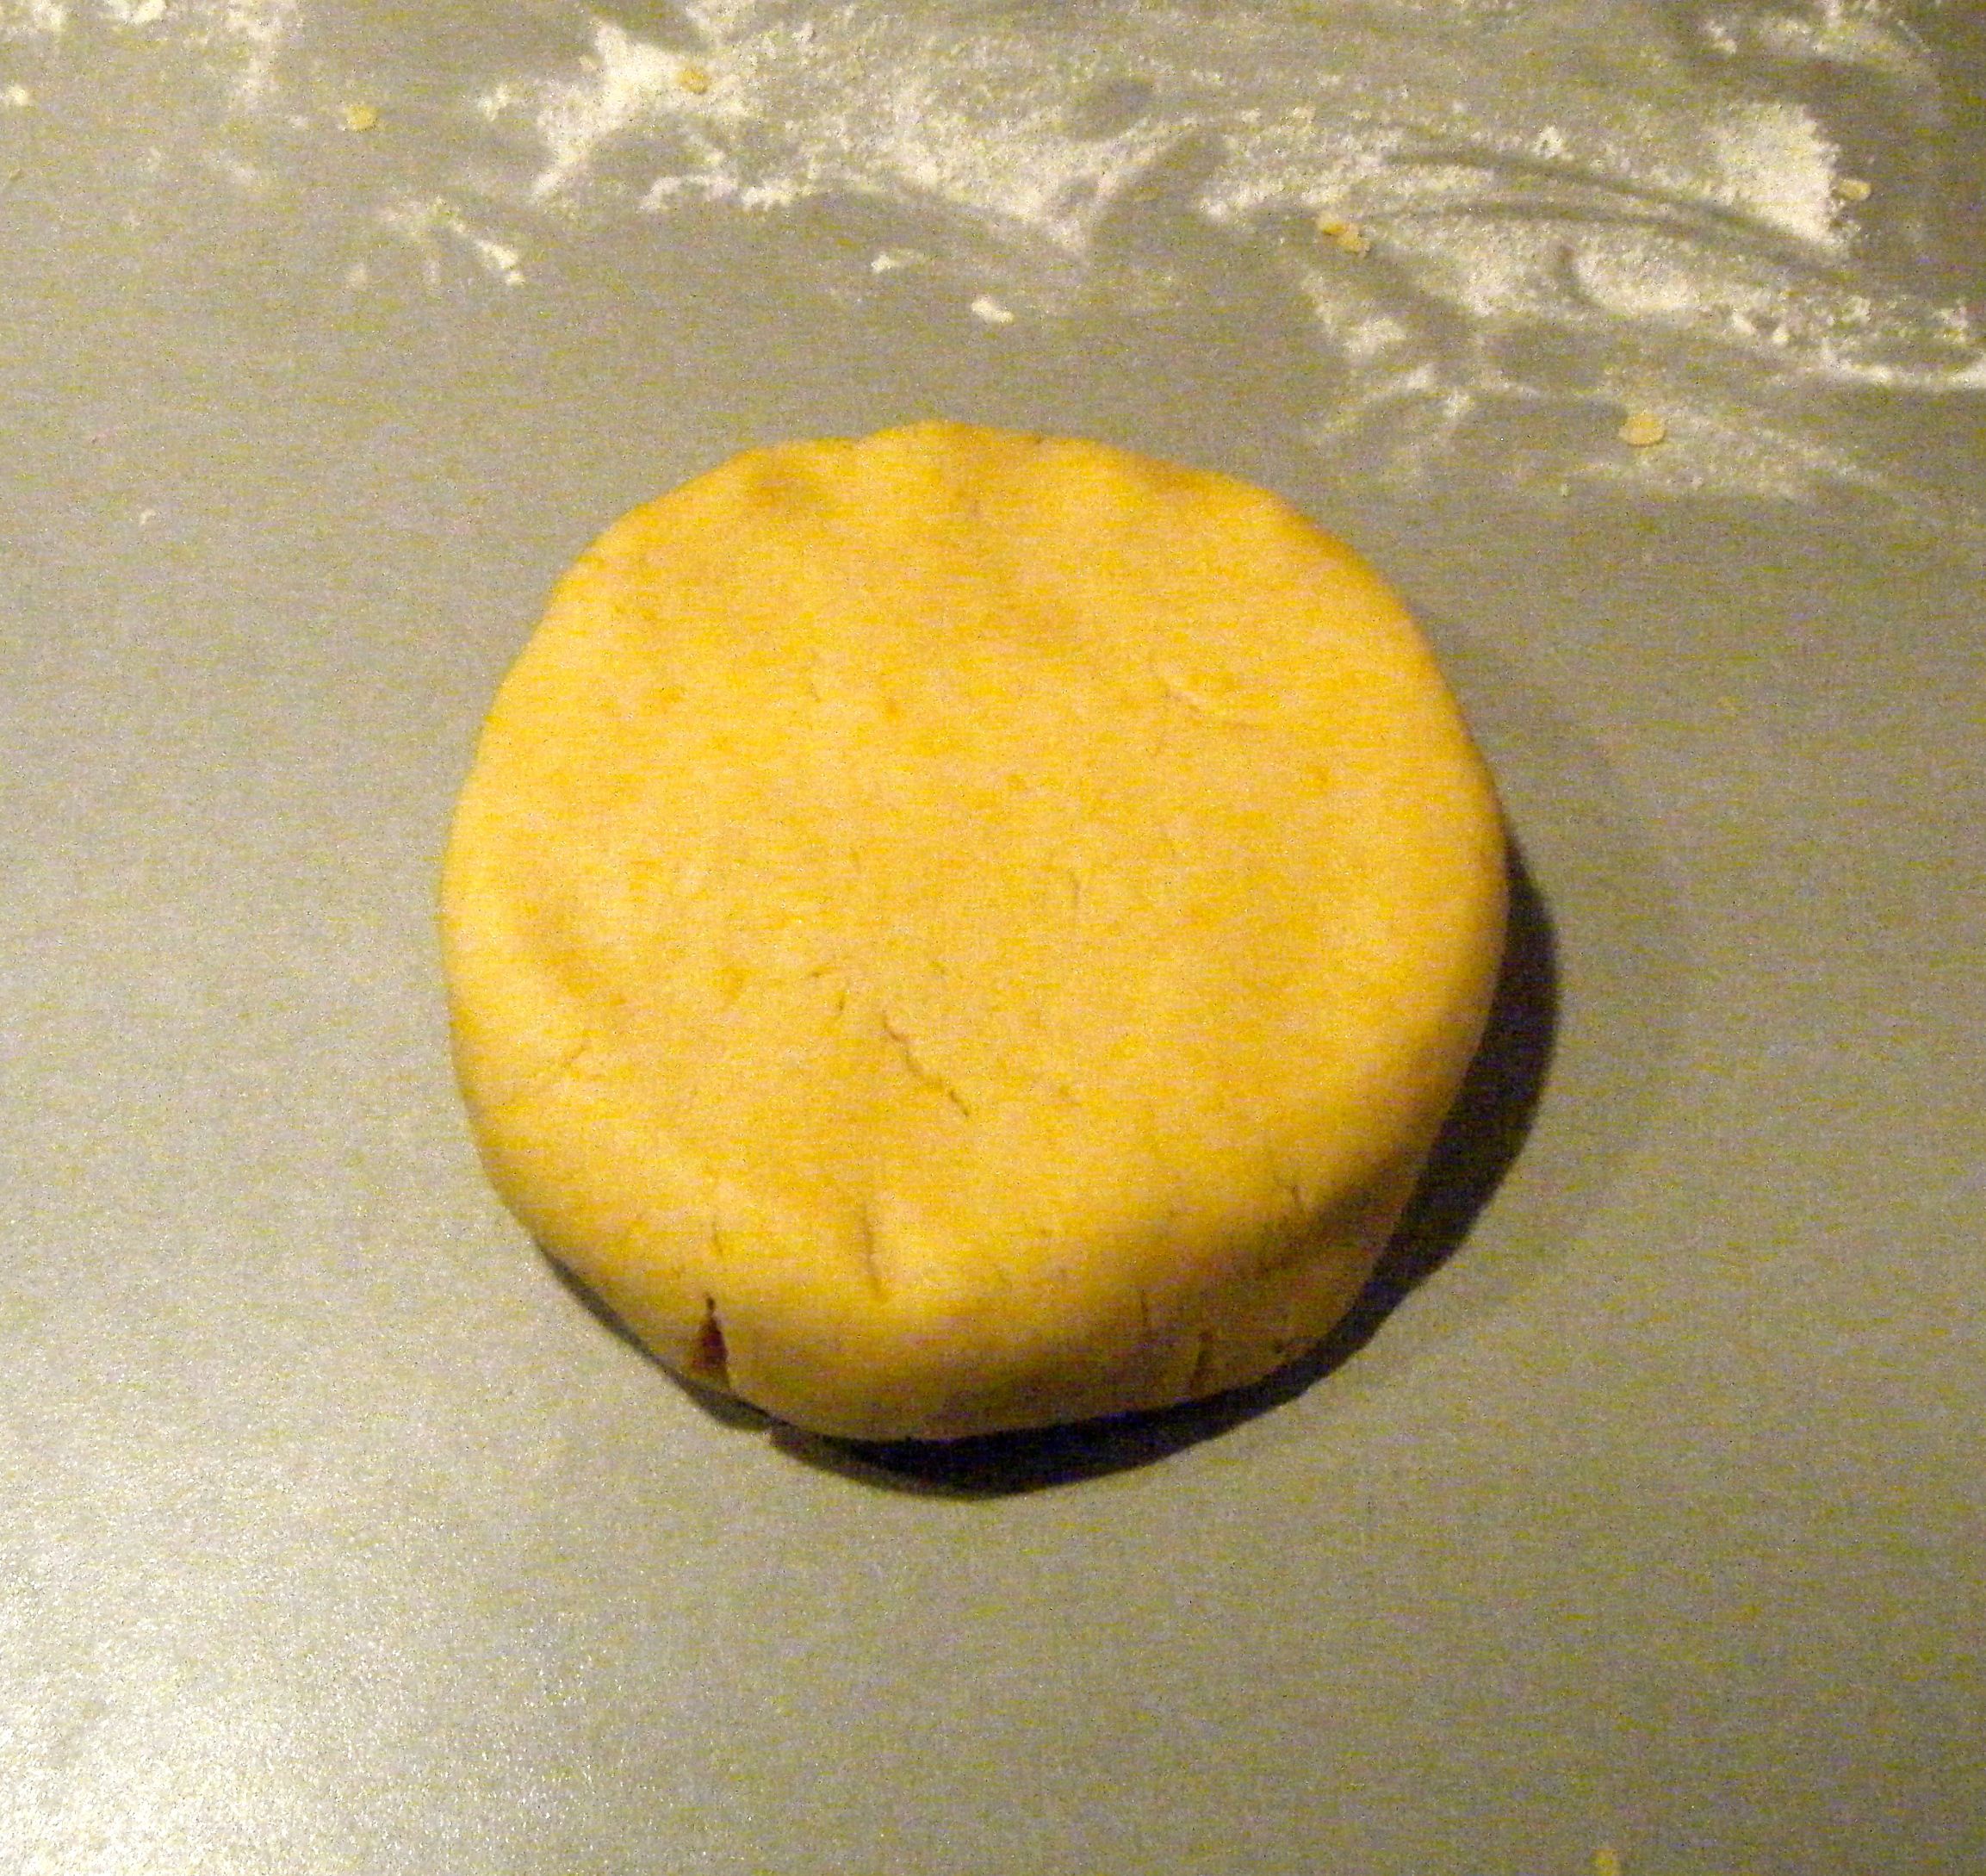
When I came to add the egg yolks, this didn’t work! I tried to blitz it but the ingredients were too packed in to get an even mix.  So I tipped it out into a bowl and brought it together by hand.  After working it for a while in the bowl, I tipped the pastry onto a lightly floured surface and gently kneaded it until it became smooth.  It was quite a crumbly mixture so took a bit of working but it got there in the end.  I then shaped it into a disk, wrapped it in cling film and popped it into the fridge to rest.

Edited - pastry disk

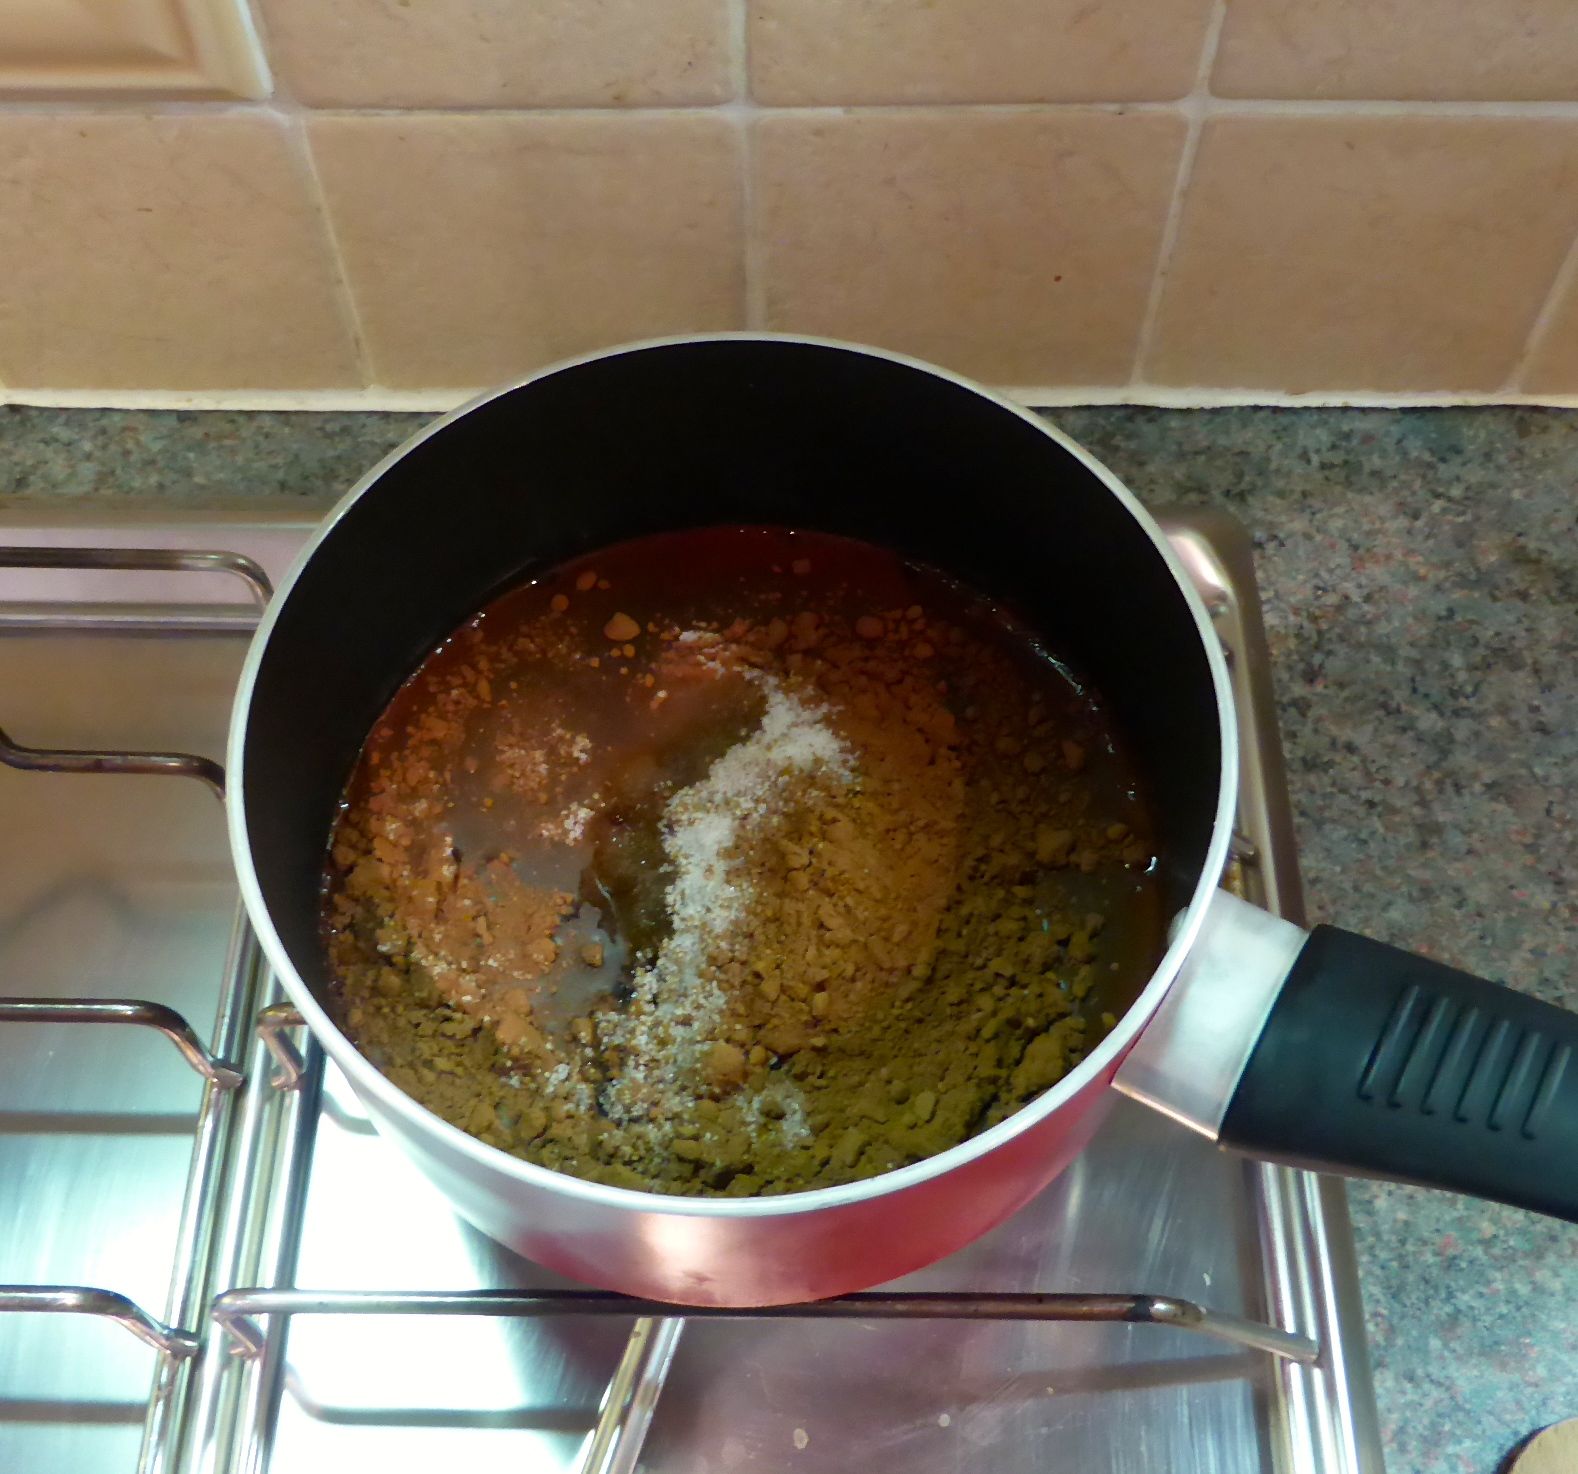
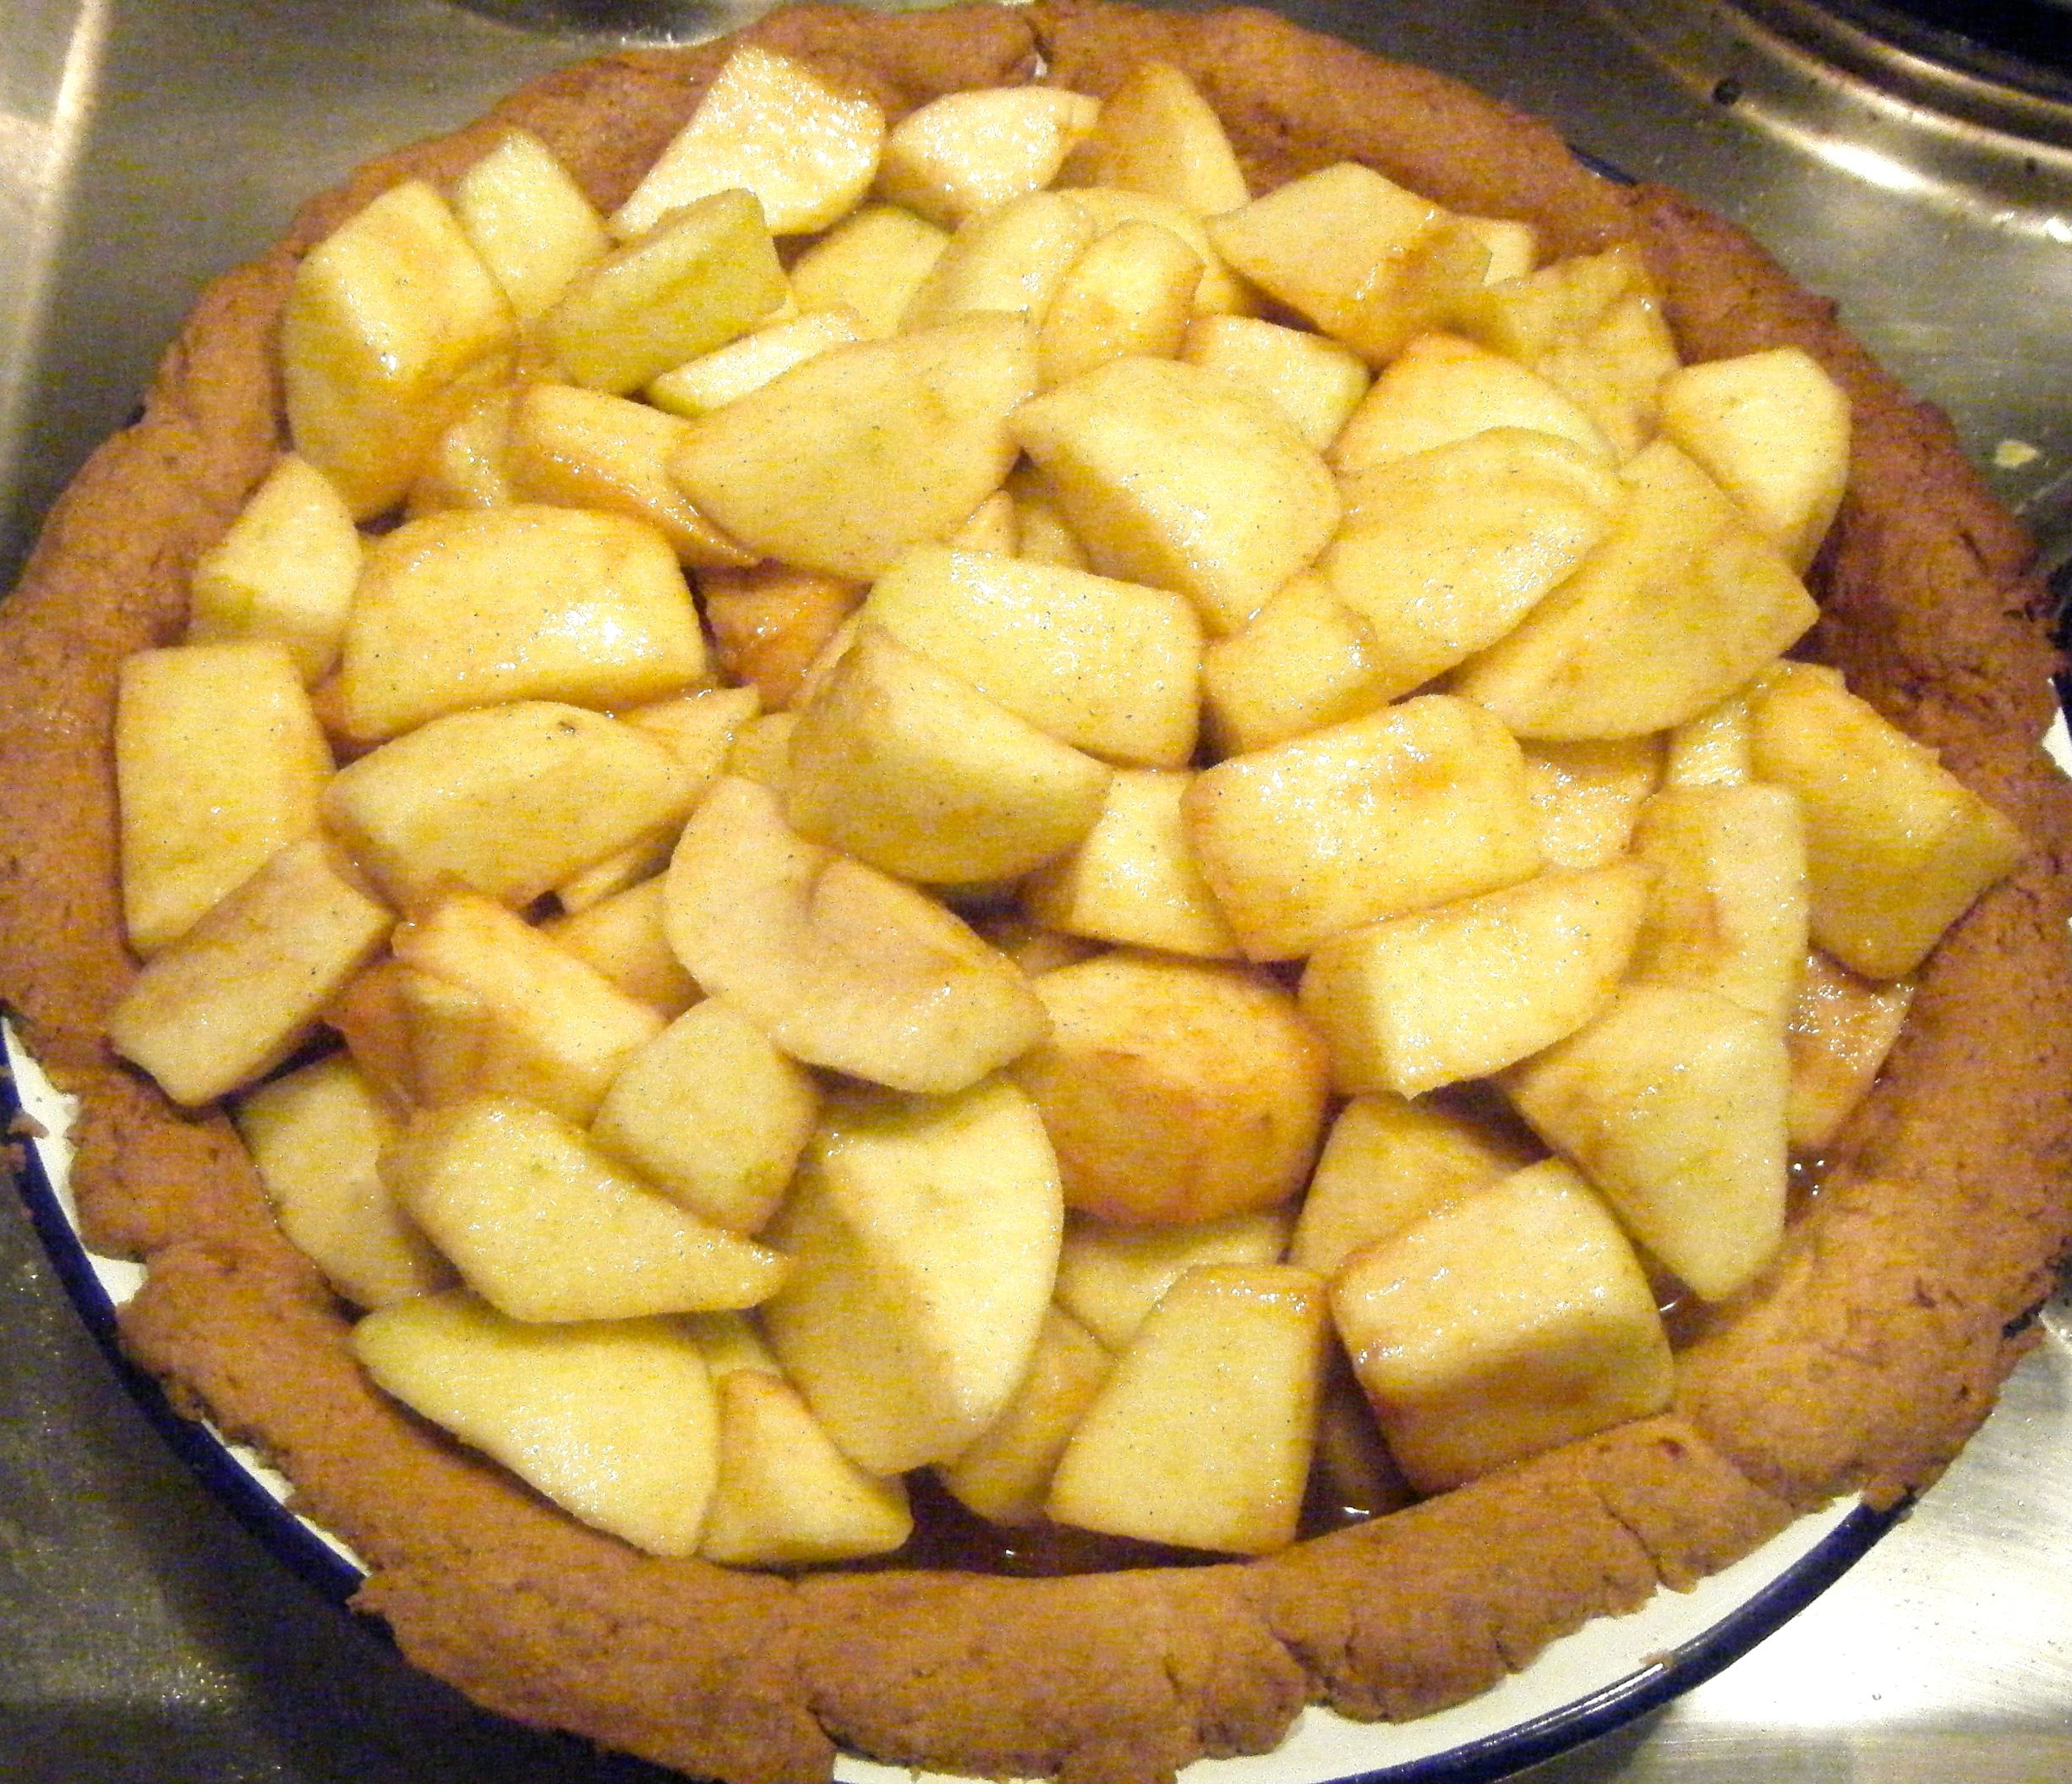
I put my apples and sugar into a big saucepan over a medium to low heat.  The recipe said to heat the apples gently for 5 minutes or until they start to break down slightly.  The 5 minutes didn’t seem to do very much to the apples so I let them heat for about 10 to 15 minutes.  I then stirred in the cornflour, vanilla extract and cinnamon.  I left it on the heat for a couple of minutes and then set it aside to cool down whilst I made mine and Dave’s dinner.

 Edited - applesEdited - cooked apples

Once I was ready to get back on with the pie, I pulled the pastry out of the fridge and broke off 2 thirds.  The pastry was really stiff and when I tried to roll it out, the edges kept splitting.  So I decided to work the pastry to soften it slightly before rolling it out. 

I then lined my (new!) pie dish with the pastry.  I covered it with baking paper and added my rice to use in place of the baking beans. 

Edited - uncooked base

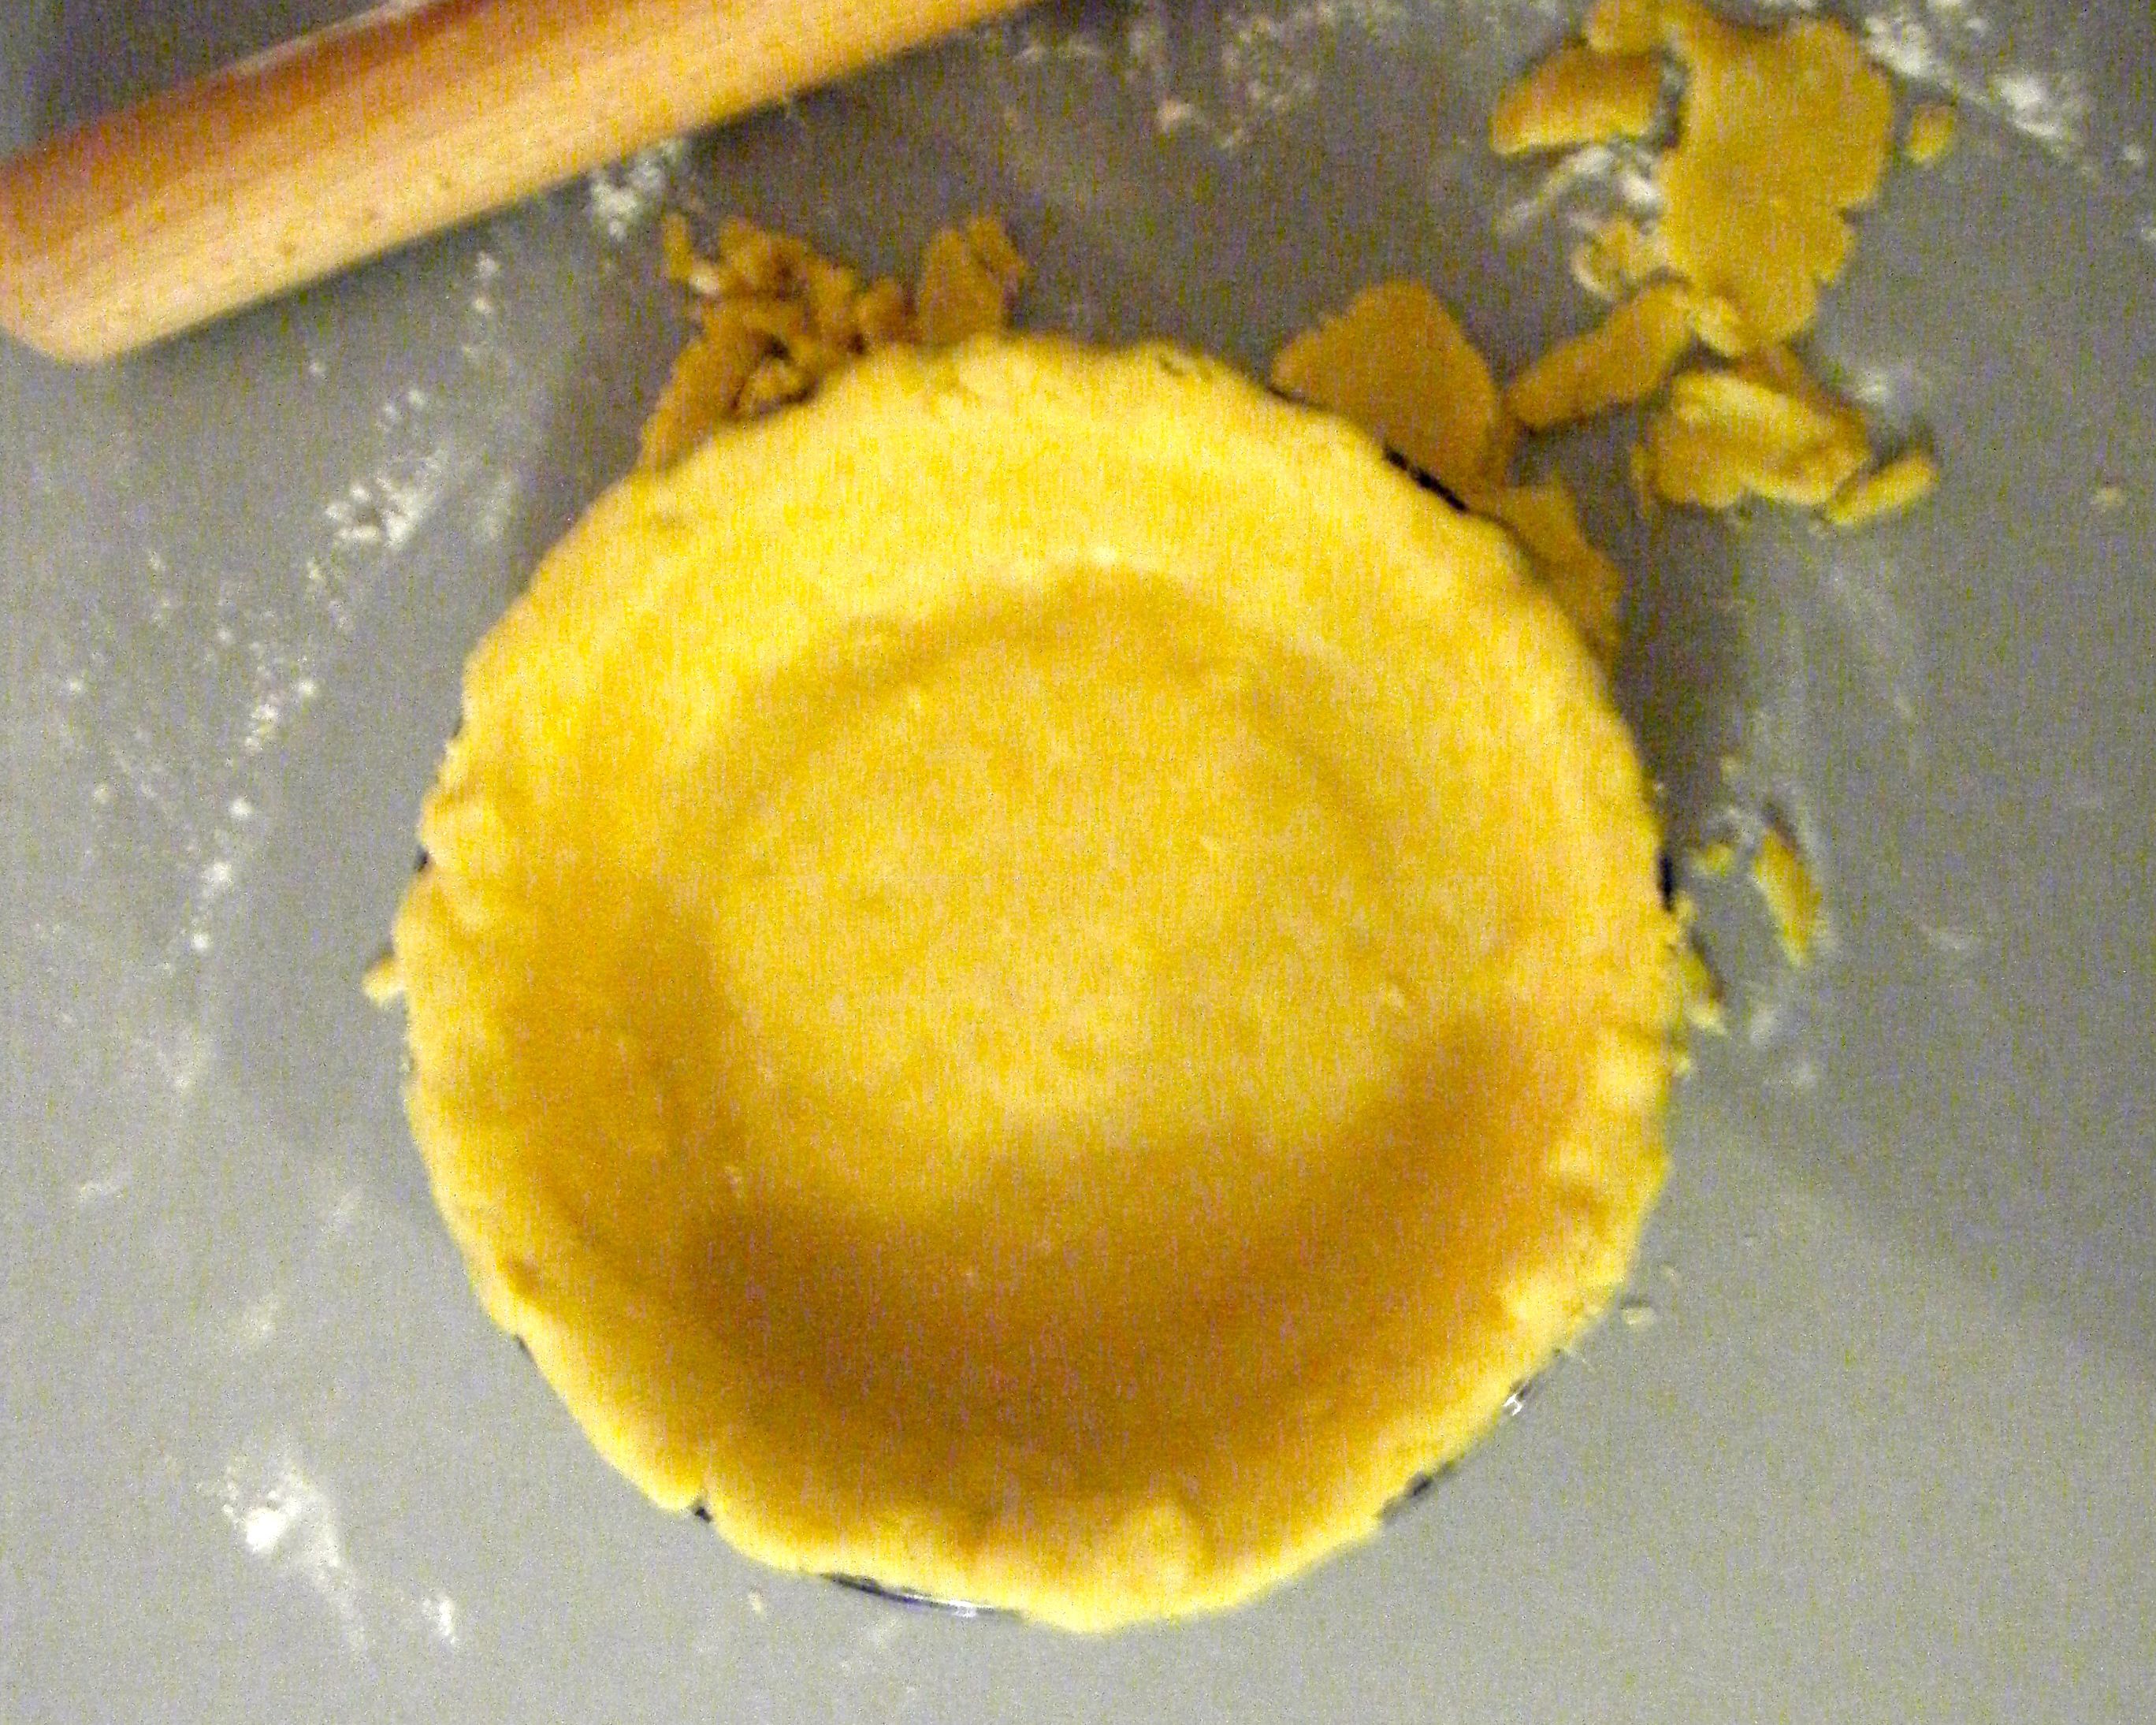
I popped the dish into the oven on 200 degrees celsius for 15 minutes before removing the rice and baking paper.  I then put the dish back in the oven for another 10 minutes.

Edited - part bakes

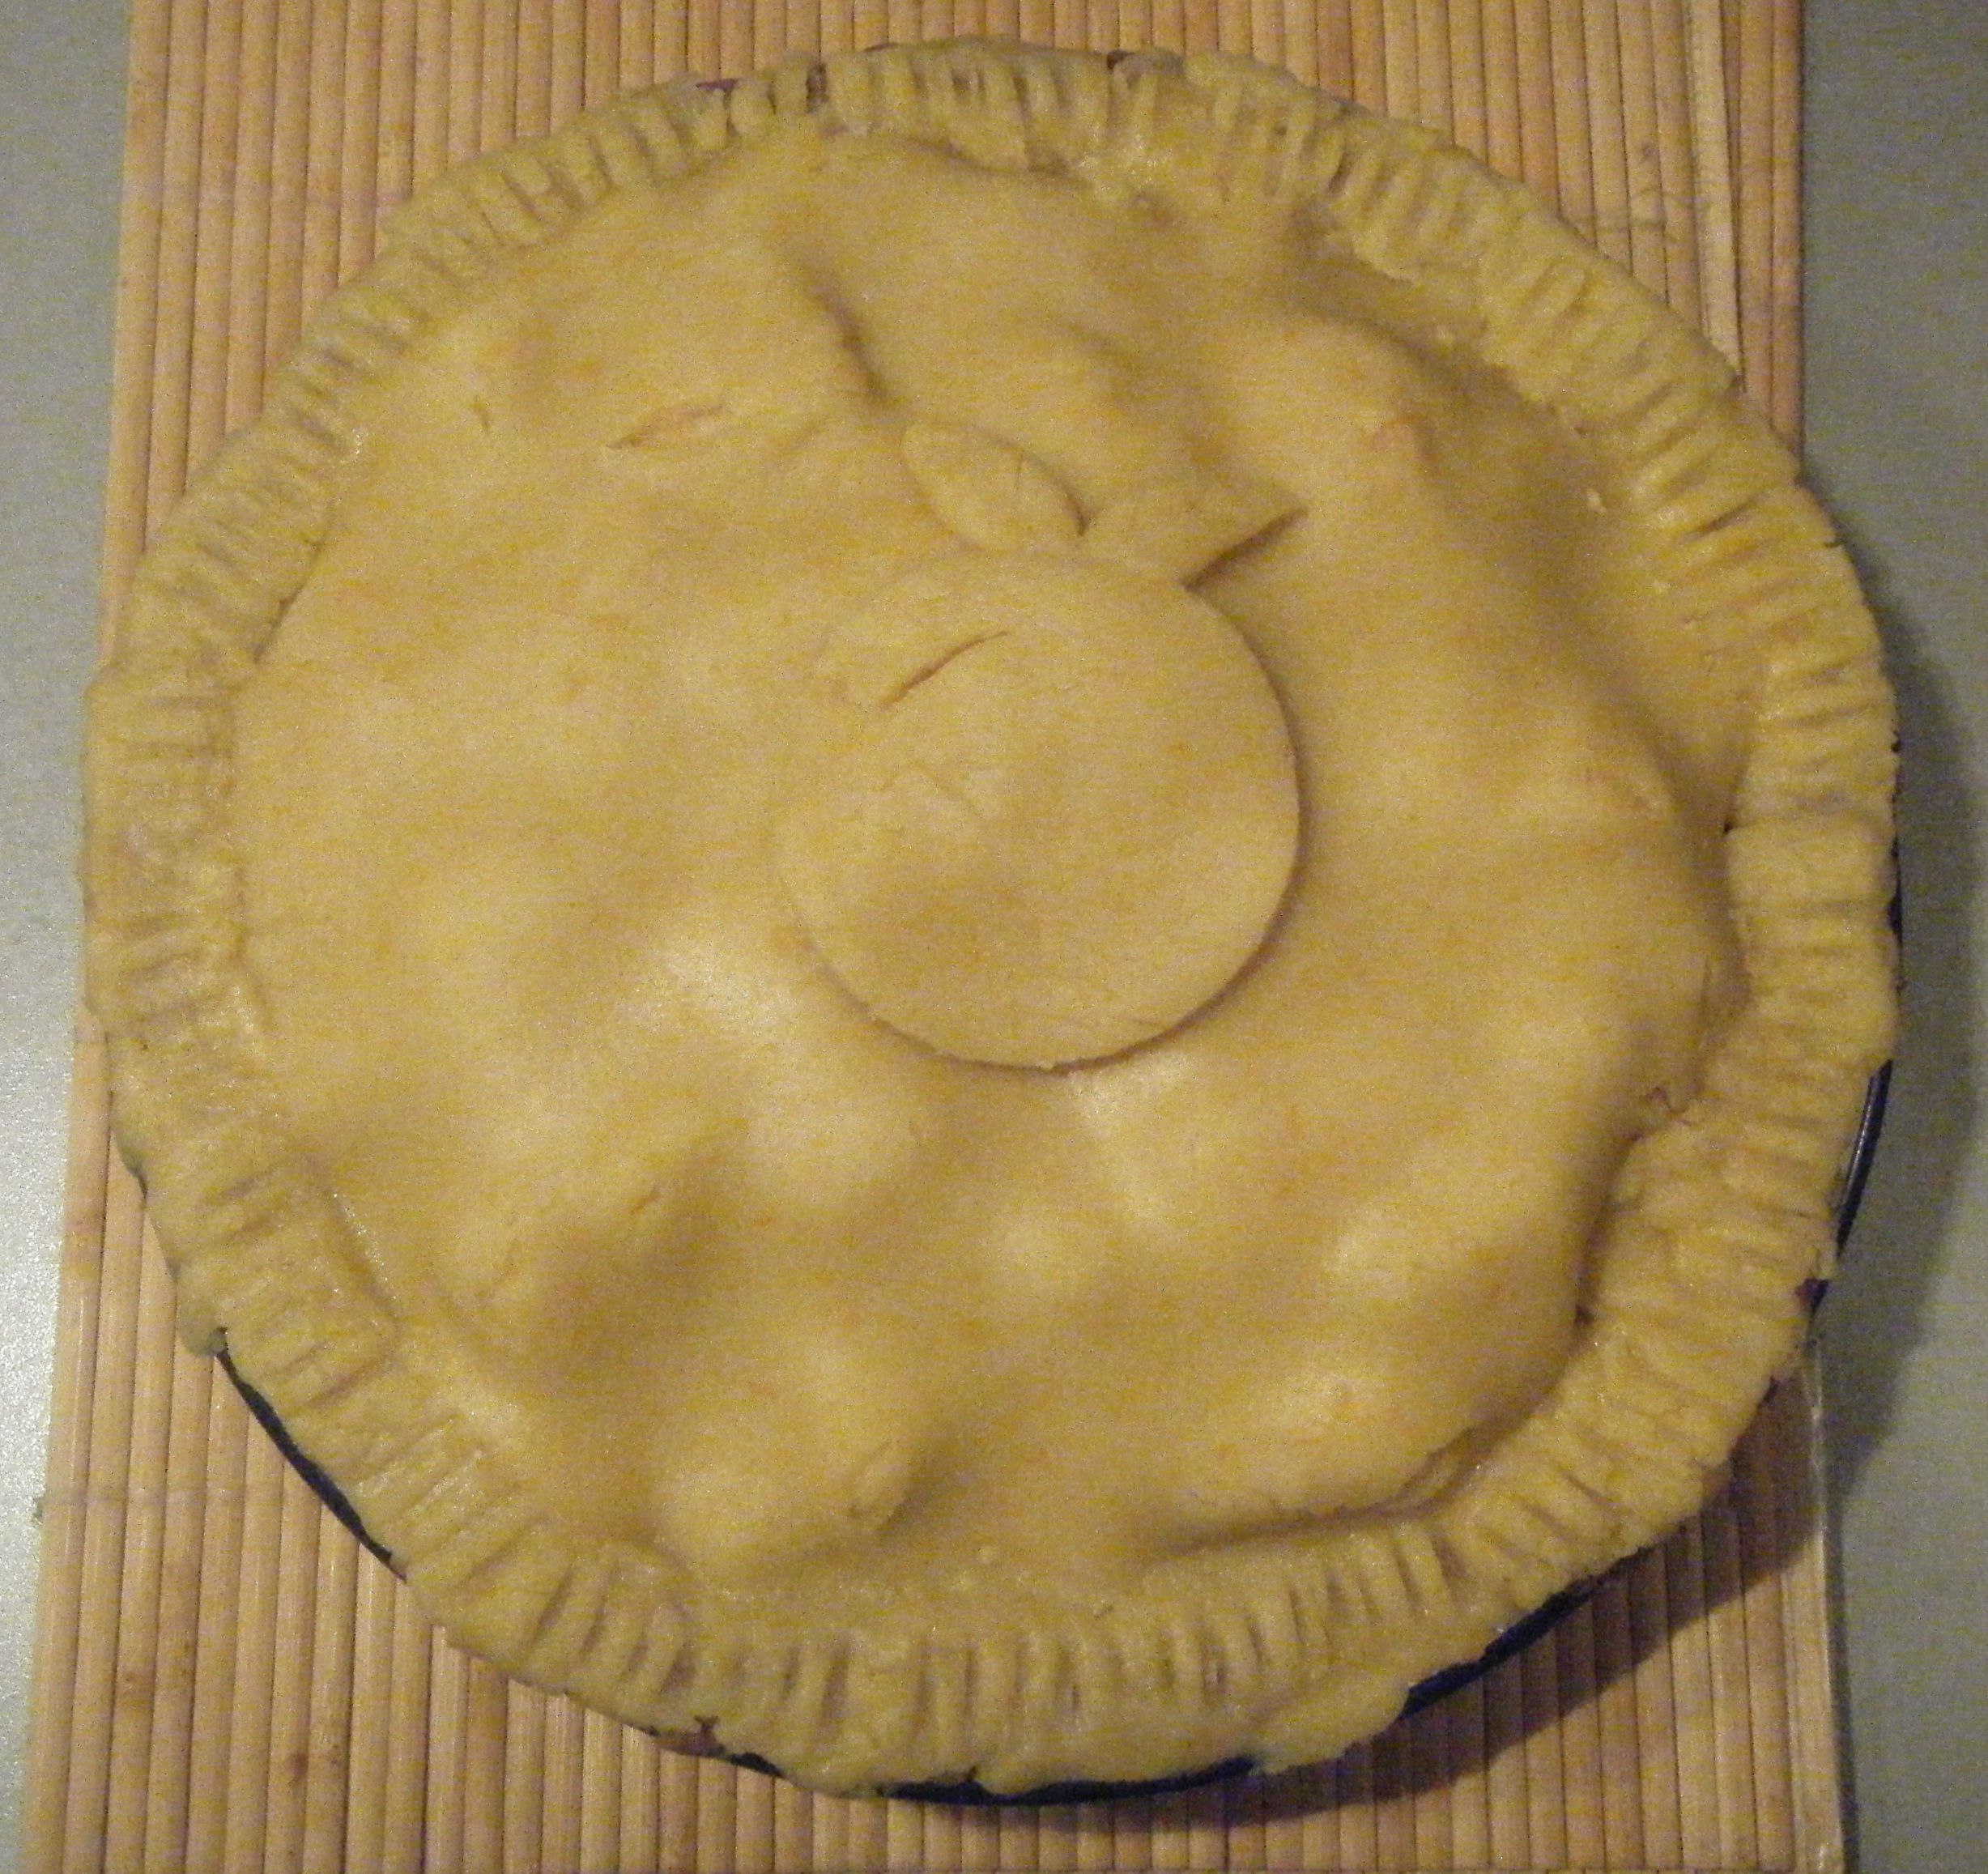
Whilst the pastry was finishing up, I rolled out the final third to create my pie lid.  I also used some of the excess to make a little picture topper which you can see in the pictures later on 🙂

I filled the baked pastry with the apple mixture.  This is where I potentially went a little wrong.  The apples had given off a lot of liquid when I cooked them in the pan and I decided to add most of this to the pie.  It seemed like the right thing to do but as you’ll see below, it may not have been!

Edited - filled

I added my top, sealed the edges and added my picture topper to the middle.  Then into the oven it went for around 23 minutes.

Edited - topped

When the pie had about 15 minutes left to go, I got started on my custard.  I put the milk, cream and vanilla pods and seeds into a pan over a low heat. 

Edited - milk cream pan

Once the milk/cream mixture had come up to a simmer, I poured it through a sieve into a pouring jug.  I whisked the egg yolks and sugar together using a fork and then slowly added the sieved milk/cream mixture, being sure to whisk constantly (now with a balloon whisk).

Edited - whisked

I then poured the mixture into a clean pan and returned it to a medium to heat to thicken up.  This took quite a while, and I ended taking the pie out of the oven about 10 minutes before the custard was ready.  It didn’t matter though as the pie retained its heat and the custard was well worth the wait!

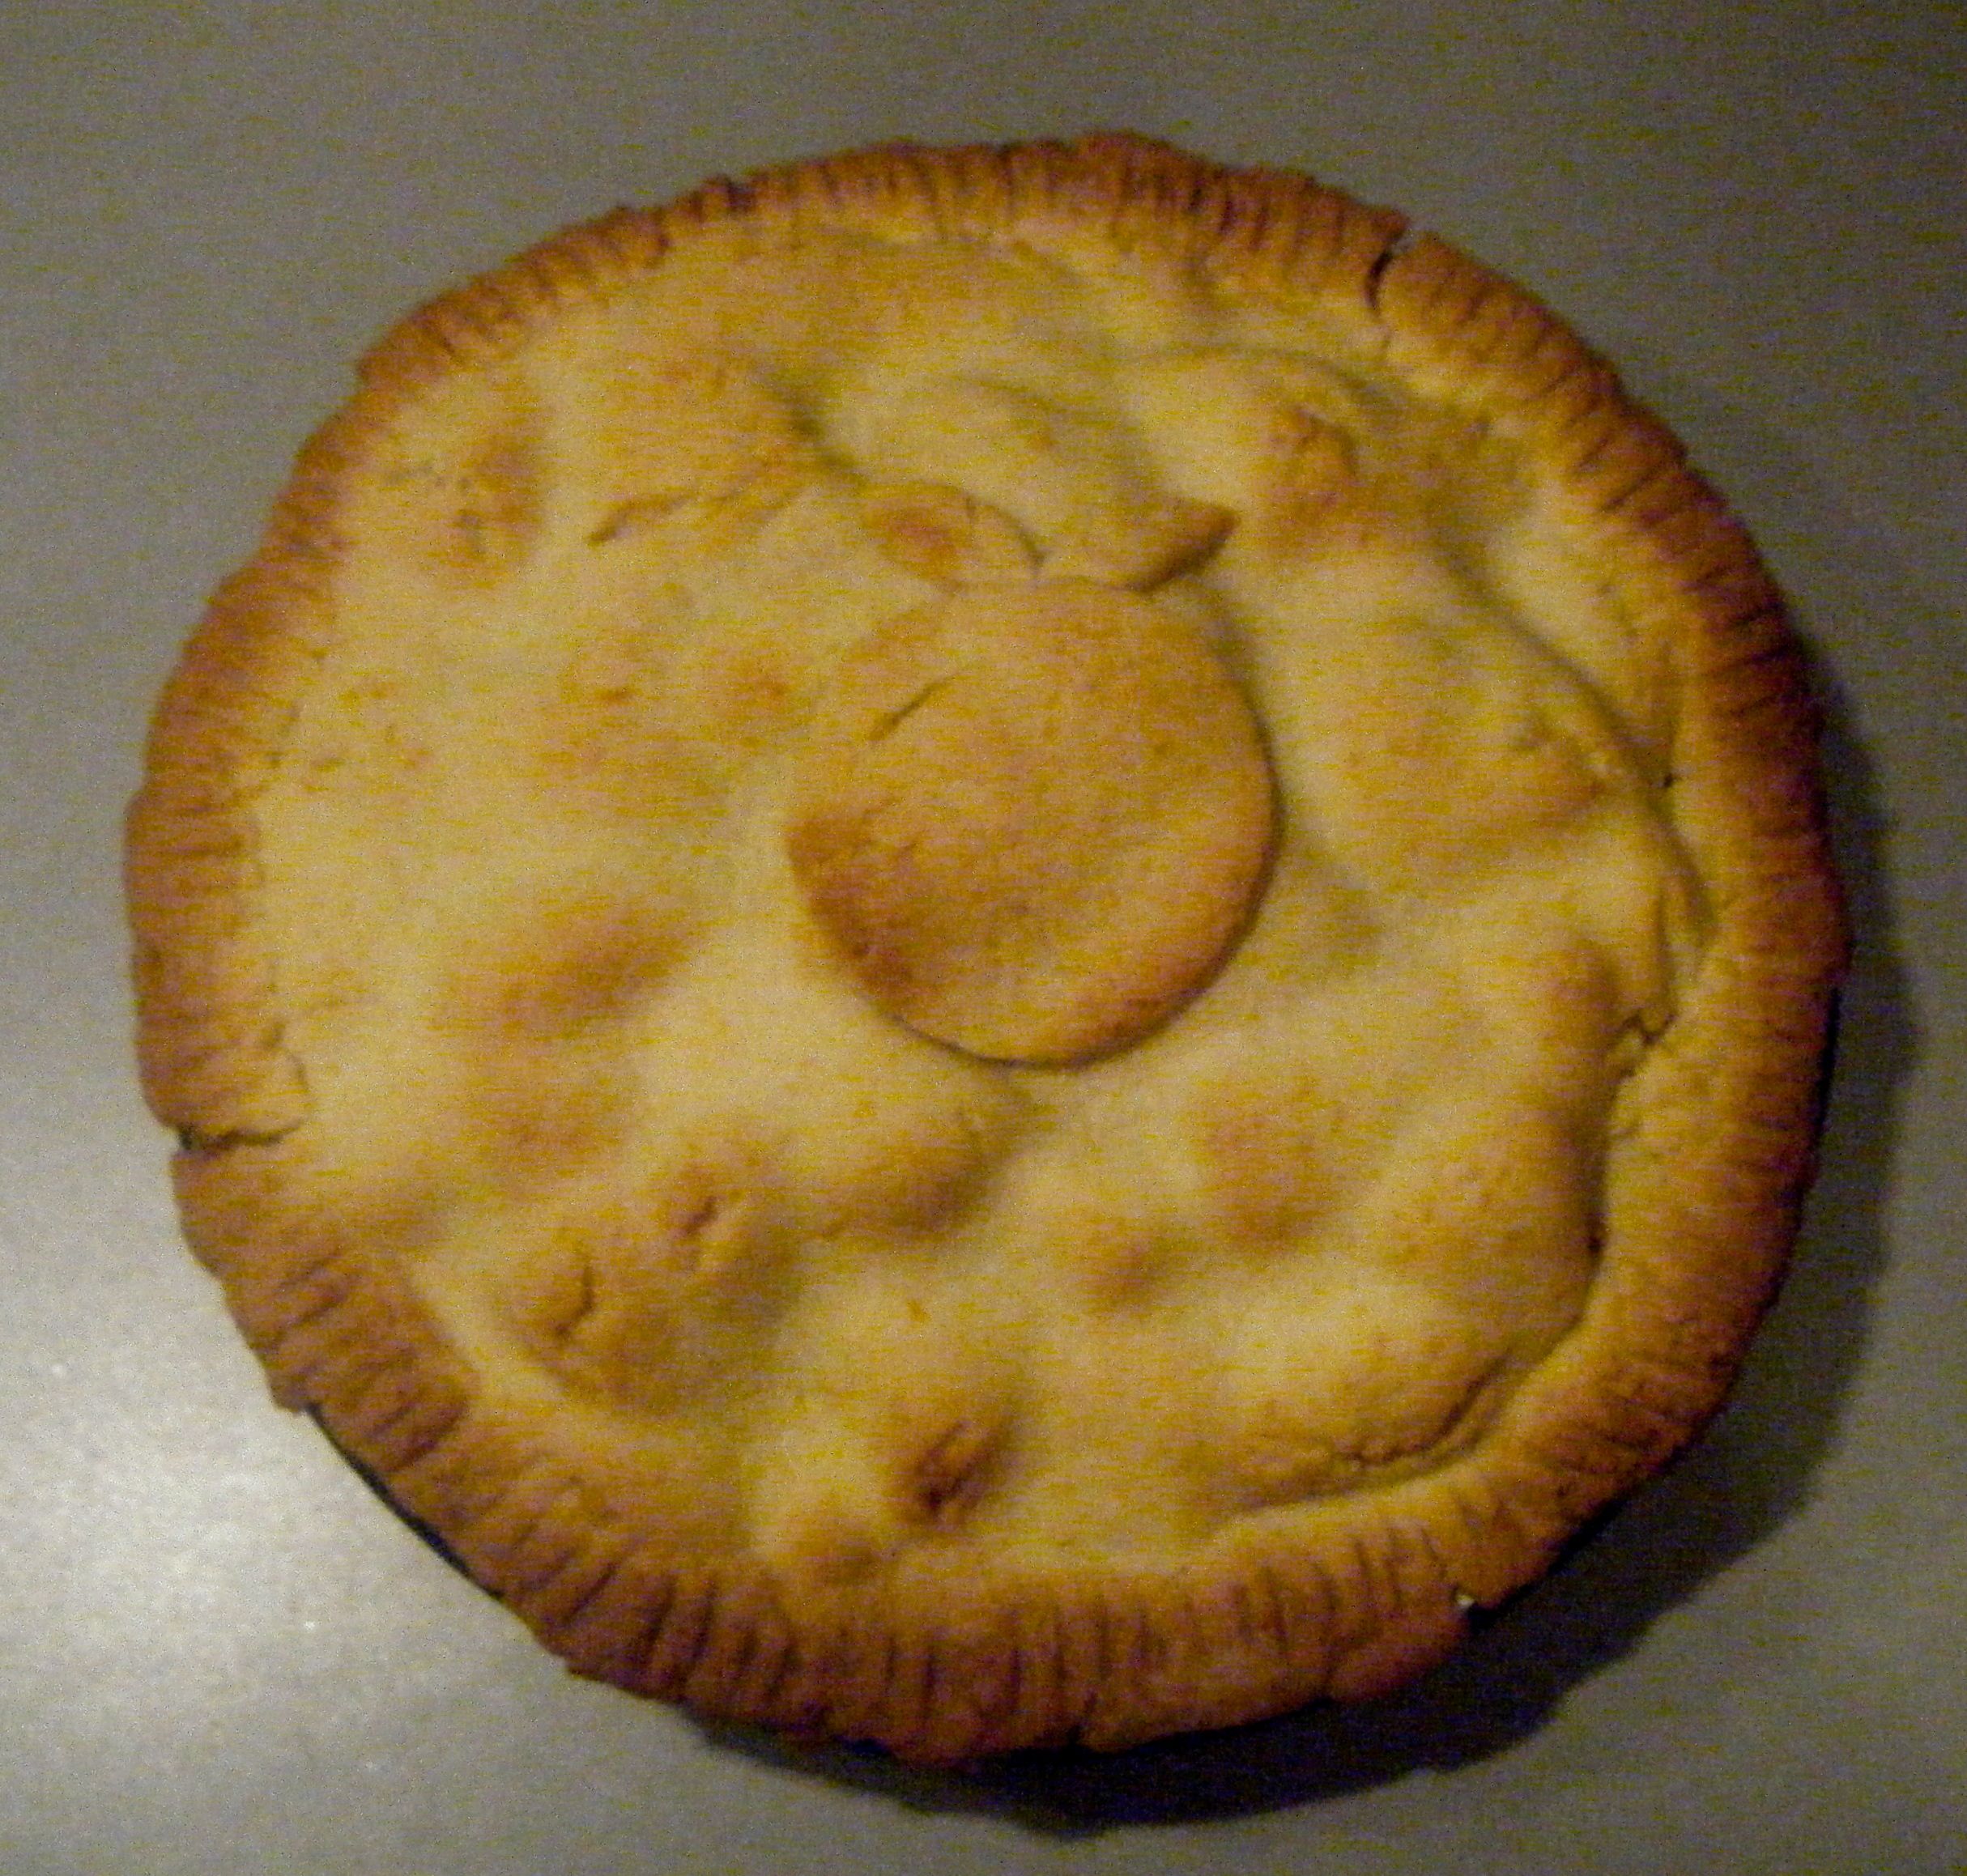
So this is my pretty pie in one piece…

Edited - baked

I then tried to serve it up to get a nice looking photo of a slice with custard…

Edited - served up

Evidently that didn’t work!! The pie didn’t have a base any more and there was so much liquid in the middle. 

Edited - juices

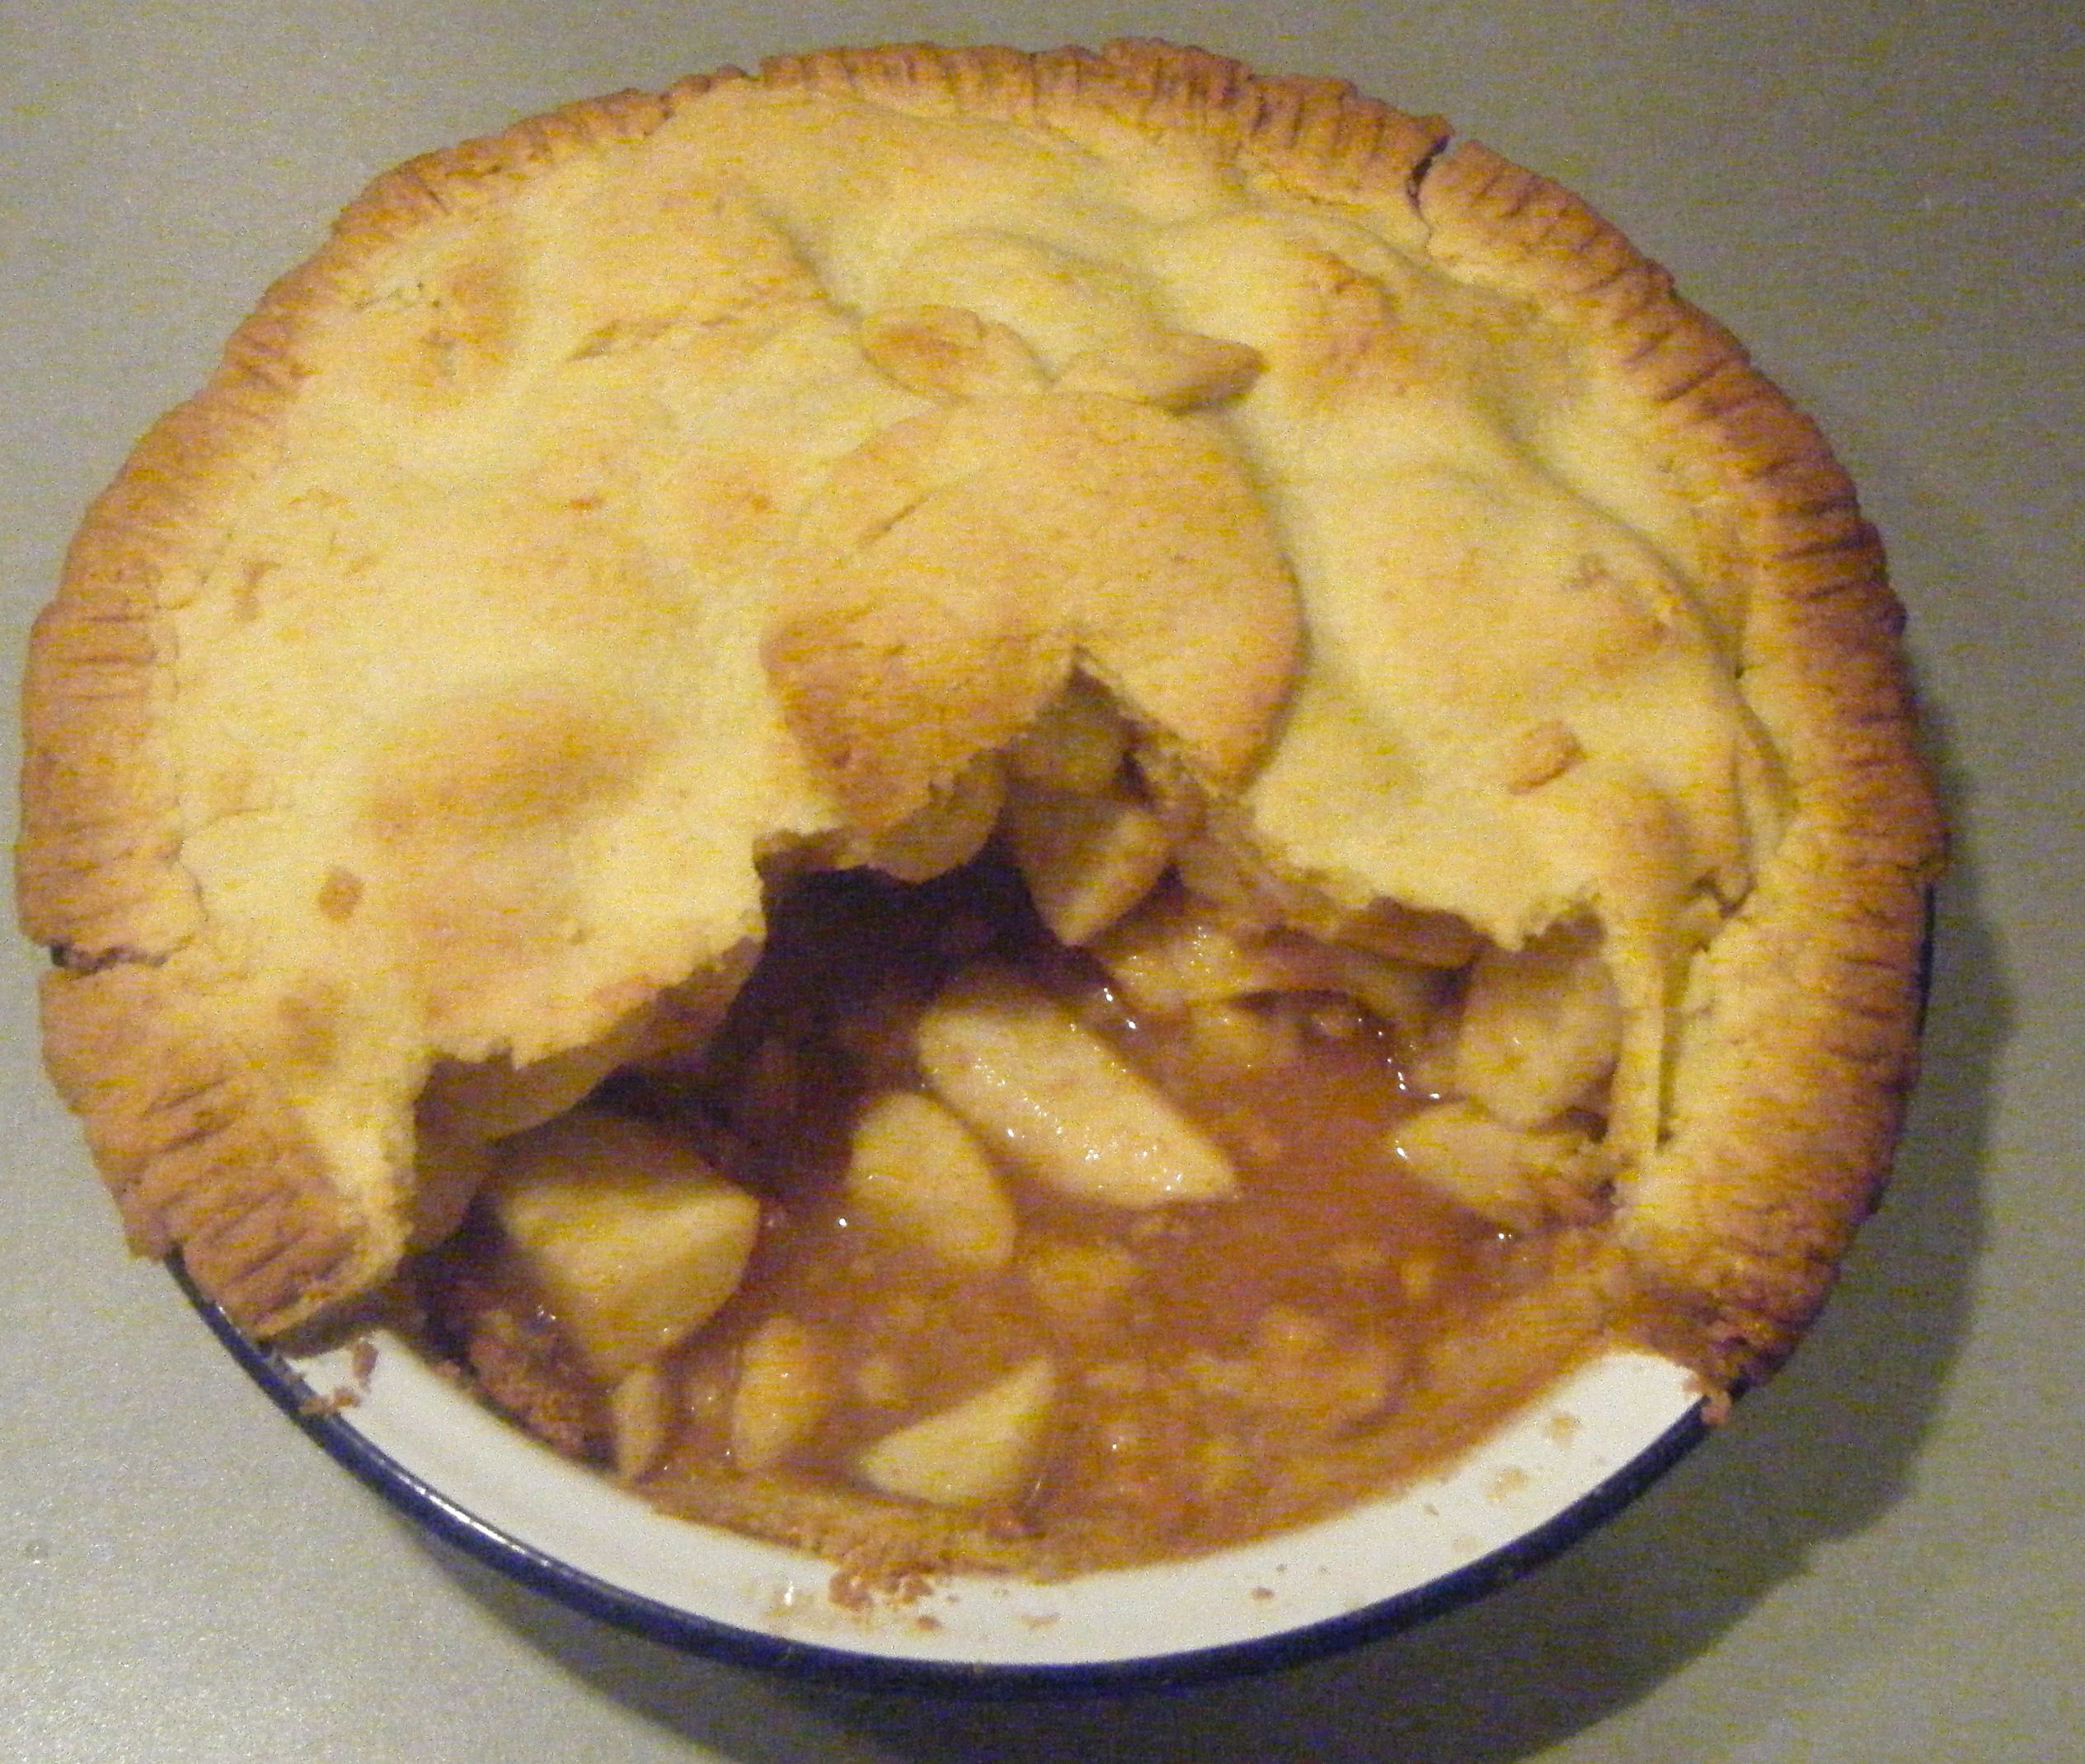
So it wasn’t the prettiest served pudding but it sure did taste yummy! There is clearly room to improve my pie making ability.  Dave said it was more like delicious baked apples with a pie crust top 🙂 but I have to say, that custard…it was absolute heaven and so easy to make.

Coming up next week, Challenge No. 40 – tomato soup.    

Challenge No. 36 – Eggs Benedict

Breakfast, brunch, lunch or dinner…I really don’t care what time of day it is, I will always happily devour a plate of eggs benedict.  I absolutely love it and I cannot get enough of hollandaise sauce.  This recipe was suggested by mum and whilst I was so happy to get to eat this dish as part of Challenge 52, I was actually pretty terrified about making it.  I’ve always cheated and used a egg poaching microwave gadget and packet hollandaise sauce.  But as Challenge52 is all about learning new kitchen skills and recipes, it is only right that I made the sauce and learn to poach eggs the proper way.

I’ve actually tried poaching an egg before.  I got a pan, half filled with water, I added a splash of vinegar, gave it a stir and added my egg.  It all sounded right but the results was anything but.  The egg just spread out in the water and made a right mess.  I ended up getting out my microwave cheat and I haven’t tried again since…until now.

I found this recipe by Jamie Oliver which looked absolutely delicious! The recipe serves 2 to 4 people, however, this is a dish Dave didn’t want to try (sometimes I really don’t understand him!!) so I adjusted the quantities.  I love hollandaise sauce so I left the quantities for this bit unamended meaning I could have lots of it! I also decided to leave out the lemon from my spinach, simply because I’m not a fan of food which has been covered in lemon.

So for my slightly adjusted recipe, you will need the following:-

  • 2 spring onions
  • olive oil
  • 200g baby spinach
  • 1/2 a whole nutmeg, for grating
  • Salt and pepper (missing from my photo!)
  • 1 English muffins
  • 3 free-range eggs
  • 1 large slice of ham
  • For the hollandaise:
    • 100 g unsalted butter
    • 2 large free-range egg yolks
    • 1 teaspoon Dijon mustard
    • 1/3 tbsp lemon juice (this is also missing from my photo!)
    • white wine vinegar

Edited - ingredients

I started by making the spinach topping.  I finely chopped the spring onion and added it to a pan with some hot oil.  I gave it a stir and then added the spinach.  It was near enough spilling over the side of the pan so I decided to let this cook down slightly before I grated over half a nutmeg and seasoned it with some salt and pepper.  I then gave it another mix together and let it cook until all the moisture was cooked out.  This actually took quite a while and at one point I decided to squash the spinach to release some of the water and then tip this out of the pan.  Eventually I had a lovely smelling and dark spinach mixture which I transferred to an oven proof dish, covered with foil and popped it in the oven on a low heat to keep warm.

Edited - leaves Edited - spinach

Practical tip: my research told me that hollandaise sauce doesn’t reheat very well.  However, to make the sauce and poach eggs at the same time is not easy.  So I dug out a thermal mug, filled it with boiling water whilst I made my sauce.  When the sauce was done, I poured the water away, dried the mug and added my sauce.  I put on the lid and put it to one side whilst I poached my eggs.  It worked perfectly!   

With my thermal flask heating up, I got on with the hollandaise sauce.  I filled my small pan with some water and put it over a medium to low heat.  I then separated the egg yolks and put these into a heatproof glass bowl.  At the same time, I measured out the mustard and lemon juice ready to be added to the eggs. 

Edited - eggsWhilst the pan was coming up to heat, I melted my butter.  The recipe says to do this in a pan on the hob.  However, I don’t have enough pans for this so I decided to melt it in a jug in the microwave and it worked perfectly.

Edited - butter

Once the pan of water was just bubbling, I put the bowl with the eggs in on top (making sure the water didn’t touch the bottom of the bowl).  I started whisking the eggs, poured in the mustard and lemon juice and whisked it together.  I then very slowly added the butter, being sure to continue whisking constantly.

Practical tip: keep an ice cube to hand and if the mix starts to split add it to your bowl.  I didn’t have to do this but apparently it helps.

When the sauce started to thicken up, I added a splash of white wine vinegar and gave it a taste.  It was delicious! So I emptied and dried the thermal flask before pouring in the hollandaise sauce to keep warm.

Edited - hollandaise sauce Edited - thermal flask

I sliced the muffin in half and popped it under the grill whilst I poached my eggs.  I half filed a large pan of water and bought this to a simmer. 

Practical tip: make sure the water isn’t too hot.  It should be just simmering, but definitely not boiling.

Edited - simmering water

I put a drop of white wine vinegar into a small jug and then broke in one of the eggs.  I whisked the simmering  water with a balloon whisk to create a vortex before carefully pouring the egg into the centre.  I did this very slowly, dipping the tip of the jug into the water to help with a smooth transition.  I then covered the pan and let it simmer for 3-4 minutes.  I fished out the egg with a slotted spoon and put it on some kitchen roll to drain off.  I then repeated this with my other three eggs.

Edited - poached

Once these were done, it was time to assemble everything.  I topped each half of the toasted muffin with some ham, the spinach mixture, a poached egg and finally some of the lovely hollandaise sauce.  Time to tuck in 🙂

  Edited - served up Edited - served up4

Oh my gosh! This was absolutely amazing! I am so proud of myself for the poached eggs.  The first one was slightly over done but the other two were perfectly runny.  And the hollandaise sauce was so rich and quite frankly so much nicer than the packet stuff I usually use! I can’t believe I’ve never made this before.  If you are a fan of eggs benedict I would encourage you to give this recipe a go!  I’ll definitely be making it again and again.

Coming up next week, Challenge No. 37 – panna cotta with fruit coulis

Challenge No. 35 – Mother of all Milkshakes

This challenge was suggested by my milkshake-a-holic brother.  Despite being nearly 30, Si regularly orders milkshakes when we go out for dinner.  Over the last few years, I think he has become a bit of an expert.  With this, Si didn’t just suggest any old milkshake for this challenge, he specified that it should be the mother of all milkshakes.  I started thinking about all the different flavours I could bring together but then spoke to Si about what the mother of all milkshakes means to him.  And do you know what he said?  Just a good, simple, chocolate milkshake.  So here it is, my attempt to make a simple chocolate milkshake be the mother of all milkshakes.

I started by having a little look at what makes a good milkshake.  It’s not rocket science and a few simple things help make a good milkshake great.  In particular:-

  • Freeze your serving glass beforehand
  • Use good quality ice cream
  • Use full fat milk
  • Use a nice thick straw to drink through

I did some quick searches online and found a recipe for a homemade chocolate syrup here.  So to make this chocolate syrup and my mother of all milkshakes, you’ll need the following ingredients:-

  • 120ml water
  • 3 tbsp granulated sugar
  • 1 tbsp brown sugar
  • 6 tbsp cocoa powder (plus a little extra for dusting)
  • 1 tsp grated dark chocolate (plus extra to put in the milkshake)
  • 1 tsp vanilla extract
  • pinch salt
  • Vanilla ice cream
  • Milk (full fat is best!)
  • Double/Whipping cream

Edited - ingredients

With everything ready to go, I ran my glass under cold water and popped it in the freezer to chill.  I then got started on the chocolate syrup.  I put the water, sugars and cocoa powder into a small saucepan and mixed it all together. 

Edited - syrup pre

I put the saucepan over a medium to low heat to bring it to a simmer.  I then reduced the heat to low and let it simmer for 5 minutes, being sure to stir the mix regularly. 

I took the saucepan off the heat and stirred in the grated chocolate.  Once it had sat for a minute, I added the vanilla extract and a pinch of salt.  I poured the chocolate syrup into a pot and let it cool to room temperature whilst I had a yummy lunch with my family. 

Edited - chocolate syrup

Edited- Judy enjoying the bowl

Judy had the pleasure of licking the spoon clean 🙂

Once we were all well fed, I started to make the milkshake for us to enjoy as pudding.  I added the ice cream into my blender.  I actually used 500ml of ice cream as I was making enough milkshake for 7 of us. 

Edited - ice cream

Next up, I added the milk.  I started off with just a small amount and gave it a blitz.  I then checked the consistency and added a little more milk

Practical tip: if you add too much milk, you can just add more ice cream and vice versa.  It’s best to add a little at a time until you have it exactly as you want – plus you get to taste after each addition! 🙂

I then added about three table spoons of chocolate syrup and some chopped up chocolate before giving it another blitz.  Once the milkshake was at the right consistency and level of chocolate-goodness, I got my frozen glass out and poured in the milkshake.

I put some of the double cream into a bowl and whisked it with a balloon whisk until stiff.  I topped the milkshake, drizzled over some extra chocolate syrup and a sprinkling of cocoa powder.

Edited - milkshake

So here it is, my mother of all milkshakes and I have to admit it was pretty amazing! Unfortunately, my brother wasn’t there to try this one, although the spare chocolate syrup has been saved for him to use.   However, as I’ve said above, there were 7 of us to enjoy this milkshake and it was a resounding success.  We all had great fun enjoying this together and even my 86 year old nan had some 🙂

Edited - me and judy Edited - me and champ Edited - Linda enjoying the creamimage1

This milkshake was so rich and creamy with a perfect texture and the bits of chocolate added a delicious bite.  The chocolate syrup was amazing and I’ll definitely be making this again to try in other drinks and recipes. 

Coming up next week, Challenge No. 36  – eggs benedict