Challenge No. 38 – Beef Bourguignon

This challenge was suggested by my lovely Dad.  Beef bourguignon is one of the classics from Julia Child’s Mastering the Art of French Cooking.  With the film Julie and Julia being the inspiration behind my blog, I thought this was a perfect suggestion.  When I searched for a recipe, I did come across Julia Child’s version, however, I ended up using this recipe by James Martin.

Before I get into this challenge, I thought I would explain why I’m a little late with this post.  Sadly Dave’s grandad passed away last Saturday, the 19 September 2015.  At the age of 83, Eric had a long life full of some wonderful adventures.  He was a big part of Dave’s life and Eric, along with Dave’s grandma helped shape him into the wonderful, caring man he is today.  I unfortunately didn’t get to meet Dorothy who passed away 10 years ago, but I have had the pleasure of knowing Eric for the last 7 years.  He was a wonderful artist who was passionate about history and politics.  Eric’s health had deteriorated over the last 12 months and he passed away peacefully in his own home.  He will be sorely missed by those who knew him but I know he will always be a part of my life through Dave.  Rest in peace Eric.   

It has been a tough period since Eric passed away and I’ve struggled to get going with this post.  I actually made the challenge a couple of weeks ago but just couldn’t find the words for my write up.  I’m therefore going to apologise in advance if this post isn’t very good.  Hopefully you will still enjoy reading about this challenge and can maybe take something away to try for yourself.

For this recipe, you will need the following:-

  • For the beef bourguignon
    • 2 tbsp plain flour
    • salt and freshly ground black pepper
    • 1 kg/2lb 4oz blade of beef, cut into large cubes
    • 2 tbsp olive oil
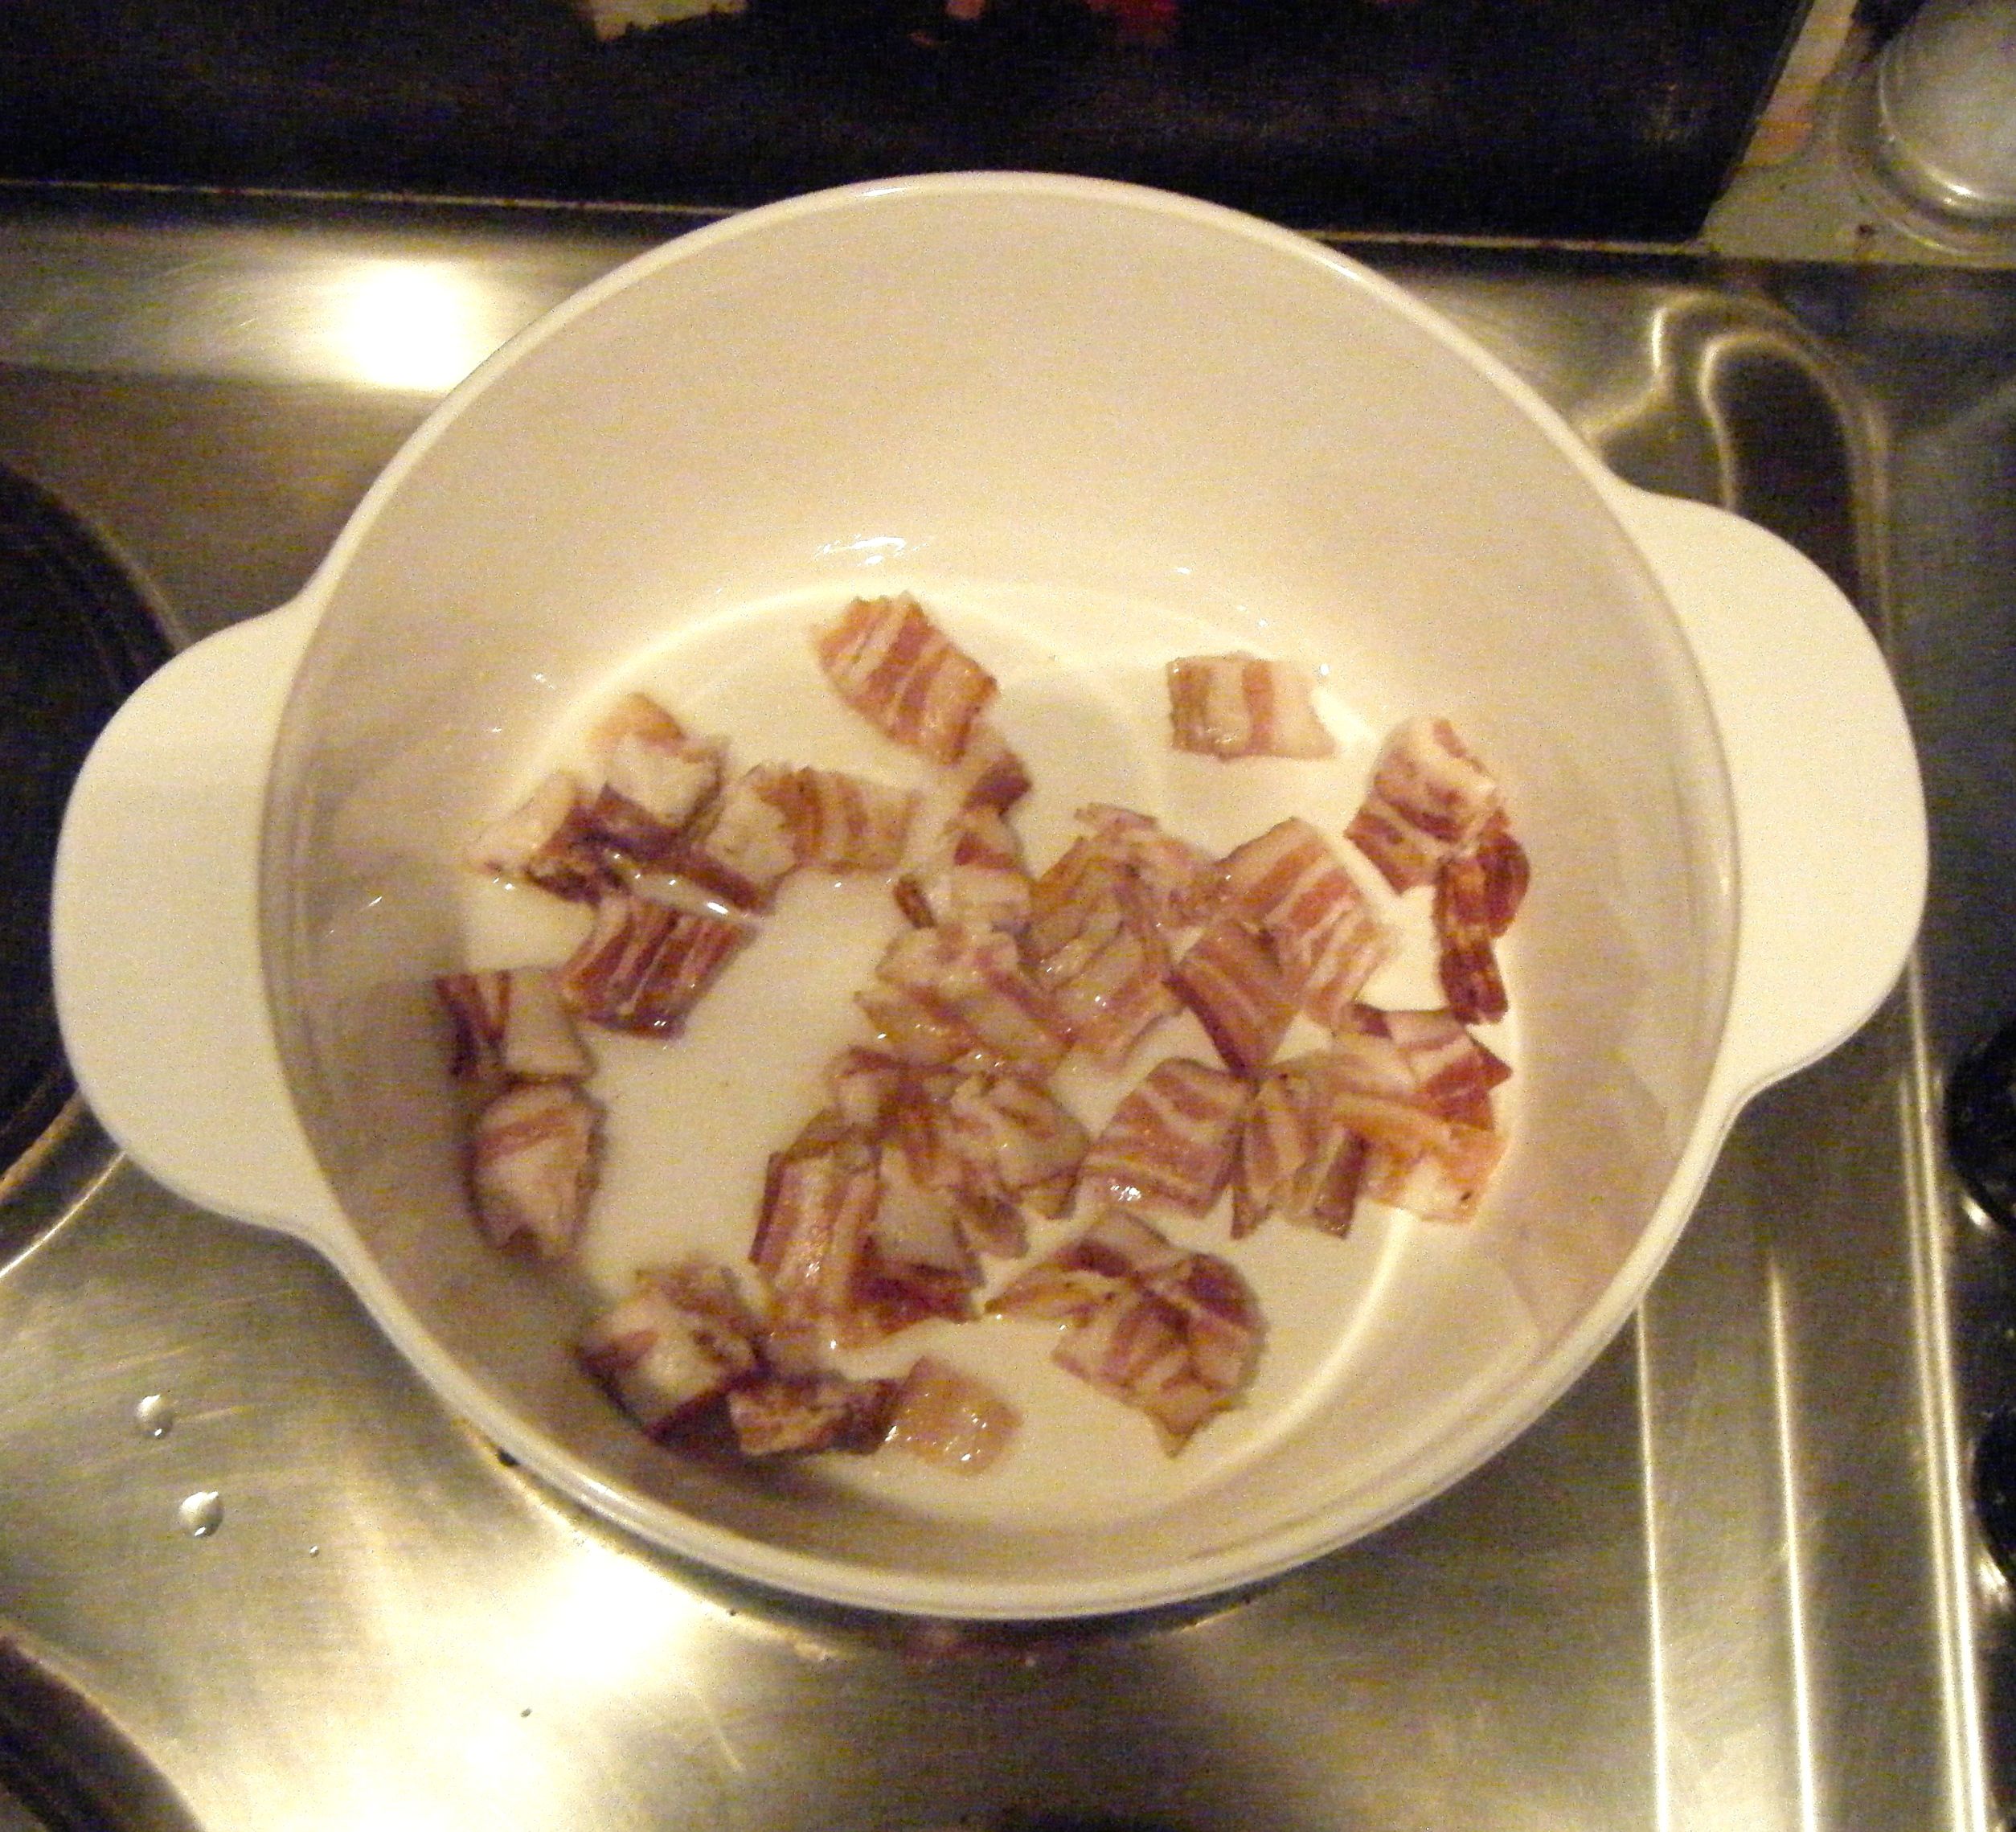
    • 150g/5oz pancetta, cut into small chunks
    • 2 shallots, finely chopped
    • 1 garlic clove, crushed
    • 50ml/2fl oz brandy
    • 500ml/18fl oz Burgundy, or other red wine
    • 250ml/9fl oz beef stock
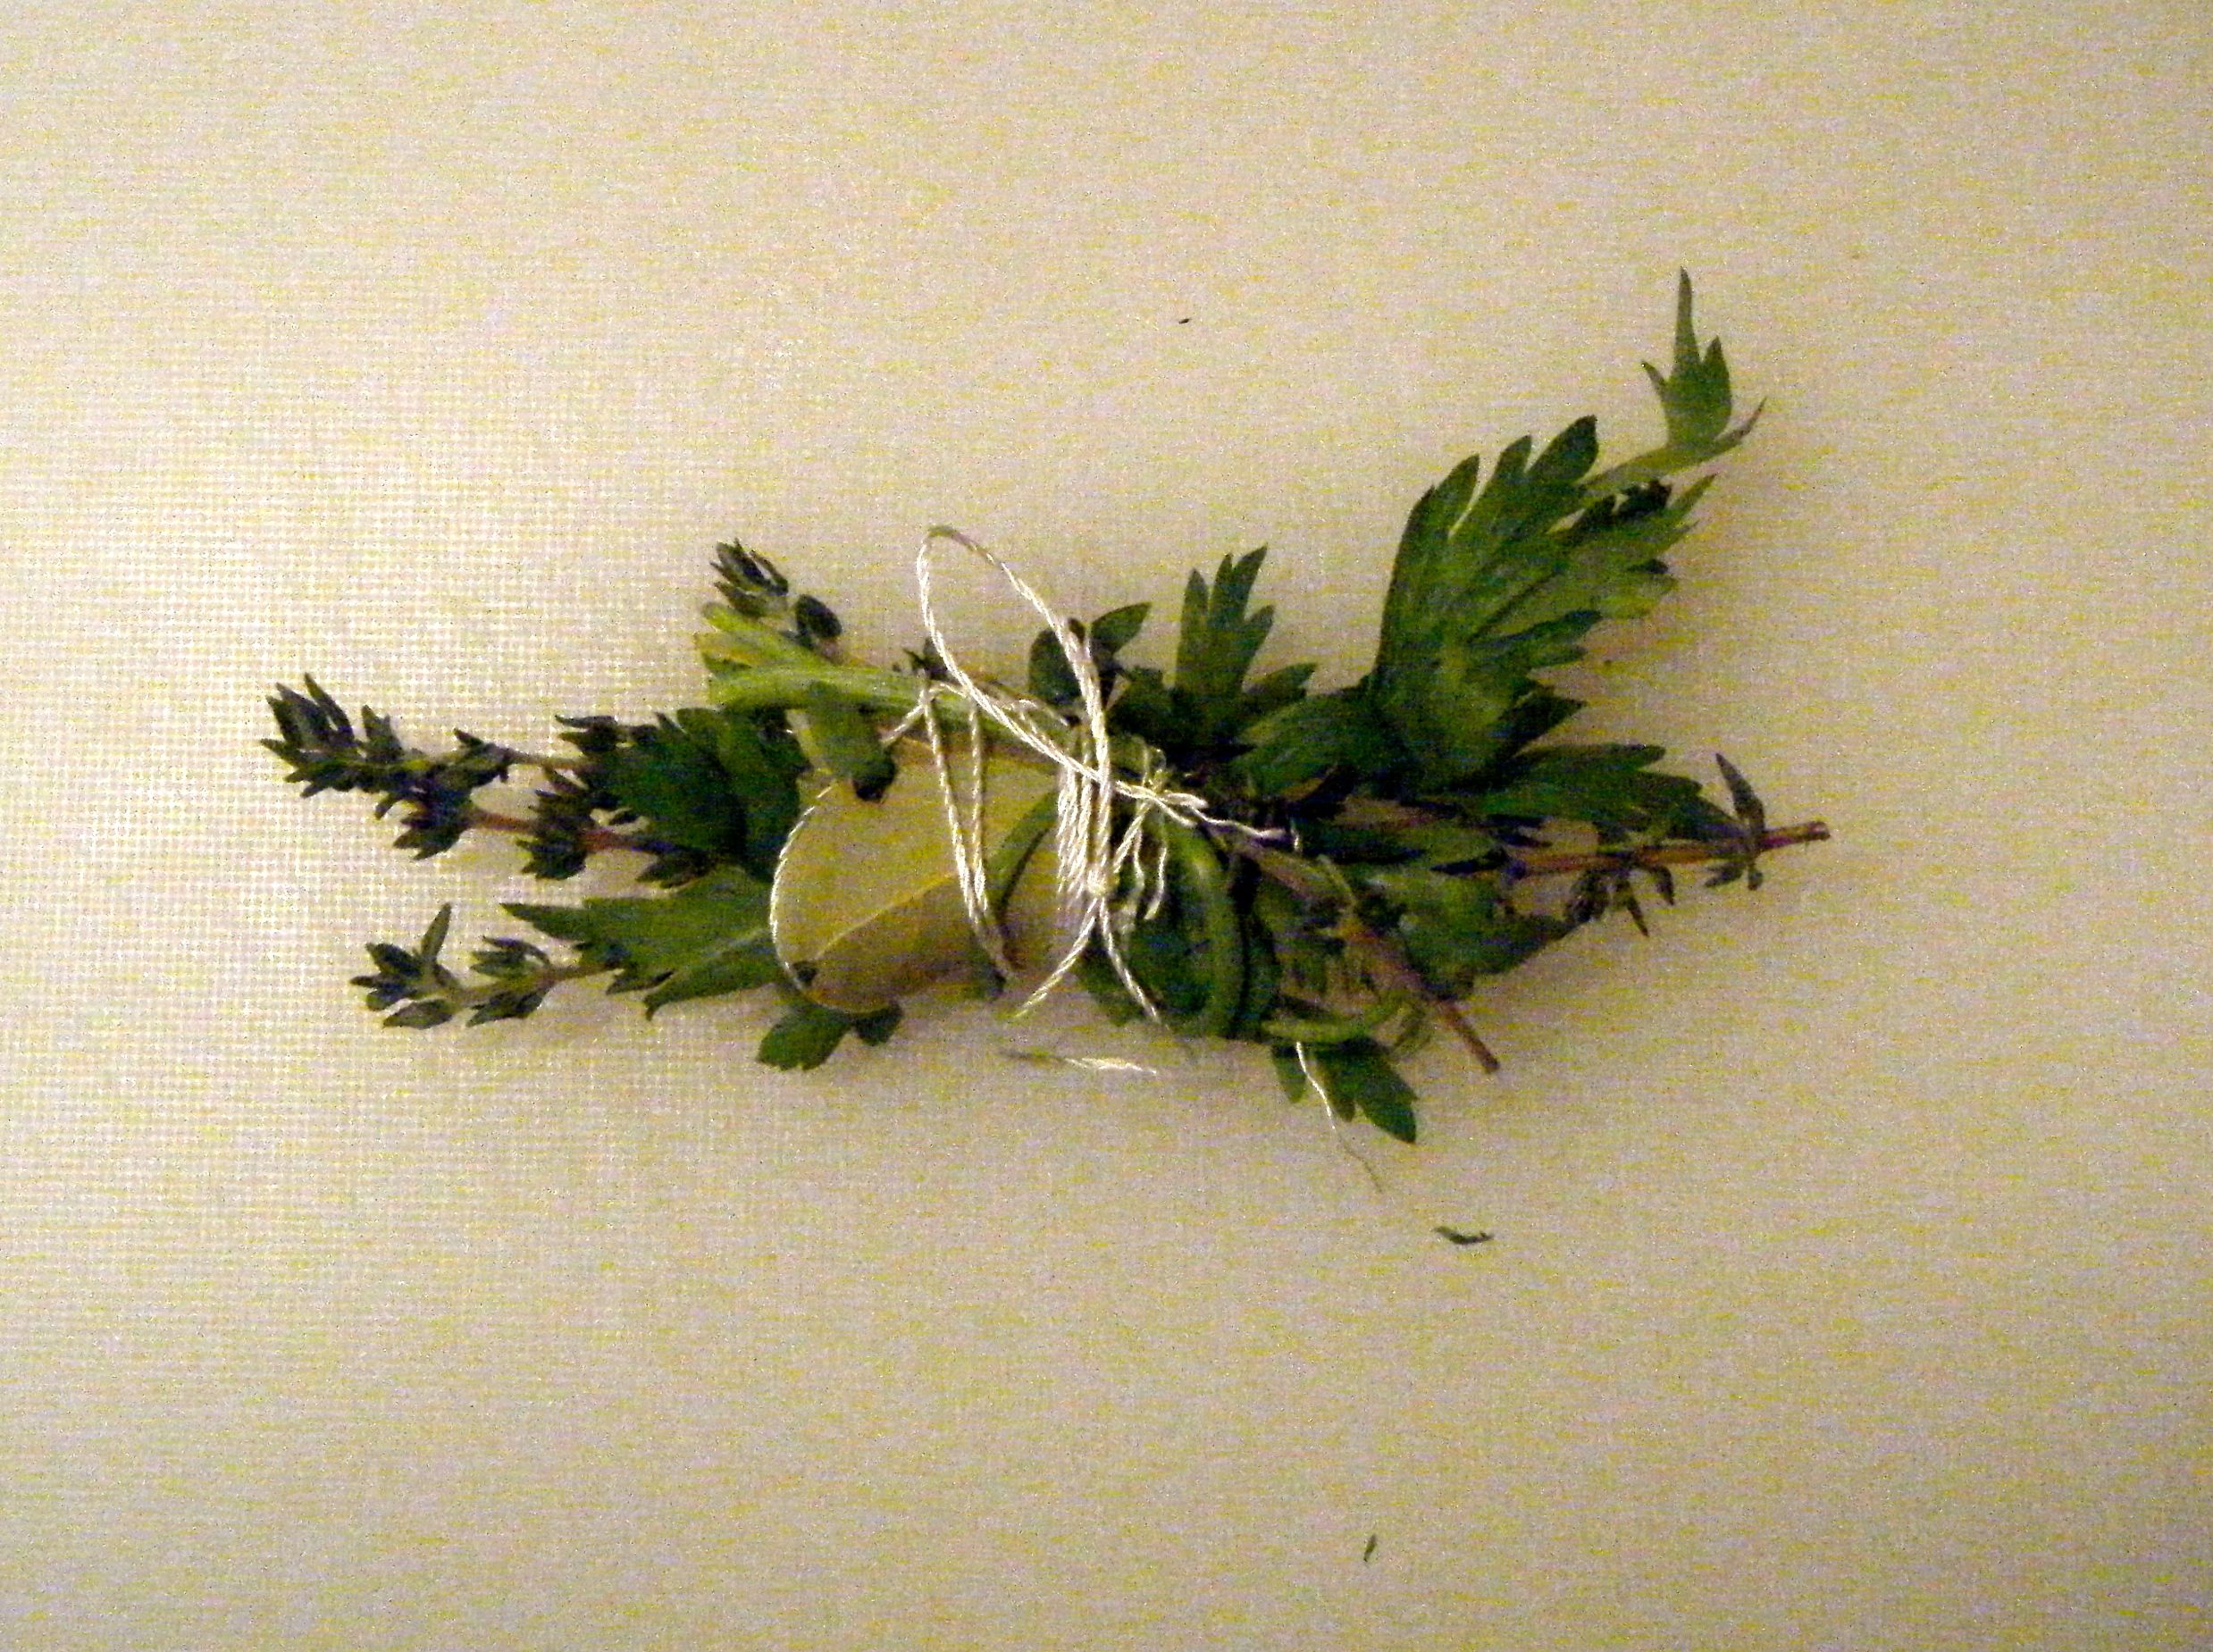
    • 1 bouquet garni made up of 2 bay leaves, 2 sprigs thyme, 2 sprigs flat-leaf parsley
    • 25g/1oz butter
    • 150g/5oz peeled baby shallots (or frozen button onions)
    • 200g/7oz chestnut mushrooms
  • For the mash
    • 1kg/2lb 4oz floury potatoes, peeled and cut into chunks
    • 110g/4oz butter
    • 110ml/4fl oz full-fat milk

Edited - ingredients

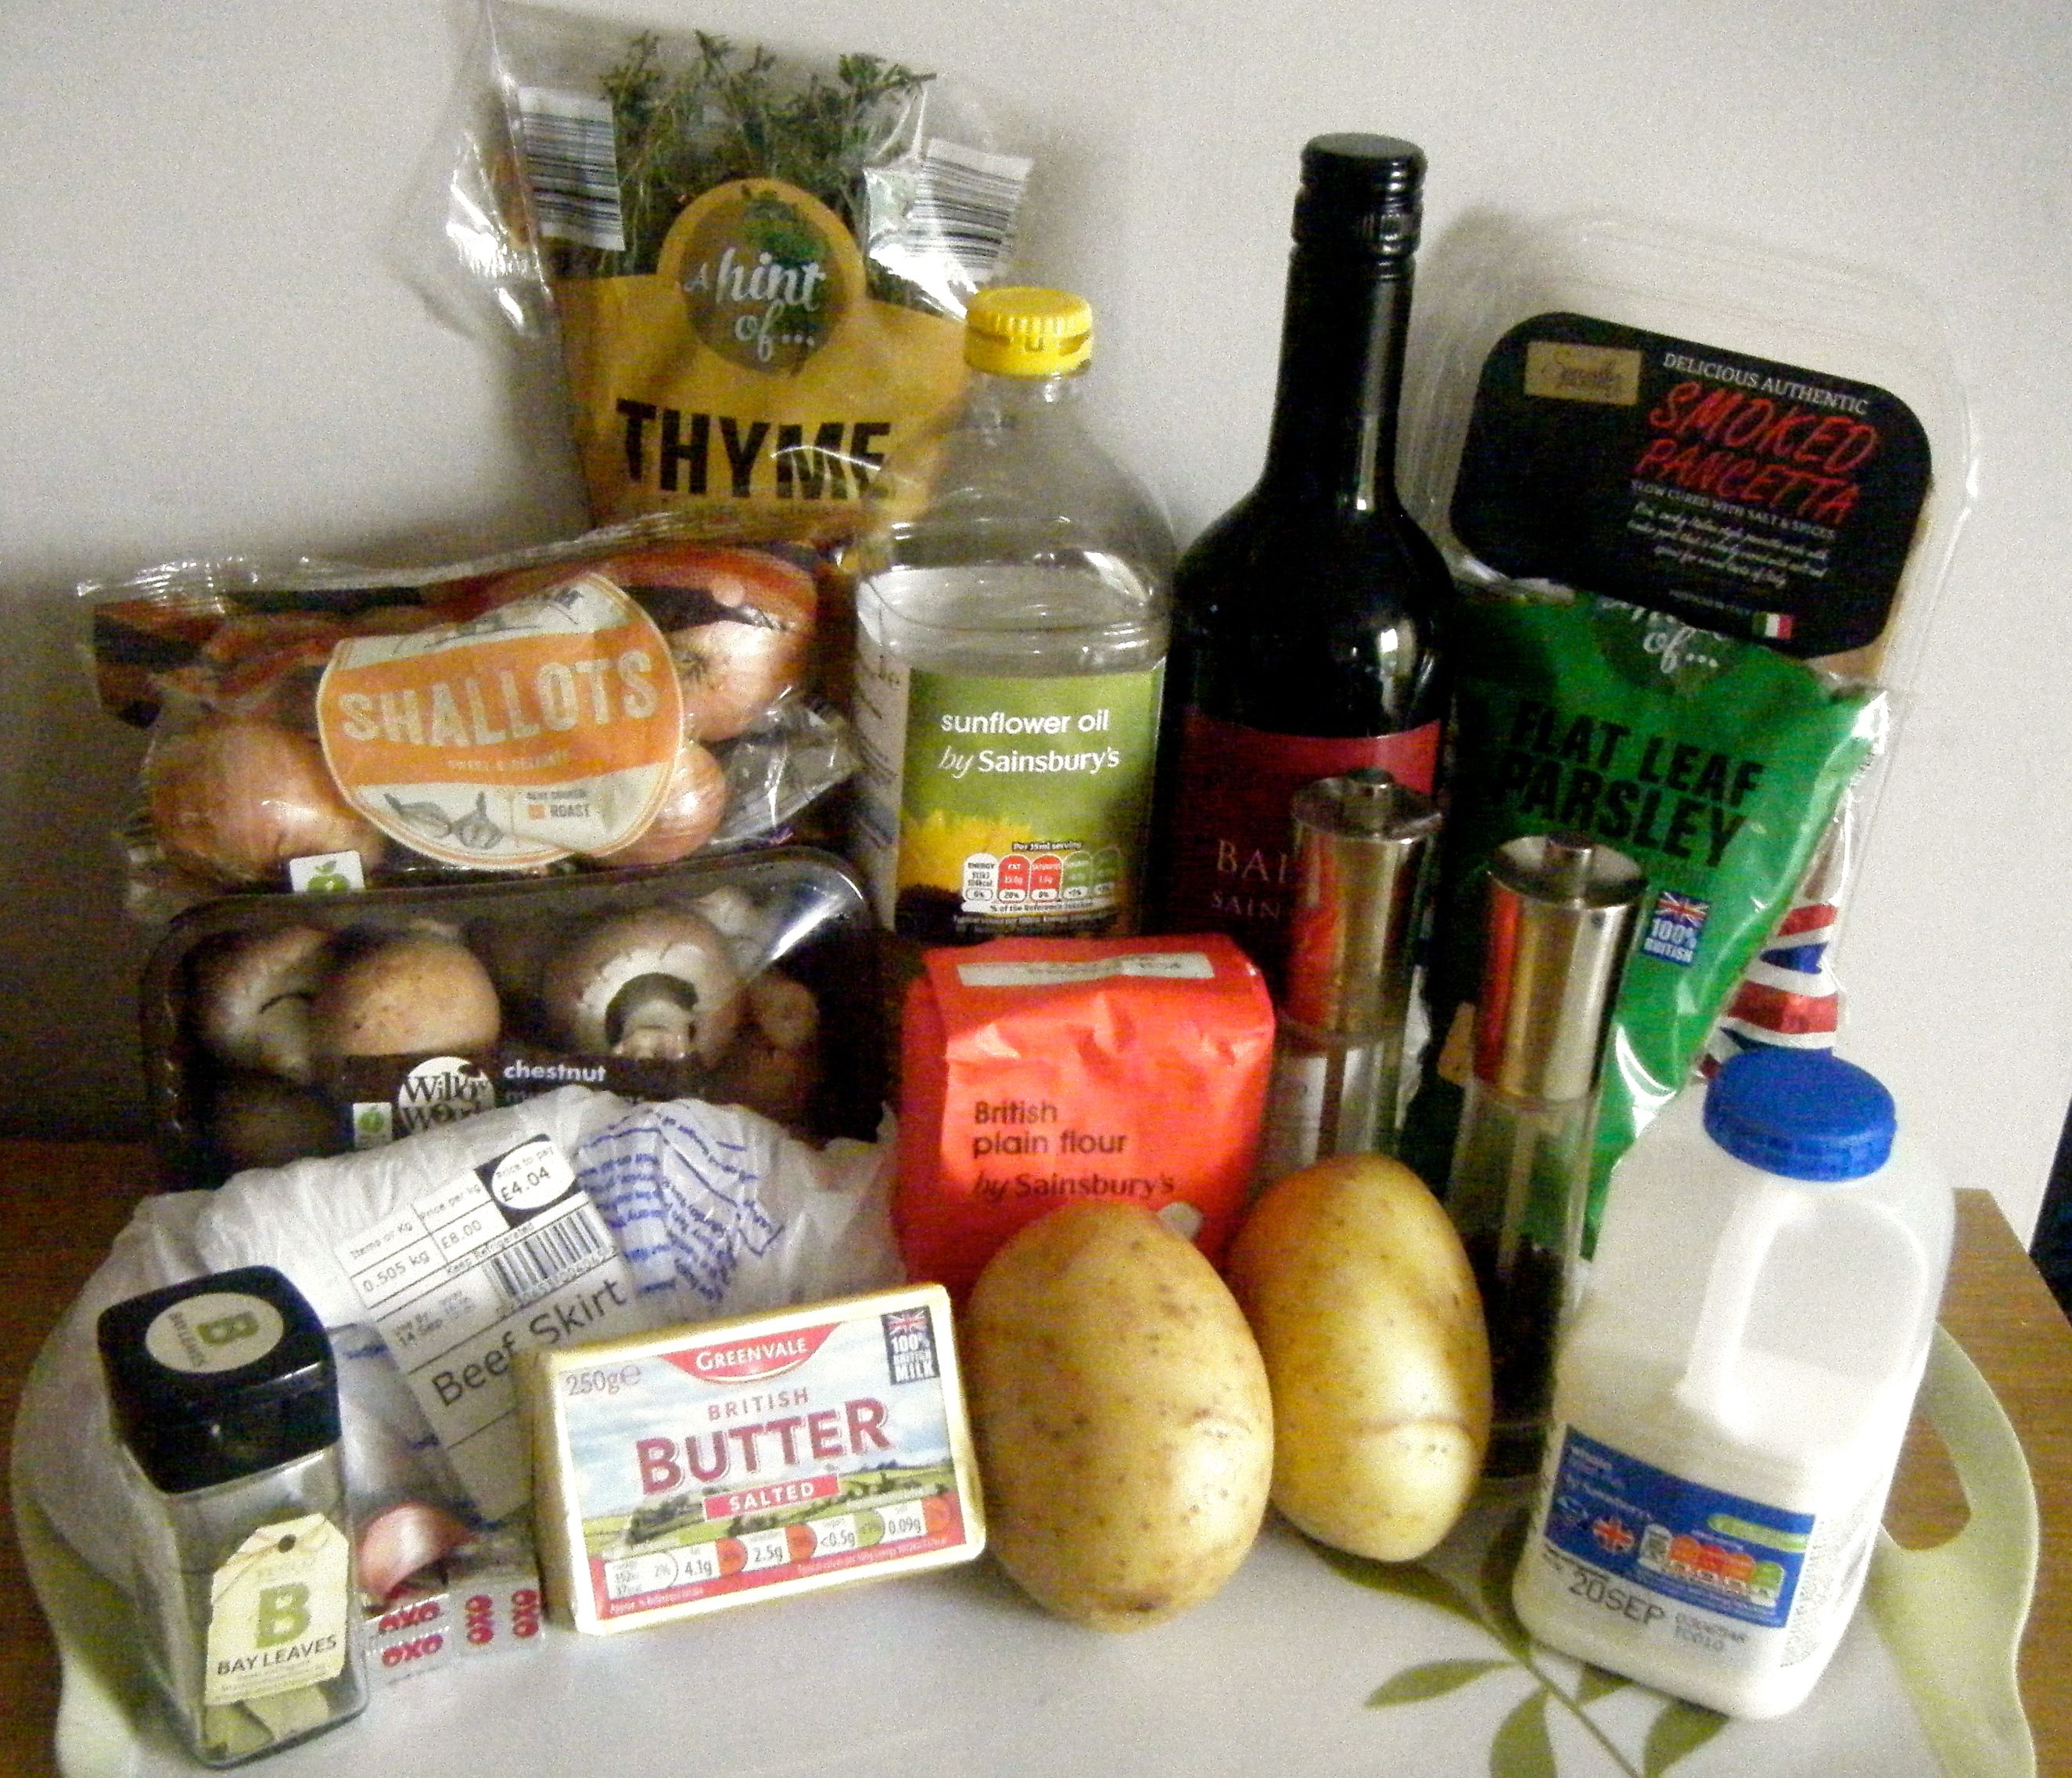
When I went to get my ingredients, I had a little trouble getting ‘blade of beef’.  I ended up just getting some stewing beef and it seemed to work.

With everything ready, I started off by putting the flour in a bowl and seasoning it.  I then tossed the beef chunks in the seasoned flour and put it to one side whilst I fried the pancetta until golden-brown.

Edited - floured beefEdited - panchetta

I added the beef and fried it off until browned on all sides. Whilst the beef was browning, I sliced up the shallots and got the garlic ready to crush.  I then added these to the browned beef.

Edited - beef added Edited - shallotts

The recipe then states to add the brandy and light it.  I chickened out a little bit here.  Being in a flat with a small kitchen, I was terrified I was going to set the cupboards on fire! So I decided not to use the brandy. 

Instead, I went straight ahead and poured in the red wine and beef stock.  Once it came to a boil I added the bouquet garni and let it cook on low for two hours.

Edited - wine added

Practical tip: a bouquet garni is like a floral bouquet but made with the herbs.  Simply take the herbs and tie them together with some cooking string.

Edited - garni

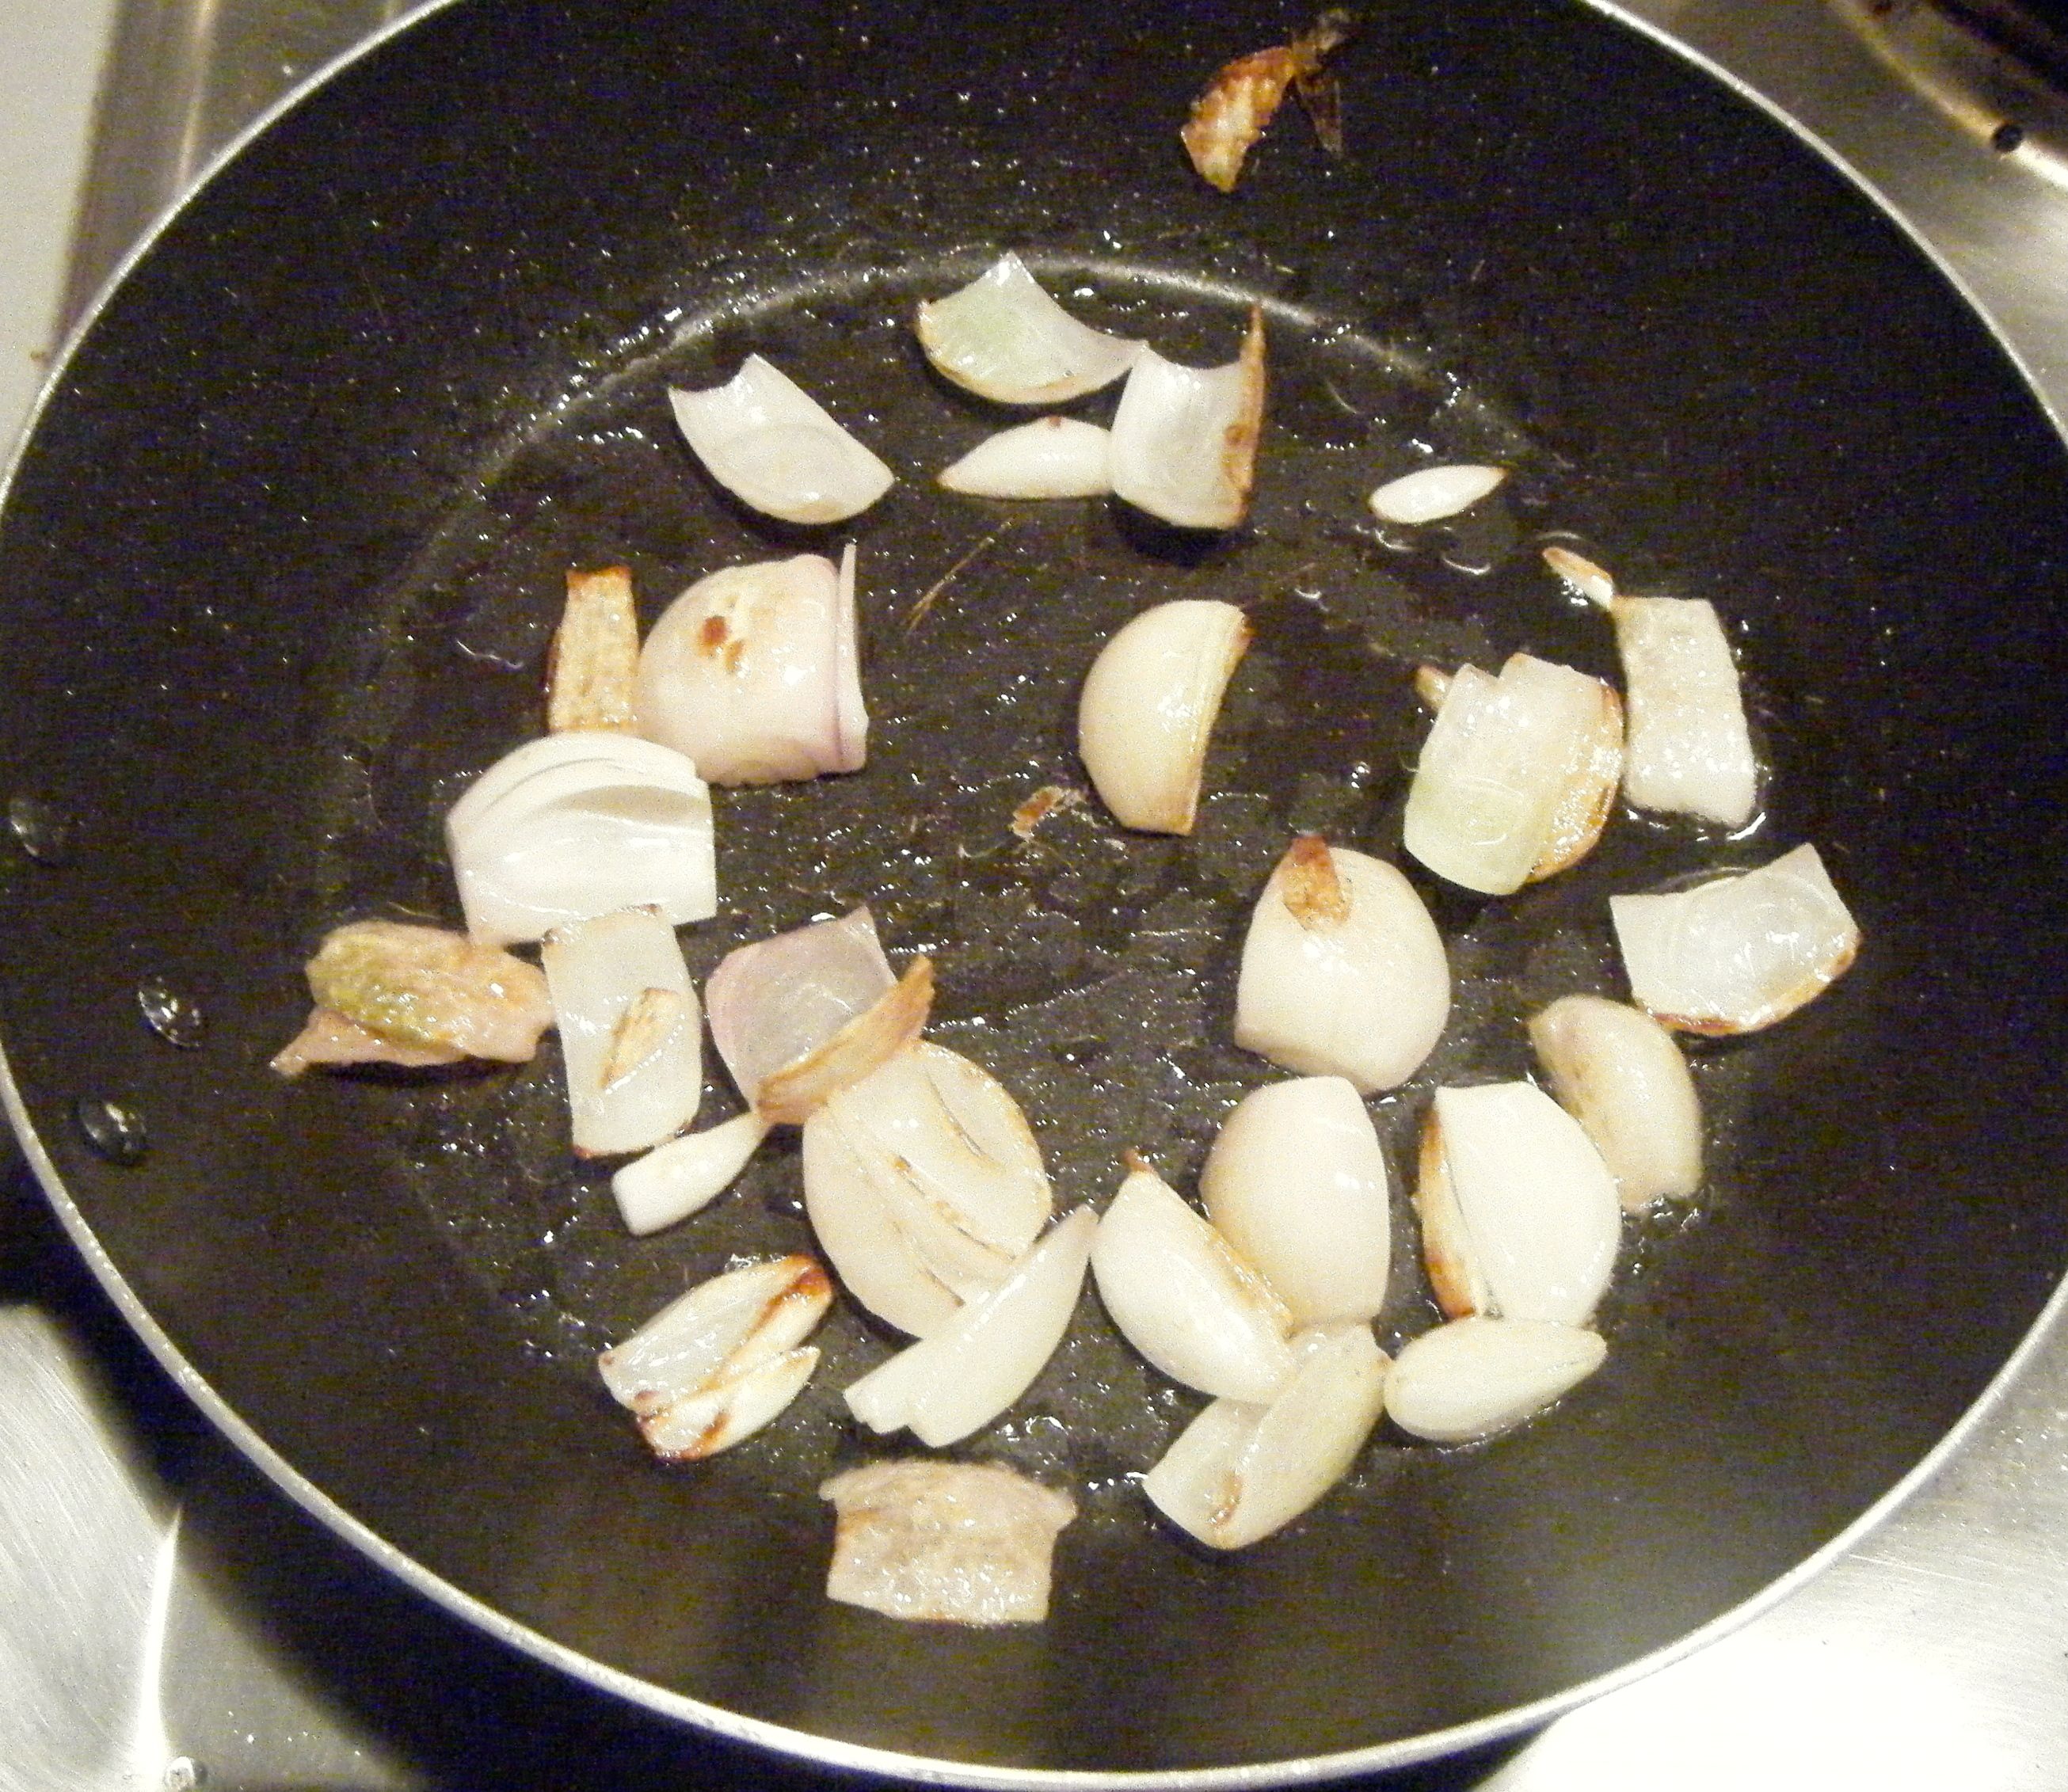
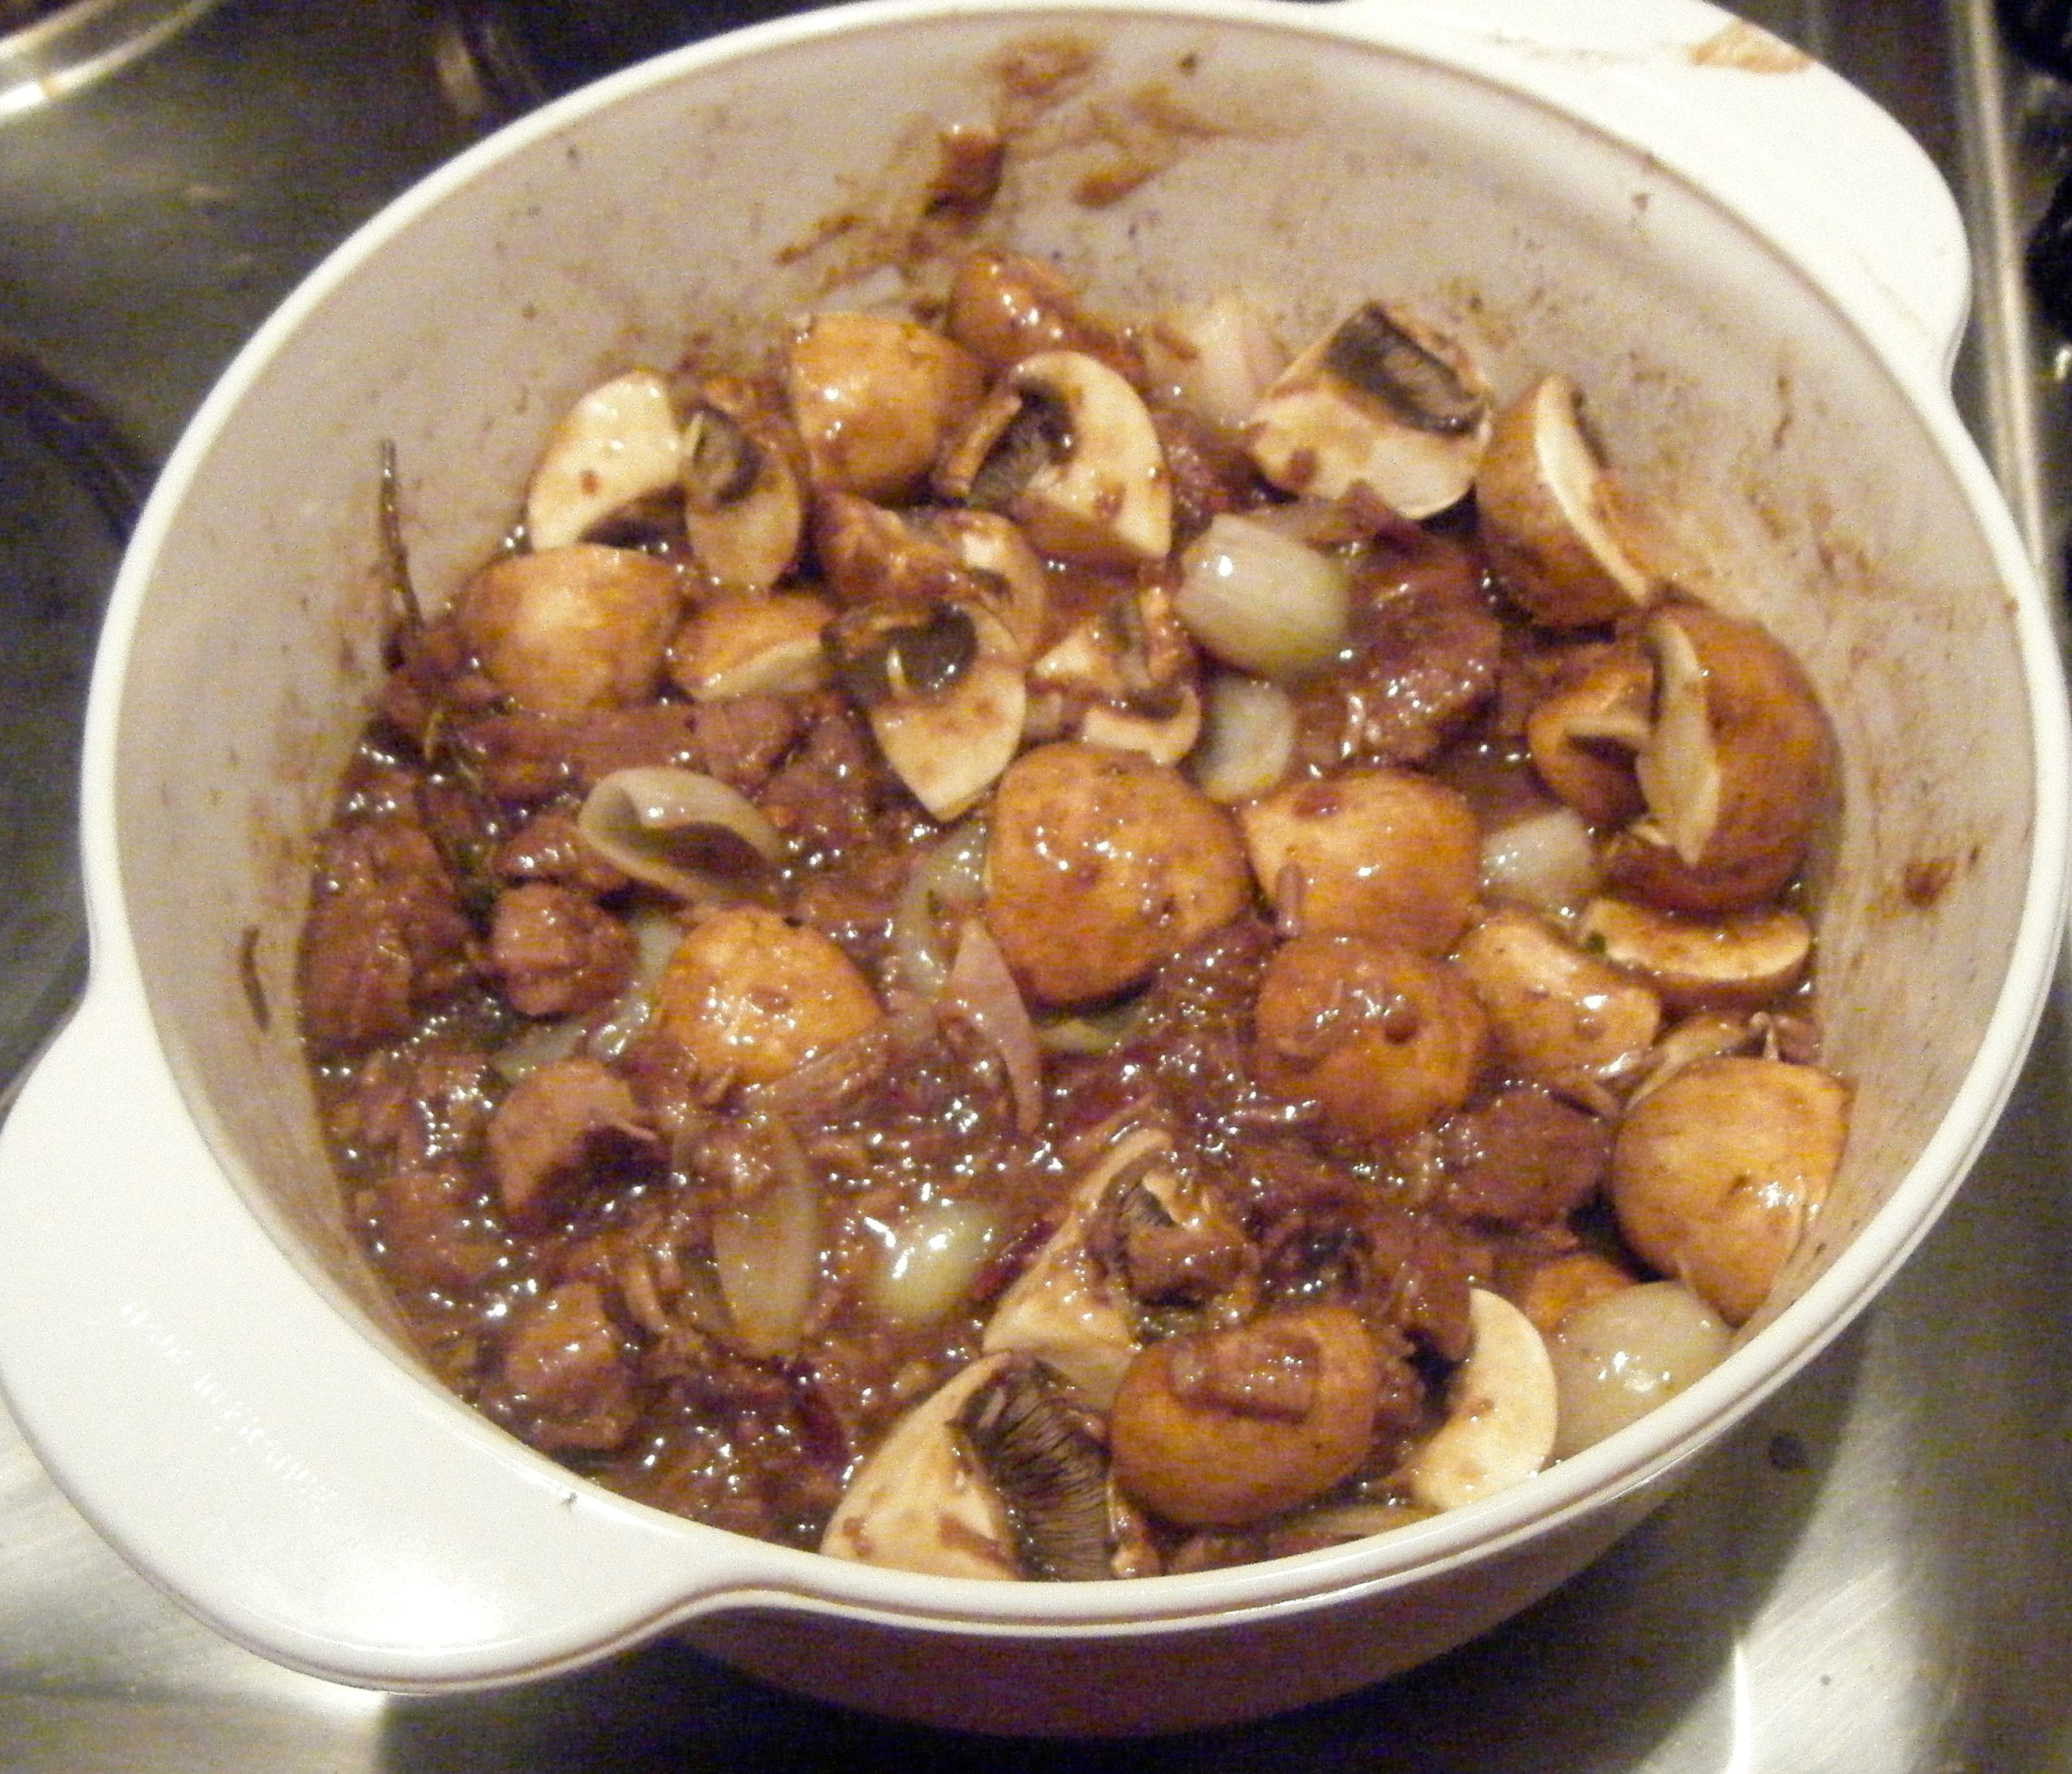
When the two hours was up, I fried off the shallots before adding them to the beef along with the mushrooms. I had chopped up the shallots and chestnut mushrooms just because Dave and I prefer our vegetables a little smaller.

Edited - frying shalotts Edited - cooked

Whilst the bouguignon cooked for the final 20 minutes, I boiled the peeled and chopped potatoes until soft.  I drained them and put them back on the heat for a couple of minutes.  I added the butter and milk and mashed it all together.

And then it was time to serve up…

Edited - served up

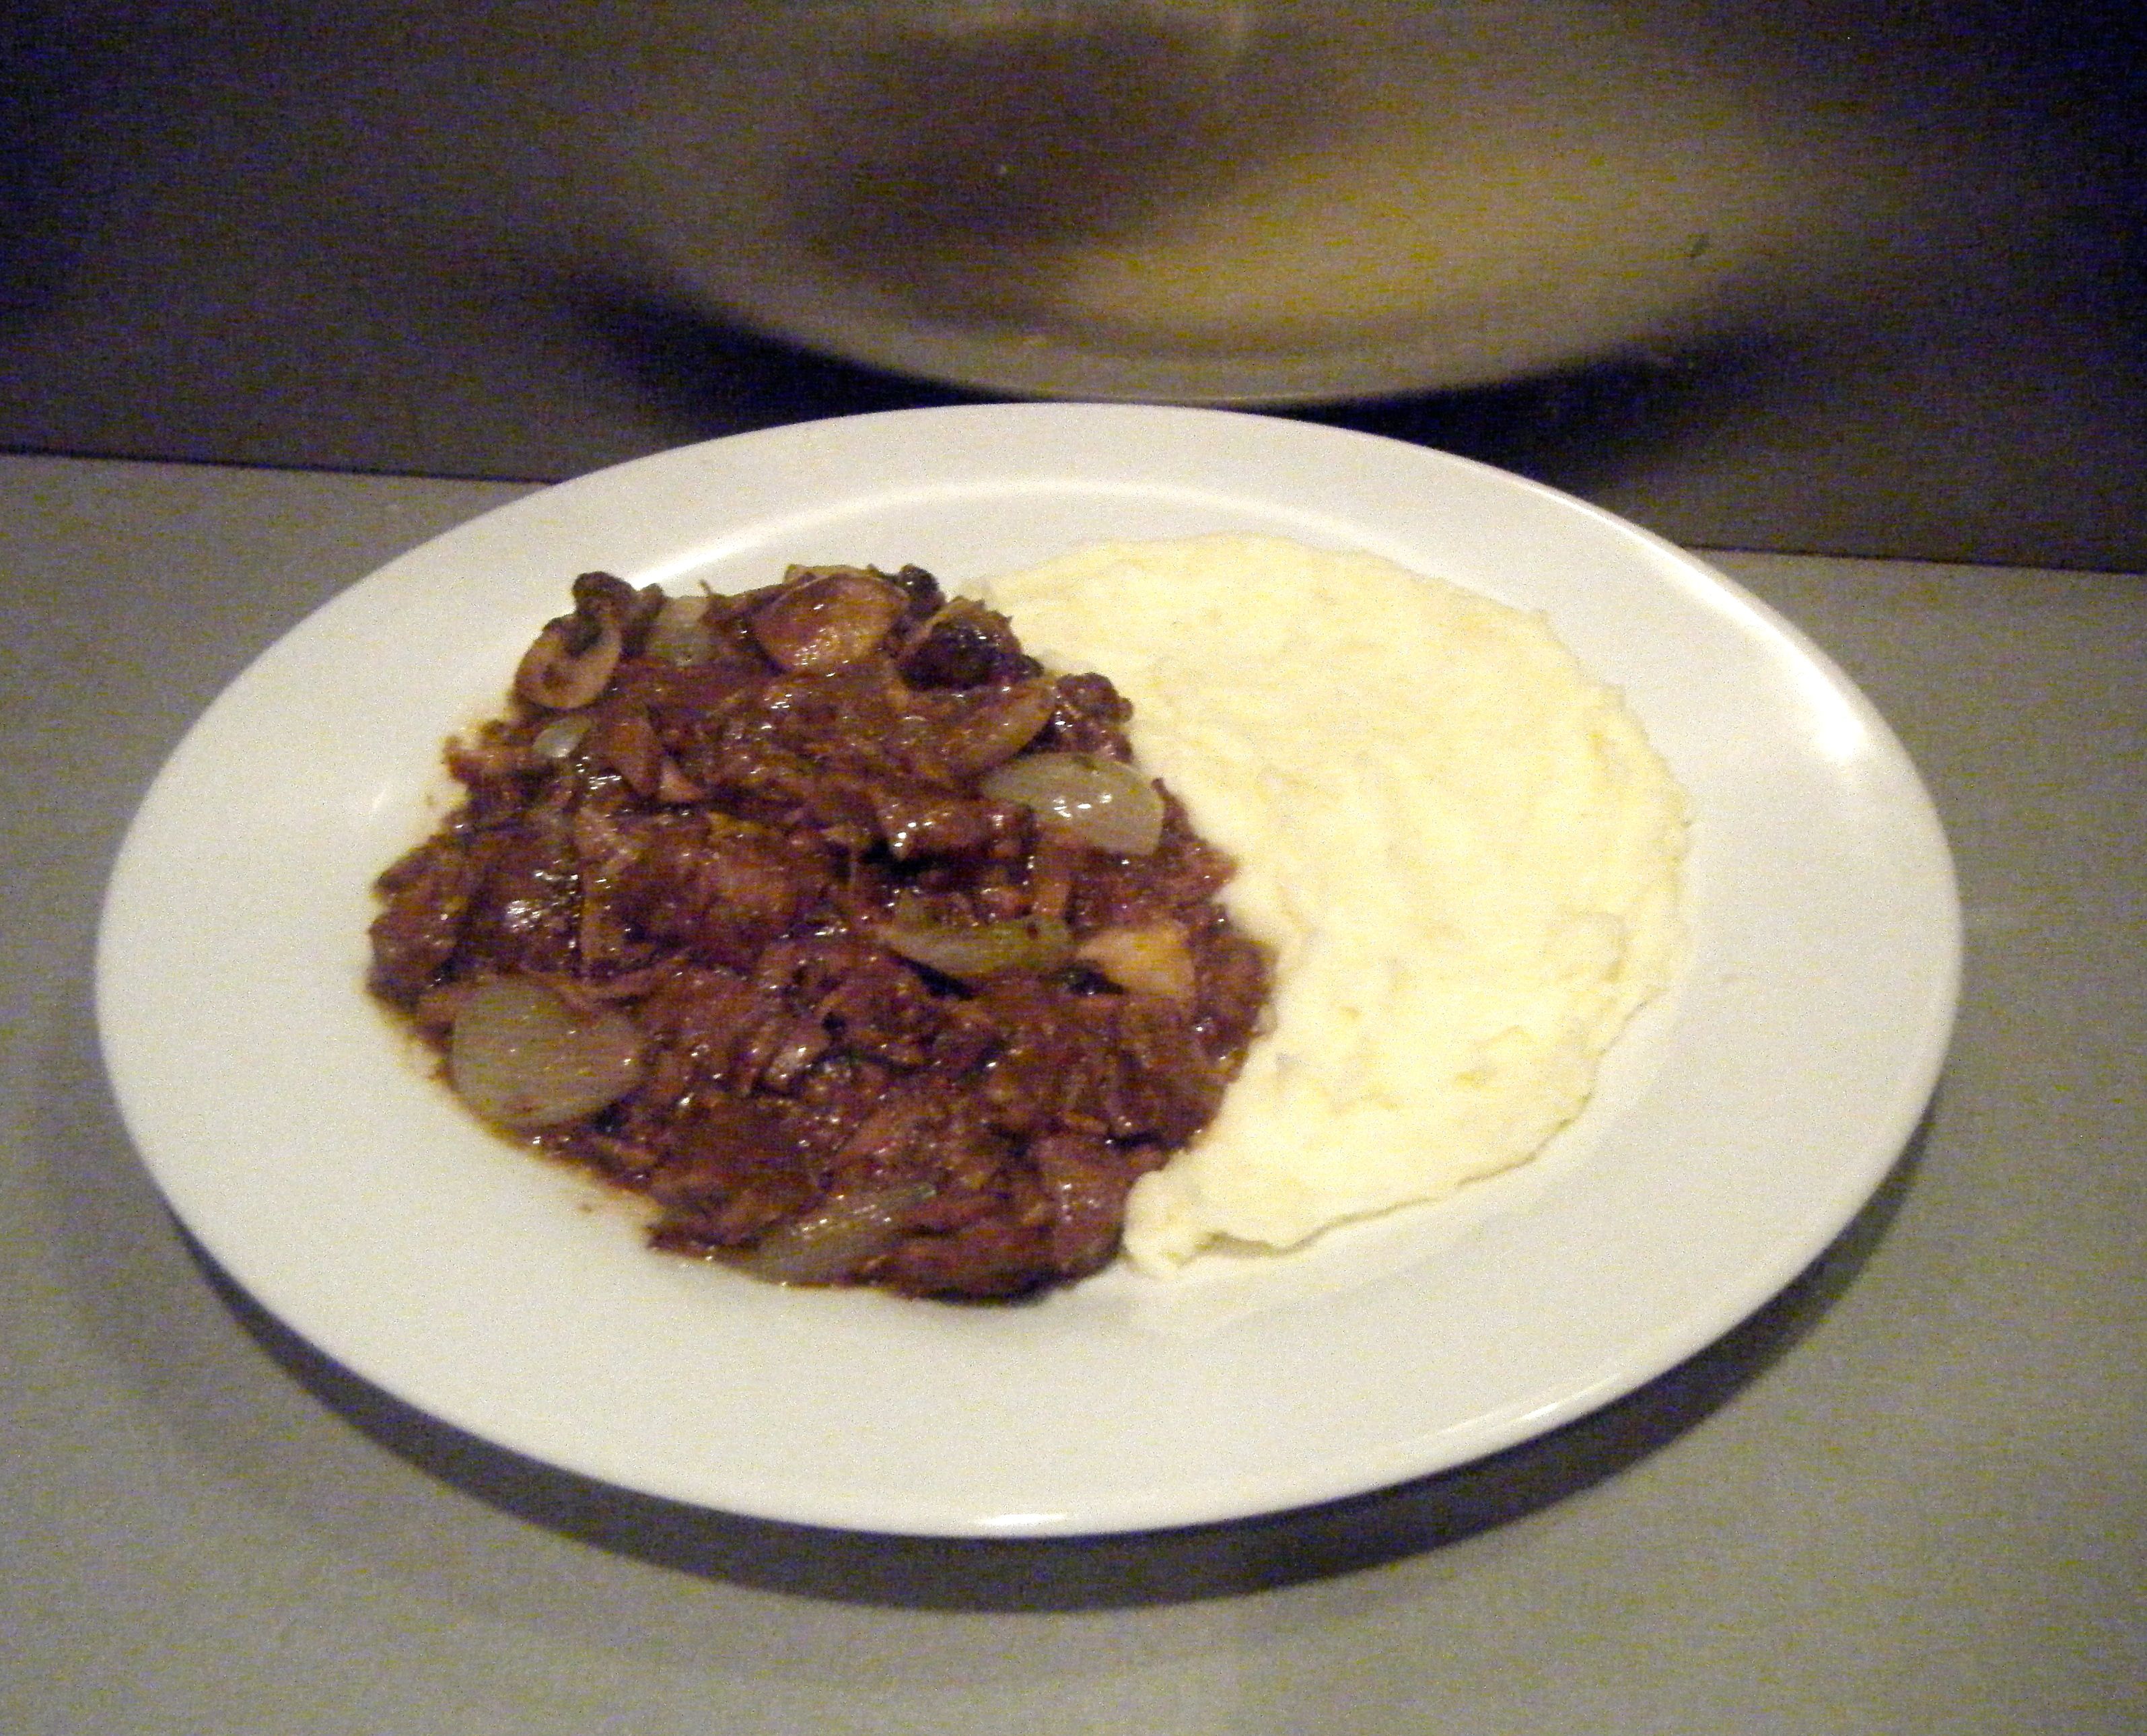
Whilst this was really nice, to be honest, it was just a bit of a posh beef stew and I didn’t think it was as nice as the one made for Challenge No. 02, beef stew with dumplings.  Perhaps it is because I missed out the brandy or I didn’t use the right cut of meat.  Don’t get me wrong, I still polished off my plate and enjoyed the leftovers the next day, but to me, it just wasn’t quite as good as the beef stew I made earlier in the year.

Coming up next week, Challenge No. 39 – apple pie (which was meant to be windberry pie!)

Challenge No. 23 – Chocolate Truffles

This recipe was suggested by my friend Katie.  On Saturday another friend of ours had a garden party for her hen do and I decided to attempt this challenge at the weekend so I could take the truffles to be enjoyed by all the girls.  I was staying with Katie and she got very excited when I said I was making them to take with us.  Considering I was taking the truffles to a hen do, I thought I would make them a little bit special by adding some alcohol 🙂 So this is my attempt at Prosecco truffles and Disaronno truffles.

I did a little bit of internet searching and found a lovely looking Prosecco truffle recipe by Miss Messy (aka Holly).  I think these truffles are adorable with the addition of the little gold hearts. I even bought some edible glitter so I could do the same but I sadly ran out of time – I’ll have to try this next time.

I adapted Miss Messy’s recipe to make my Disaronno truffles.  The method is exactly the same but it’s just the ingredients which differ slightly. 

  • For Prosecco truffles I used the following:-
    • 280g good-quality dark chocolate
    • 280ml double cream
    • 50g unsalted butter
    • 20ml Prosecco
    • cocoa powder
  • For the Disaronno truffles I used the following:-
    • 280g good-quality dark chocolate
    • 280ml double cream
    • 50g unsalted butter
    • 2 tbsp Disaronno
    • cocoa powder
Ingredients

Note: I accidently left out the cocoa powder in this photo so it its own below 🙂

I started by making the Prosecco truffles and broke the chocolate into small pieces to put into a large bowl.

Edited - chocolate broken

I put the butter into my saucepan, poured over the cream and put it on a medium heat.  I kept a close eye on this and kept stirring until the butter had melted and the cream was nice and hot.  It was just about starting to bubble when I decided it was hot enough.

Practical tip: to help the butter melt quickly so that your cream doesn’t burn, let it sit at room temperature before starting and chop it into small pieces.

In the pan Melted cream

Once the cream was ready, I poured it over the chocolate and let it sit for a minute before I gave it a good stir.  At first, the mix was a bit milky looking but after a bit of patience and continued stirring, it turned a beautifully rich chocolate colour. 

Melting Chocolate ganache

I mixed in the Prosecco and poured the ganache into a clean dish to cool.  I covered the dish with cling film and put it in the fridge. 

In the dish

I then got started on the Disaronno truffles and I repeated all of the above steps.  In hindsight, I could have simply made all the ganache together and separated it into two bowls before adding the alcohol…but I didn’t do this and I’m not sure why! I’m going to put it down to having a bit of a blonde moment.

With both my ganache mixtures chilling in the fridge, I realised it was already 11pm!  The recipe says to leave the ganache for at least 4 hours and considering the time, I decided to just leave it overnight. 

The next morning, I took the dishes out of the fridge to check them and the mixture was really hard! I panicked a little and decided to let them sit at room temperature for about half hour before I started shaping the truffles.  It turns out I didn’t need to do this and it actually just made rolling the truffles a bit more difficult as the ganache was melting.  So I popped the dishes back in the fridge to firm up again.

With the ganache re-chilled, I got a shallow bowl and poured in some cocoa powder. 

Cocoa powder

I took one of the dishes out of the fridge and started forming my truffle balls.  I coated my hands in the cocoa powder and used a measuring spoon to scoop out a small portion of ganache.  I rolled the ganache in my hands to achieve a rough ball shape (as much as tried, they weren’t very neat!) and then rolled the ball in the cocoa powder before popping it to one side and getting on with the rest.

Things got a little messy here so I couldn’t get any photos of the rolling process but here is the aftermath…

What a mess

Once all the truffles were rolled and coated, I put them in the fridge to keep chilled until I left for the garden party.

Done On a plate

So these truffles were really nice, however, none of us could taste the alcohol and I couldn’t even tell the difference between the Prosecco ones and the Disaronno ones! Next time, I’ll just make sure to add some more alcohol 🙂

Whilst all the girls enjoyed these little chocolate treats, some of them weren’t a massive fan of the cocoa coating.  Another recipe I found used a mixture of icing sugar and cocoa powder and I think this would perhaps be a bit lighter.  I’m going to give this a try next time and I’ll let you know how I get on. 

Coming up next week, Challenge No. 24 – scotch eggs.    

Challenge No. 19 – Rum Raisin Ice Cream

Have you ever made home-made ice cream without an ice cream maker? Better still, have you ever tried to find a recipe online for making ice cream without an ice cream maker?  It is not easy – finding a recipe that is!  My mum suggested this challenge and I thought it was a great idea.  I set out trying to find a recipe and a few times thought I had got one only to get to the last instruction and the recipe would say to “put it in your ice cream maker and follow the manufacturer’s instructions”.  It was very frustrating! And then I remembered, my many (and I mean many!) recipe books in the flat.  I had a quick rummage and found Jamie Oliver has kindly provided a recipe which works with or without an ice cream machine. Yay 🙂

Although I had found a recipe for vanilla ice cream, I kept having a sneaky look online and do you know what I found? One of my new blogging friends has blogged about the same recipe.  You can see read about Laura’s experience at Feast Wisely

Jamie’s book (Jamie’s Comfort Food) not only gives you a lovely recipe for vanilla ice cream, it also gives 4 delicious flavour variations. One of my mum’s favourites is rum and raisin ice cream – she say’s its her ‘holiday ice cream’ but I think she would have it all the time if she could 😉 I know I would!

So for the rum raisin ice cream you will need the following ingredients:-

  • 100g raisins
  • 150ml dark spiced rum
  • 2 vanilla pods
  • 500ml whole milk
  • 250ml double cream
  • 7 large eggs
  • 150g golden caster sugar

Edited - ingredients

These quantities make 1 litre of ice cream and Jamie helpfully tells me that 1 scoop is 106 calories.  I however like to believe that anything which is homemade is guilt free, so we don’t need to worry about the calorie content 🙂

Anyway, on with the recipe.  I started off by putting the raisins in a bowl and covering them with the spiced rum.  I covered the bowl with cling film and left it on the side for around a couple of hours.

Edited - rum and raisins

Once I had about half hour left, I got on with making the vanilla ice cream.  I halved the vanilla pods lengthways and scraped out the seeds.  I’ve seen chef’s do this on TV and it looks really simple…it wasn’t! I got in a bit of a mess but I managed to scrape most of the seeds out and get them in the pan.  I added the pods to the seeds and poured over the milk and cream.

Edited - vanilla pods Edited - vanilla cream

I put the pan on a low heat to gently warm for 15 minutes and then took it off the heat.

Whilst the vanilla cream mixture was cooling slightly, I separated my eggs and put the yolks in a bowl.

Edited - egg yolk 

Practical tip: Jamie advises to freeze the egg whites in a sandwich bag to make meringues for another day.  I therefore dutifully put the whites in a plastic container and put in the fridge so I could later make room for it in the freezer – I then promptly forgot to do this and ended up throwing away the whites! Silly me!

I whisked the yolks and caster sugar with a balloon whisk until pale.

Edited - whisked egg sugar

Before combining the vanilla milk with the egg/sugar mix, I sorted out the soaked raisins.  I took out around half and put them to one side.  I then used a hand blender to blitz the remaining raisins and rum together until it was a smooth purée. 

Edited - purée

I then took the vanilla cream mixture and poured it through a sieve into my egg/sugar mix.  I added a bit at a time and whisked thoroughly between each addition.  At the end, I made sure to push through as many vanilla seeds as possible – I mean come on, the more true vanilla flavour you can get the better!

Edited - combined

I added the combined mixture back into my pan and put it over a very low heat.  I stirred constantly, patiently waiting for the mixture to thicken.  Jamie’s says this should take about 15 minutes but it took me longer.  I had my pan on a very low heat and perhaps I could have turned it up slightly but I didn’t want to burn it.  When it was finally thick enough to coat the back of a spoon, I was happy it was done.

Edited - spoon

I poured the mixture in to a clean bowl and left it to cool – this took about a couple of hours.

Edited - cooling

Time to add the rum/raisin to my vanilla ice cream.  I poured in the purée and whole raisins into the cooled ice cream base and gave it a good stir. I then poured it all into my ice cream contained (a simple klick lock storage box).

Edited - in the container

I put the container into my freezer and set the time for 30 minutes.  According to the recipe you need to whisk the ice cream every 30 minutes for about 3 to 4 hours to help break up the ice crystals. The aim is to do this until the ice cream is nicely set. 

When I read Laura’s blog, she mentioned that she stopped stirring too soon and ended up with some ice crystals.  I therefore tried to preserver and when I had reached 4 hours and it still was set, I just kept going with my 30 minutes schedule. 

I got to 5 and a half hours and it still wasn’t set! It was also time for bed so I just left it for the night and hoped it would be okay in the morning.

So here it is…

Edited - frozen

It looked okay – except that the whole raisins had definitely all sunk to the bottom of the container!  It’s a nice treat for when you get to the bottom 🙂

Now, I don’t know about you but if I am going to have ice cream, it clearly has to be served with either hot chocolate fudge cake, a cone or perhaps best of all, cookies!  So I also made some chocolate chip cookies to sandwich together with the ice cream. 

Edited - cookie

Be sure to come back after the end of Challenge 52 when I will be sharing my foolproof recipe for these delicious cookies.

This was absolutely delicious! Dave tried a TINY bit and said “whoaa, you can taste the rum in that!”.  Well that’s what we want – rum, raisin and vanilla galore.  I’ve now got to be controlled and make sure I don’t eat the whole lot before my mum next comes to visit!

Coming up next week, Challenge No. 20 – maple syrup glazed ham! Hope to see you then.