
See that lovely drawing at the top of the page, the one of the blonde girl holding the cupcake? Well, that was designed by my amazing friend Nic and is his representation of me 🙂 This next recipe was suggested by Nic who, as you can tell, is very creative. If you want to see some of his other incredible work, check out his Facebook page here. Unsurprisingly, Nic’s creative mind didn’t just suggest any old regular cupcake, nope, he suggested a candy floss cupcake!
I did a quick Google search and found lots of inspiration. One of my favourites was Harry Potter themed from bakingdom. Nic is a huge Harry Potter fan and so when I found this blog, I thought the idea was just perfect. Whilst all the websites I found included a recipe, I decided to use my own cupcake recipe and just adapted it in line with what I had read for incorporating candy floss.
So, to make my version of the candy floss cupcakes, you will need the following:-
- For the cake
- 175g softened butter/margarine
- 175g sugar
- 1 tsp baking powder
- 175g self raising flour
- 3 eggs
- A drop of vanilla essence
- 250g candy floss
- For the topping
- 550g icing sugar
- 275g softened butter
- Milk
- A few drops of pink food colouring
- A few drops of green food colouring
- 250g cotton candy
- 2 tsp of cream
- Popping candy (I used chocolate covered because that’s all I could find)
This recipe makes 18 cupcakes.

First things first, I turned the oven on and gave it plenty of time to reach the required temperature, 180 degrees celsius.
I started the cake mix by beating my softened butter with a fork until it was light and fluffy. I then added the caster sugar and continued to beat until completely incorporated.


P.S. I made these at my mum’s and she only had an orange mixing bowl which isn’t great for photo’s! So please excuse the orange tinge on some of the photographs in this post!
Anyway, next up I combined my flour and baking powder in a jug and set this to one side. I added my eggs one at a time to the butter/sugar mix.
Practical tip: each time you add an egg, put in about 1tsp of the flour and then mix together. The flour helps to stop the mixture curdling.
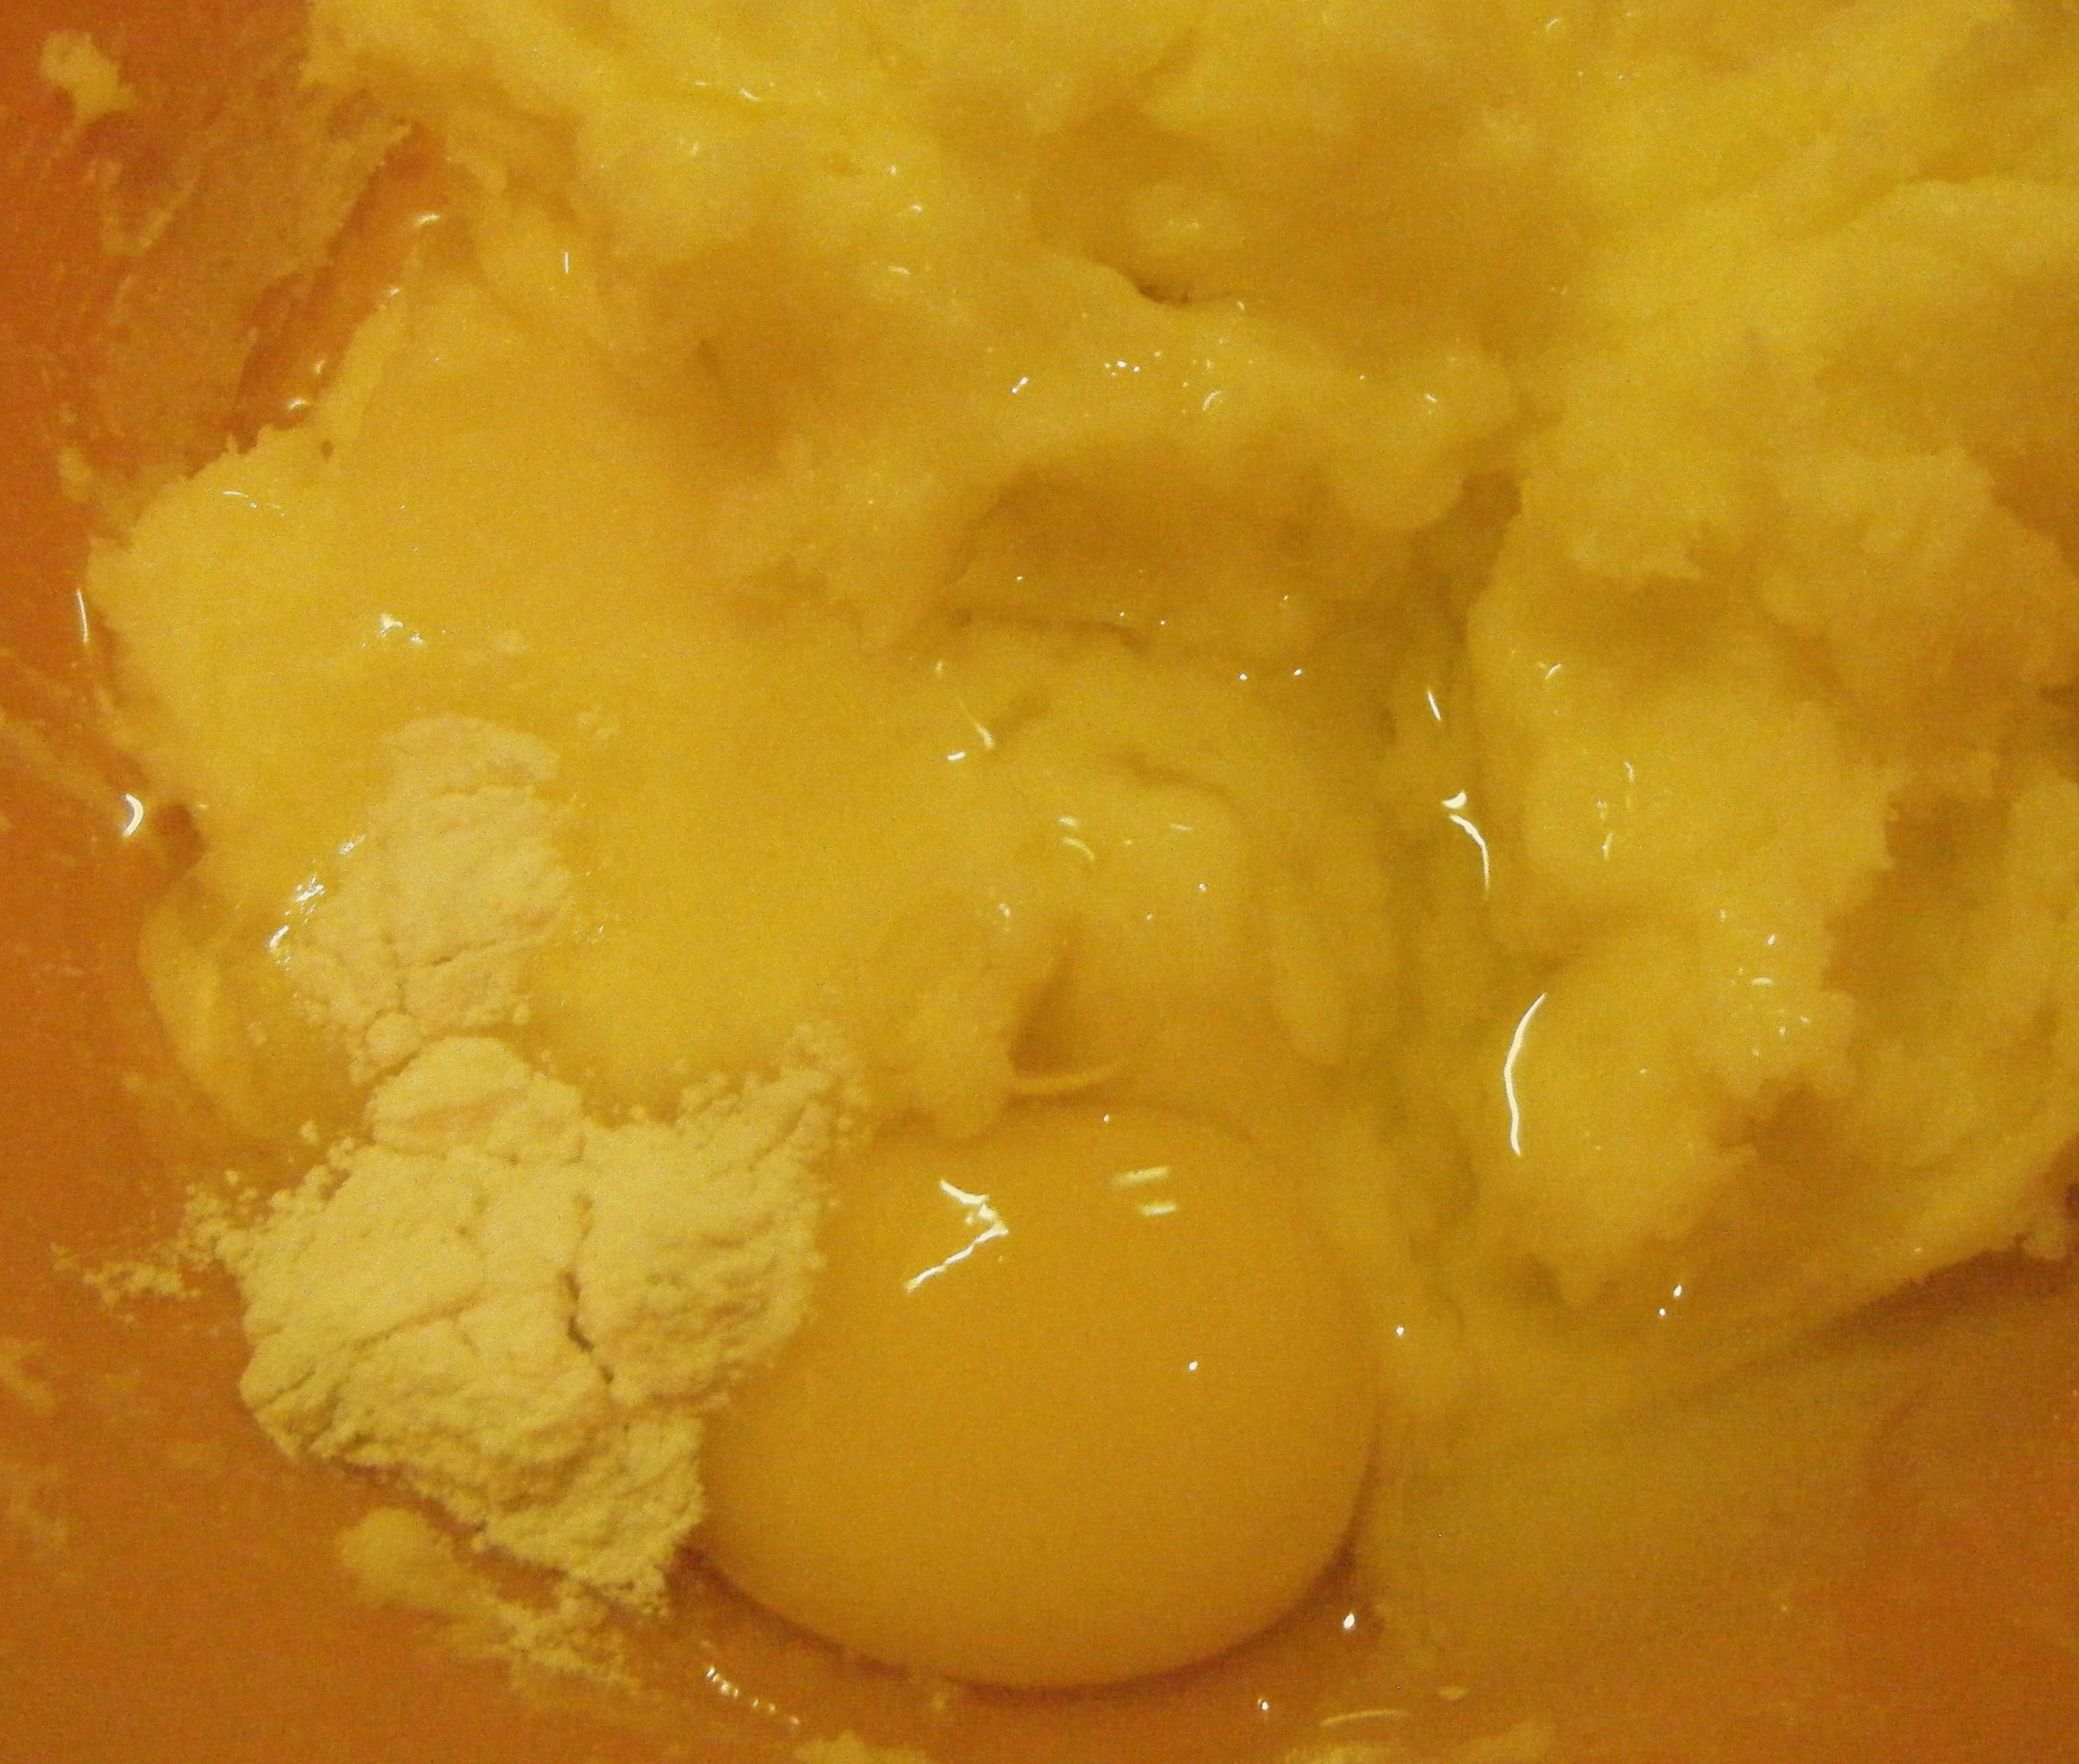
Once all the eggs were added, I sifted in the flour and baking powder and mixed until well combined. I then added a few drops of vanilla extract and gave it another stir.
Time for the fun bit. I took my candy floss and tried to break it up a bit with my fingers. This was very messy as it kept sticking to me but it definitely helped get a nice even spread throughout the cupcake mix. Once it was broken up, I stirred it into the cupcake batter.


I then put about 1 and a half teaspoons of mixture into each cupcake case. Now, I’m a bit of a perfectionist and when I make cupcakes, I take things one step further and weigh each filled case to make sure they are equal. As said above, I made these cupcakes at my mum’s house and it turns out her scales aren’t quite as accurate as mine, however, each cupcake case was either 35g or 40g with the mix in. It may seem like a bit of an OCD step but it helps get perfectly even sized and baked cakes 🙂

With the cakes (just about) equal size, I put them in the oven and set the time for 10 minutes. When the timer went off, I rotated the trays to help make sure they had an even bake and popped them back in for another 8 minutes. I then checked the cakes to see if they were done.
Practical tip: in case you missed Challenge No. 5, to test whether the cakes are cooked, gently press the top of one of the cakes with your finger; if it is done it will be springy to touch and bounce back into place. You can also take a tooth pick (or cake tester if you have one) and slide it into the centre of one of the cakes; if the cake is done the tester will come out clean. If you think it’s not quite done return the cakes to the oven but keep an eye on them – 1 minute may be all they need but that 1 minute can make all the difference!
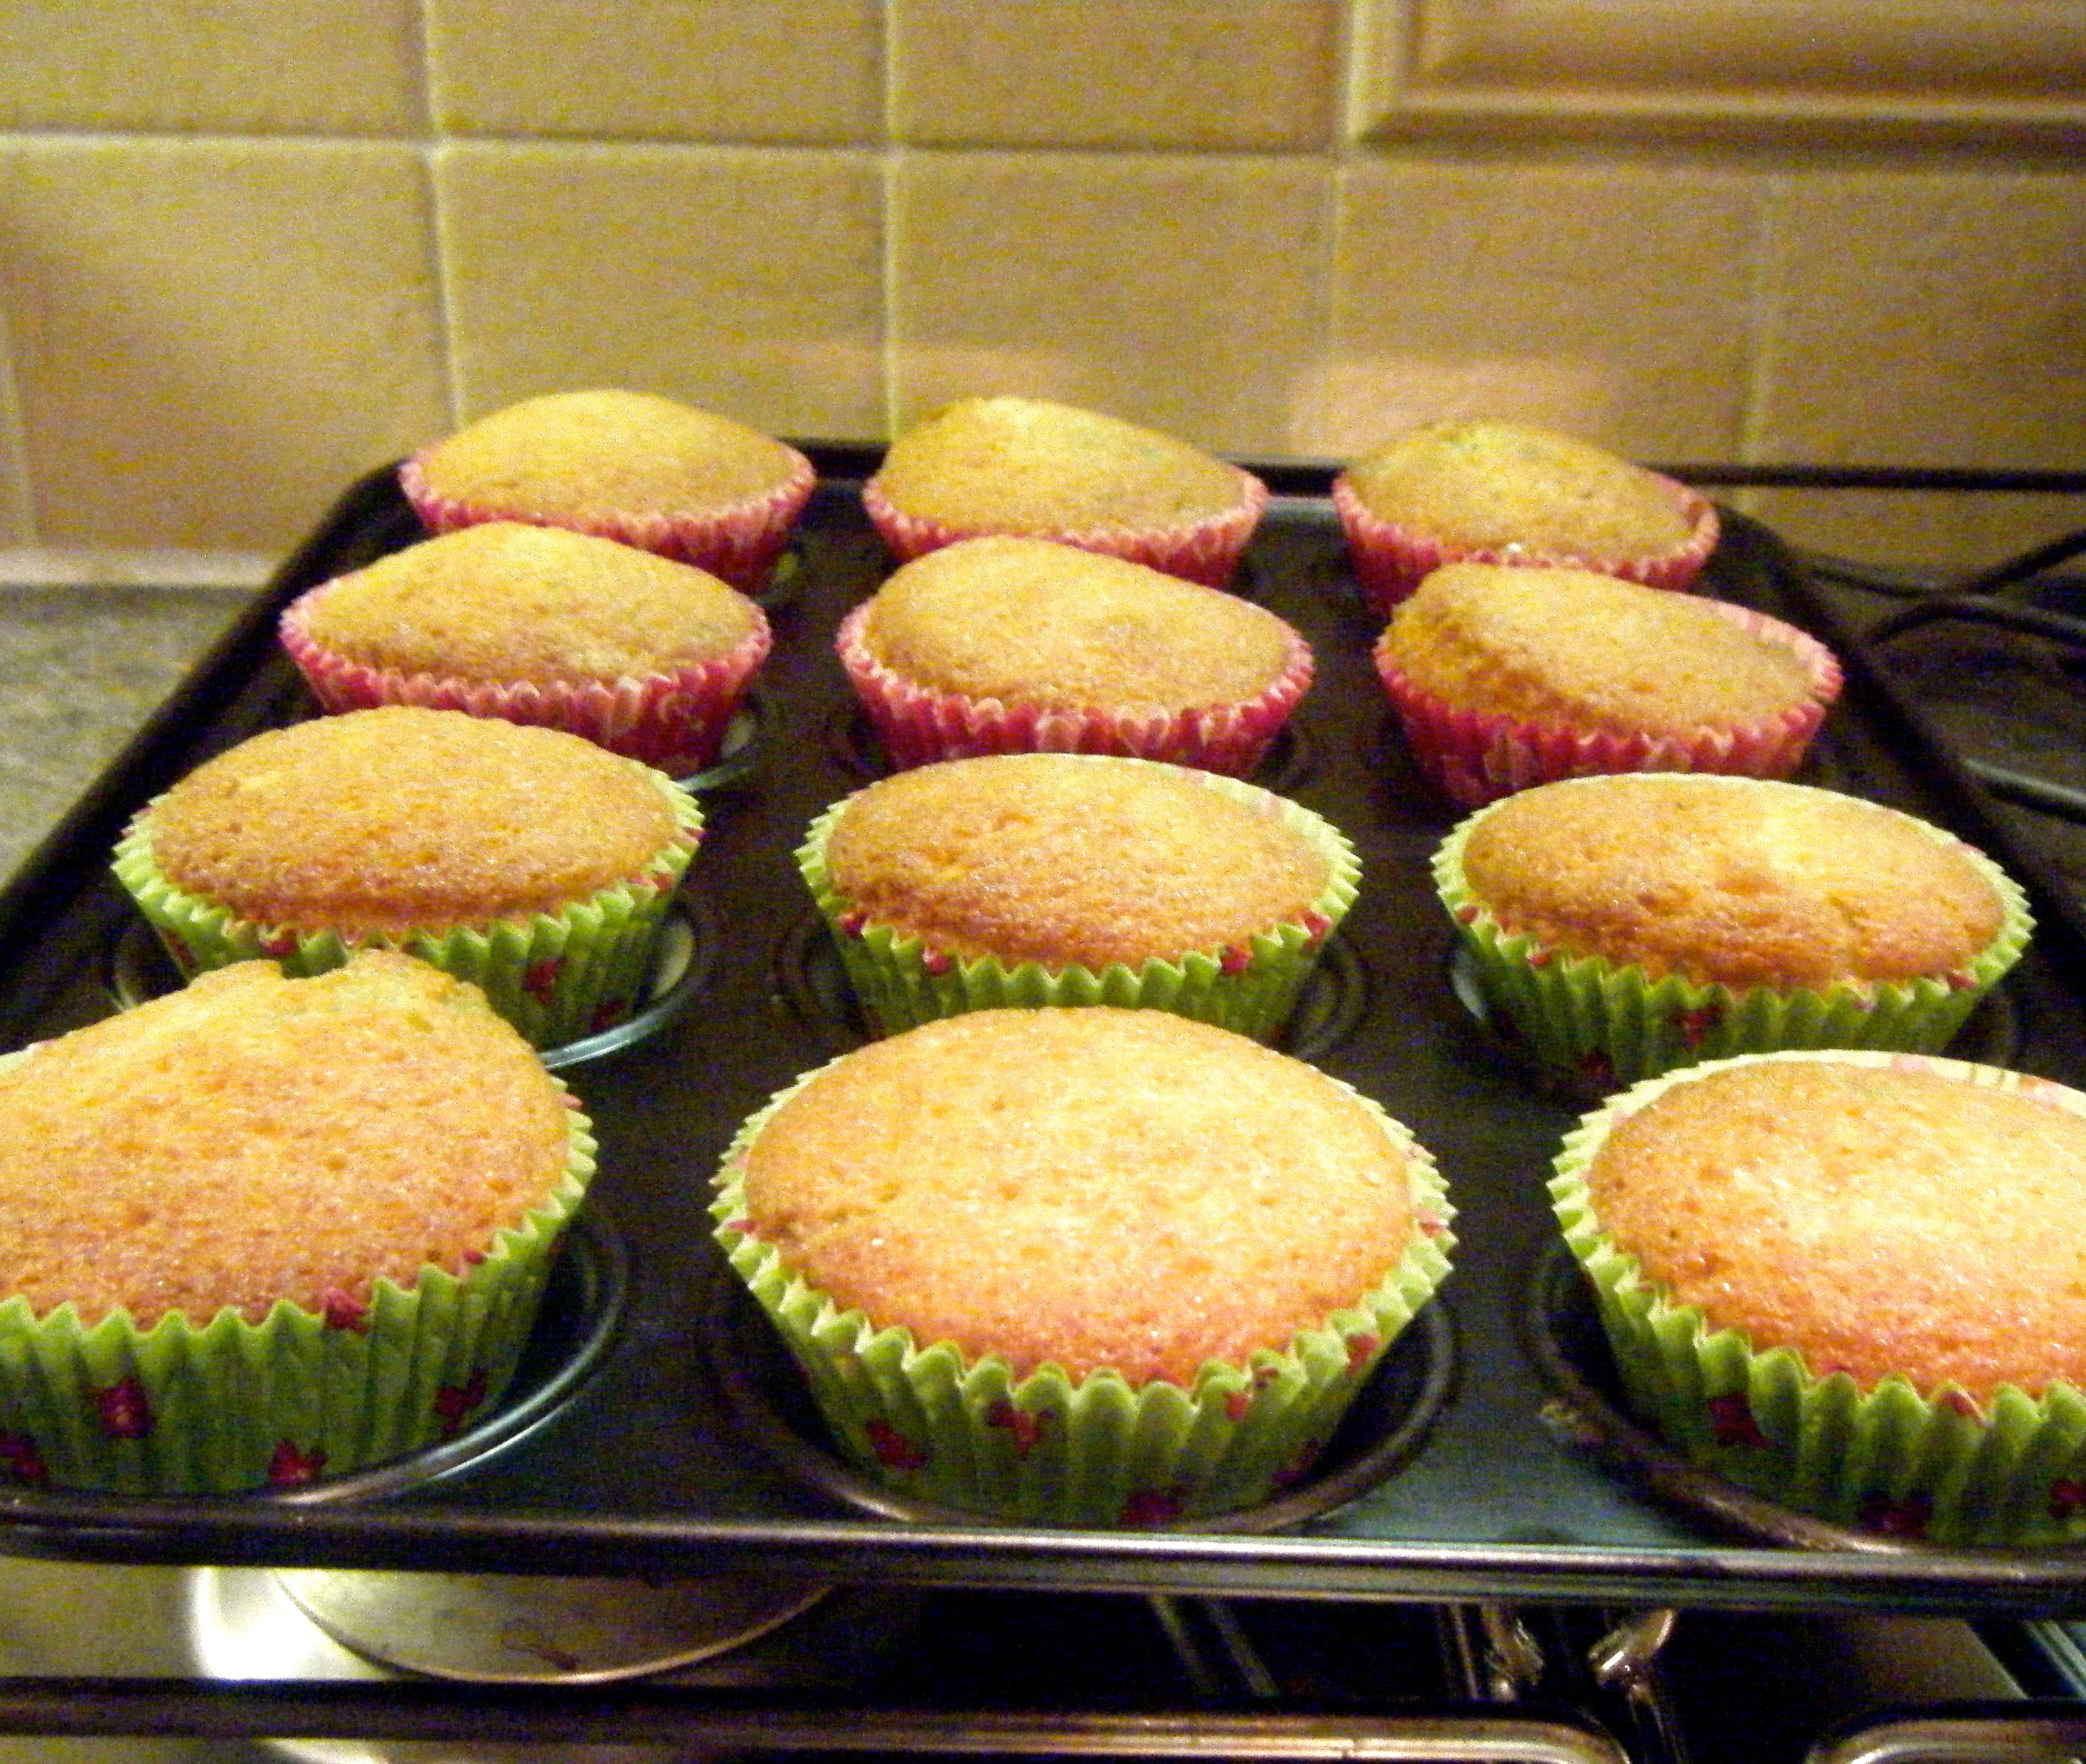
I let the cakes cool on the tray for a few minutes and then transferred them to a cooling rack.
 This is where my night changed plans, I had a yummy takeaway Chinese and a few glasses of wine with Dave and my parents. I then went out to visit some friends for the evening and somehow ended up consuming quite a lot of vodka (I blame my friend Kev!). Suffice to say, I was a little worse for wear on the Saturday morning. However, after a trip to see some 12 day old lambs at a local farm and a quick nap, I was (just about!) ready to finish decorating my cakes.
I started by whisking the butter (using a handheld electric whisk) until nice and smooth. Don’t rush this step – it is one of the most important stages to get the right consistency to be able to pipe your buttercream. I always try to whisk the butter for a good 5 minutes.
With the butter whisked, it was time to start adding the icing sugar. I added a bit at a time, covered the bowl with a clean tea towel and then whisked until combined. I continued adding a bit at a time until all the icing sugar was incorporated. As I got towards the end, I added a little milk to keep the buttercream from being too stiff. I then split the buttercream between 2 bowls.
In my slightly hungover state, I forgot to take any pictures of the above stages! I realised on the next bit and got the camera back out again.
Next up, I tried to combine the leftover candy floss with the cream. This is done so it can be added to the buttercream without making the buttercream lumpy. I however did this wrong 😦 I’d read that you should melt the candy floss with the cream but I didn’t read any more than this. When I read the word ‘melt’ I instantly thought of heat. So I put my cream into a small saucepan over a low heat and added the candy floss. All than happened is that it started to caramelise and went horribly sticky and extra lumpy! I decided to throw it away and leave the candy floss out of the buttercream.
😦 It just didn’t work!
I was making the buttercream at about 2.30pm and that night, when lying in bed at about 1.30am it dawned on me, I didn’t need the heat! The cream alone would ‘melt’ the candy floss and then the liquid could be added to the buttercream. Lesson learnt for next time and for any of you who may read this and want to give it a go.
Anyway, having given up on the candy floss flavouring, I added a few drops of pink food colouring to one half of the buttercream and gave it a mix with a wooden spoon. I then took the cupcakes which were in the green cases and used the back of a teaspoon to add a small covering of the buttercream. I got a handful of the chocolate covered popping candy and sprinkled it on top of the cupcakes.
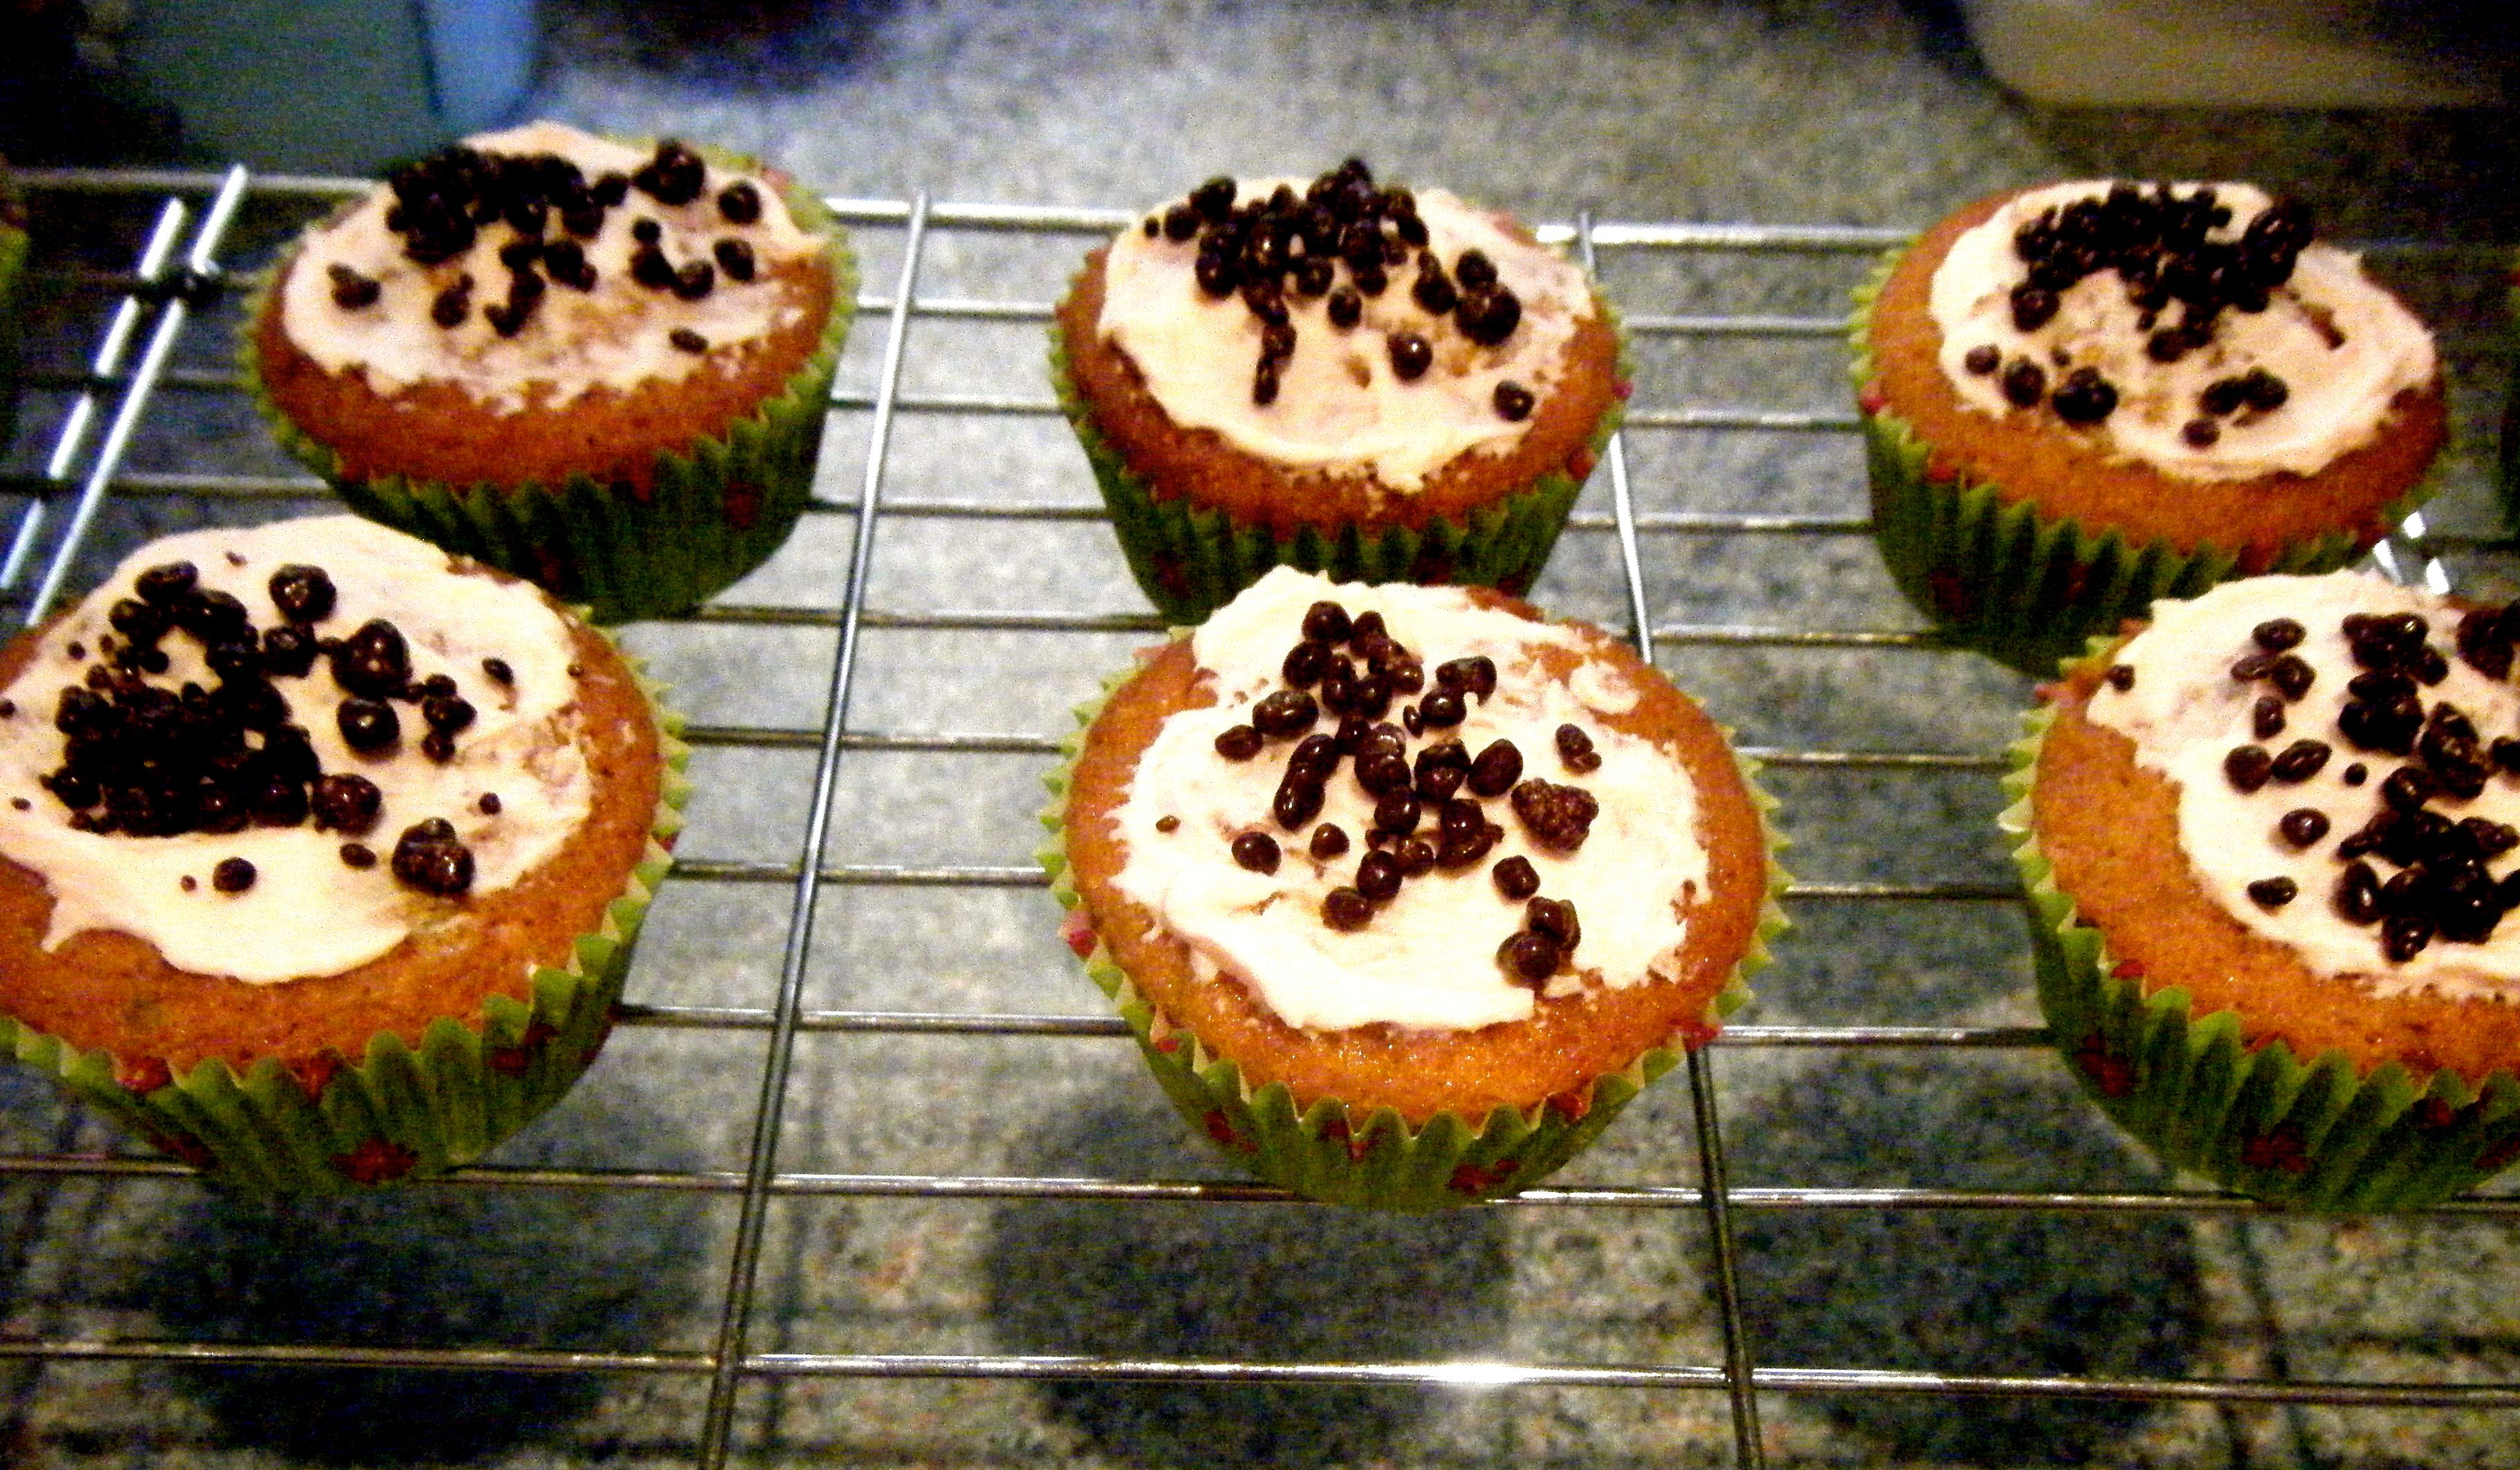
I then put the remaining pink buttercream into a piping bag fitted with a wilton 2D nozzle and piped swirls onto the top of each one.

My brother wanted to help with the piping. I let him do one and he actually did quite a good job! 🙂
Practical tip: if you missed Challenge No. 7 – when spooning mixture into a piping bag, I always find it easier to put the bag into a tall glass and turn the top down.

I then added the green food colouring to the other half of the buttercream and repeated the above steps with the cupcakes in the pink cases.
The final stage was an extra special touch, inspired by the bakingdom blog. I had created Honeydukes signs using cake-pop sticks, wrapped in purple ribbon and cling film and topped with homemade signs. It was a little time consuming but the finished product for my Harry Potter loving friend was well worth it.
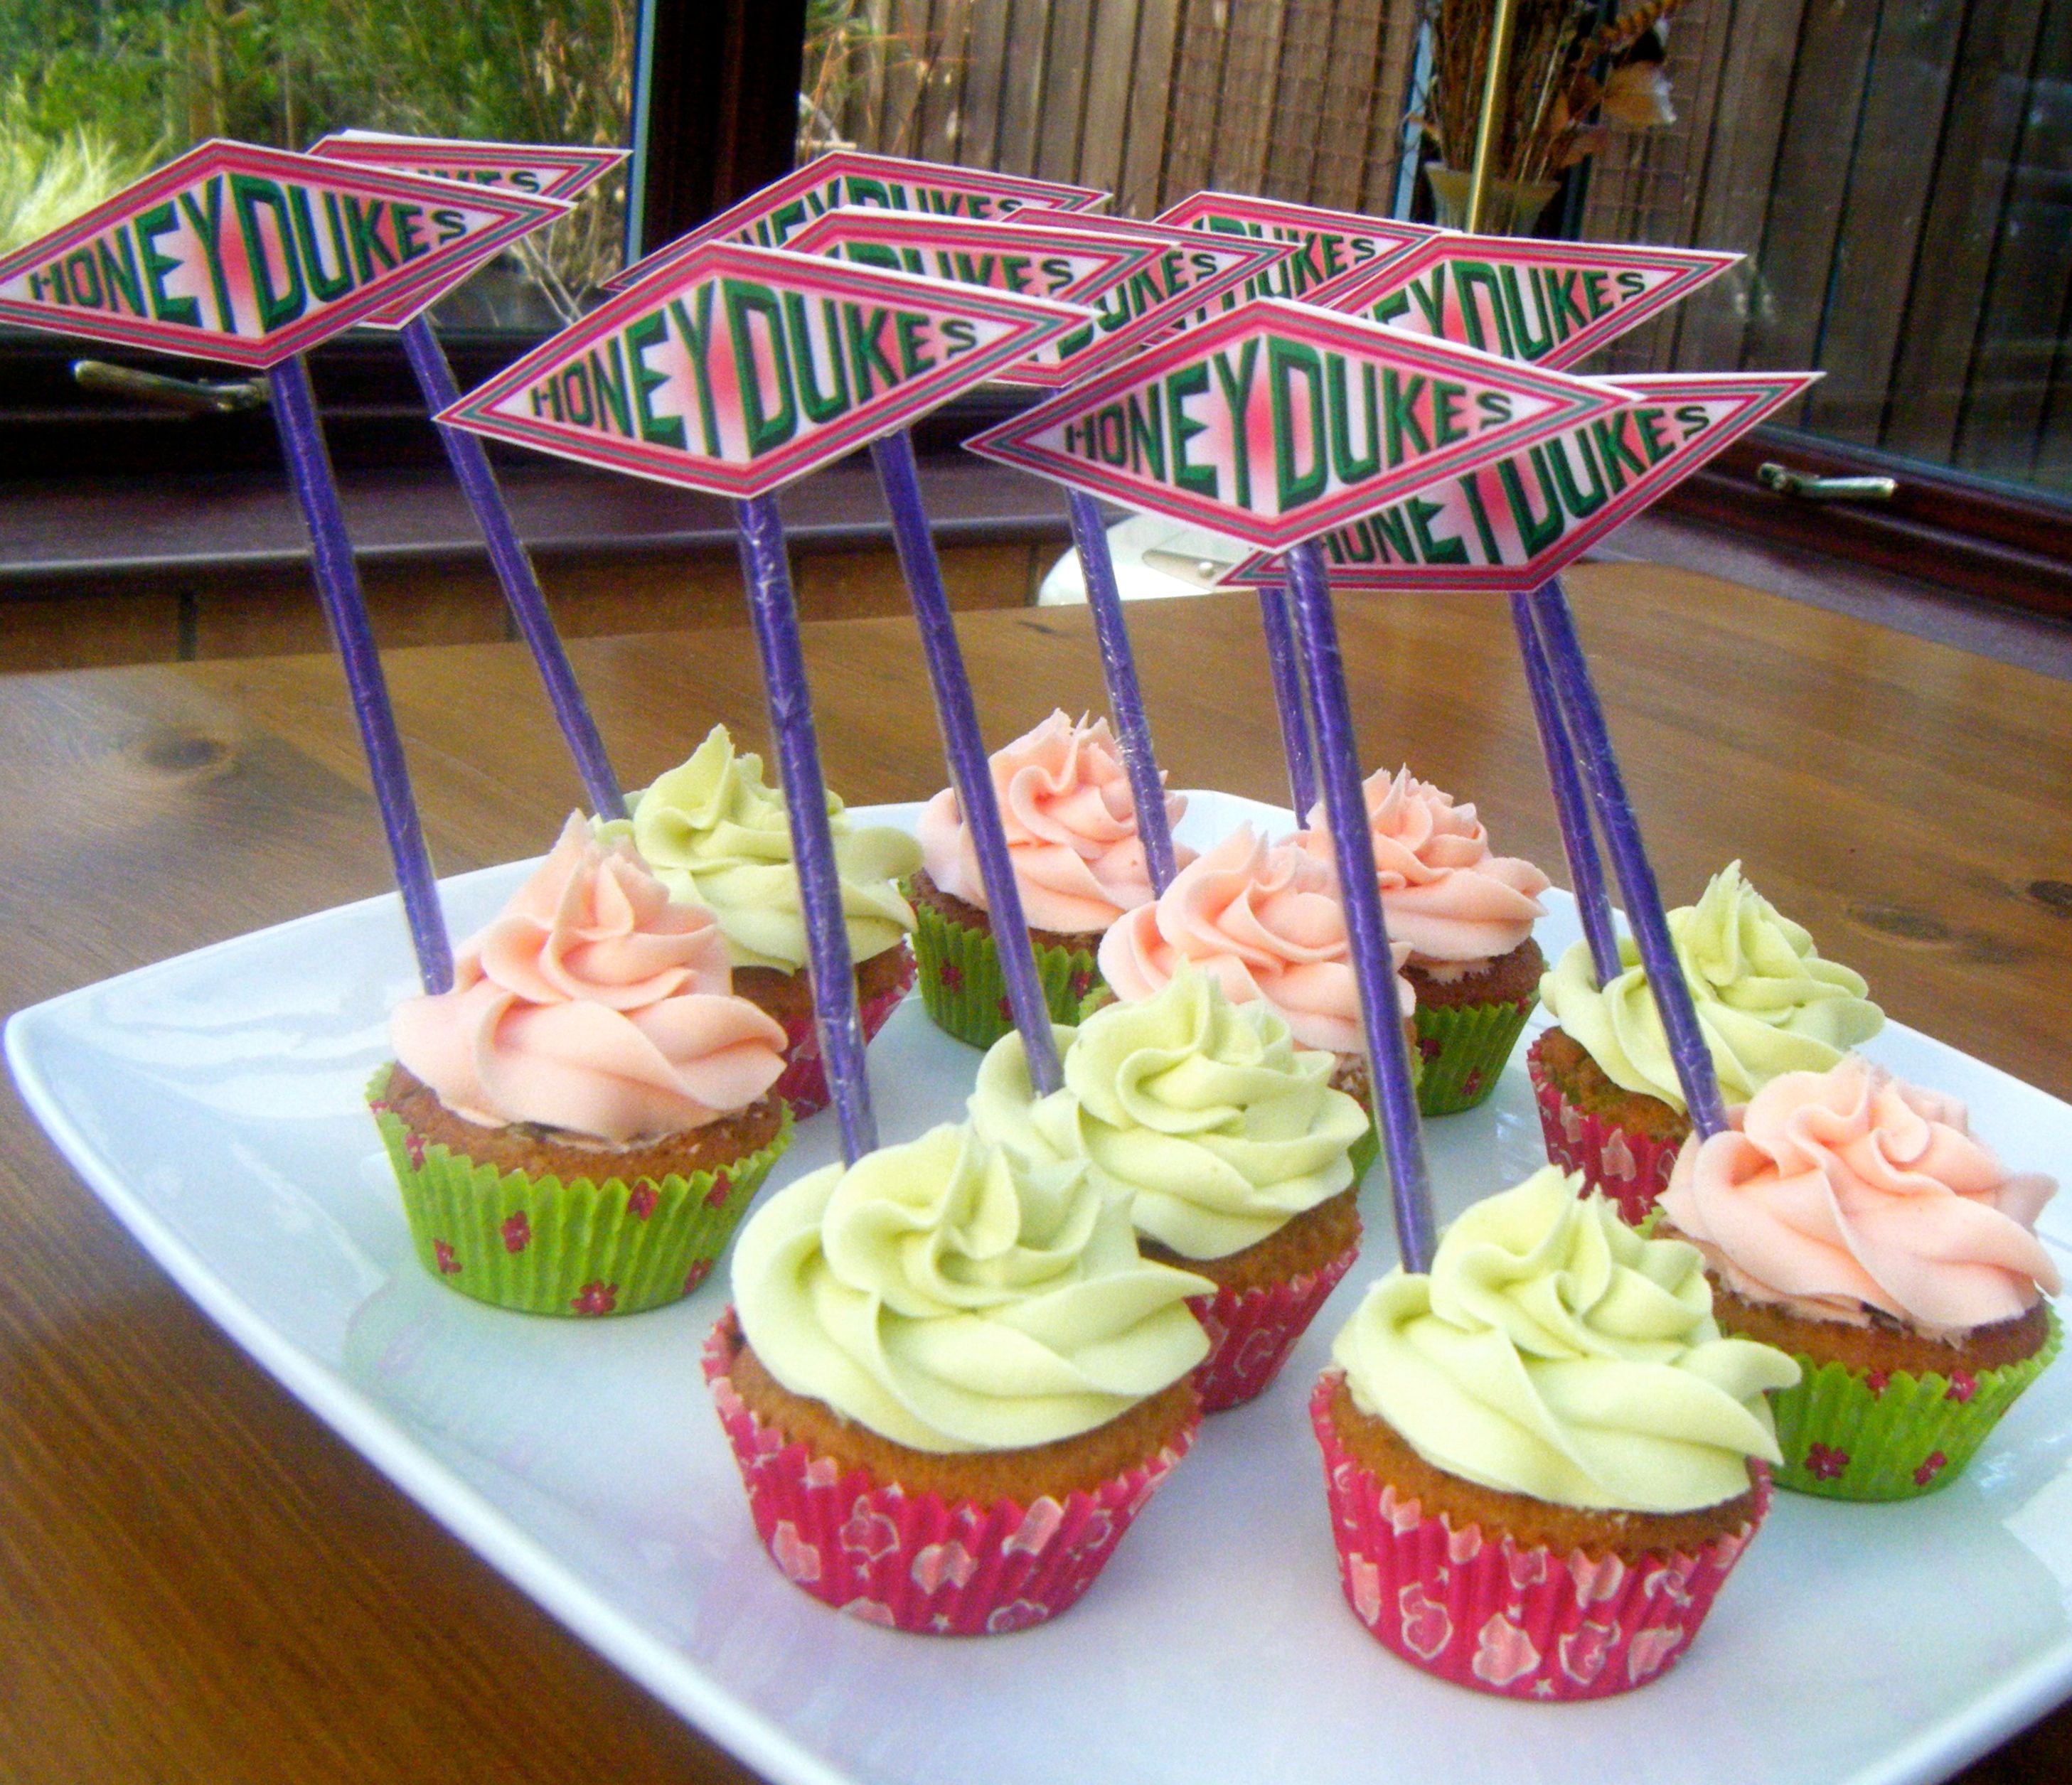
These cupcakes were a success with all who tried them. The popping candy could have been a bit more ‘poppy’ and I was disappointed I messed up the cotton candy for the buttercream but overall I was happy with this bake. The candy floss added a nice speckled effect to the cakes and they tasted yummy.
 Coming up next week, Challenge No. 14 – moussaka.

Lovely cupcakes 🙂 Great job!
LikeLike
Thanks 🙂 they were really fun to make and yummy to eat! x
LikeLiked by 1 person
This sounds fun can’t wait to try them out! Thanks for the tip on whisking the butter for longer for buttercream I did some this week and could not get it through the piping bag – I ended up scooping it back out and using a good old fashioned spatula! 😊
LikeLike
Thanks! 🙂 and thank you for following my blog. I hope you enjoy reading about my adventures in the kitchen xxx
LikeLiked by 1 person
Pingback: Challenge No. 15 – Simnel Cake |
Pingback: Challenge No. 29 – Chocolate Panda Cupcakes (Gluten Free) |