Challenge No. 19 – Rum Raisin Ice Cream

Have you ever made home-made ice cream without an ice cream maker? Better still, have you ever tried to find a recipe online for making ice cream without an ice cream maker?  It is not easy – finding a recipe that is!  My mum suggested this challenge and I thought it was a great idea.  I set out trying to find a recipe and a few times thought I had got one only to get to the last instruction and the recipe would say to “put it in your ice cream maker and follow the manufacturer’s instructions”.  It was very frustrating! And then I remembered, my many (and I mean many!) recipe books in the flat.  I had a quick rummage and found Jamie Oliver has kindly provided a recipe which works with or without an ice cream machine. Yay 🙂

Although I had found a recipe for vanilla ice cream, I kept having a sneaky look online and do you know what I found? One of my new blogging friends has blogged about the same recipe.  You can see read about Laura’s experience at Feast Wisely

Jamie’s book (Jamie’s Comfort Food) not only gives you a lovely recipe for vanilla ice cream, it also gives 4 delicious flavour variations. One of my mum’s favourites is rum and raisin ice cream – she say’s its her ‘holiday ice cream’ but I think she would have it all the time if she could 😉 I know I would!

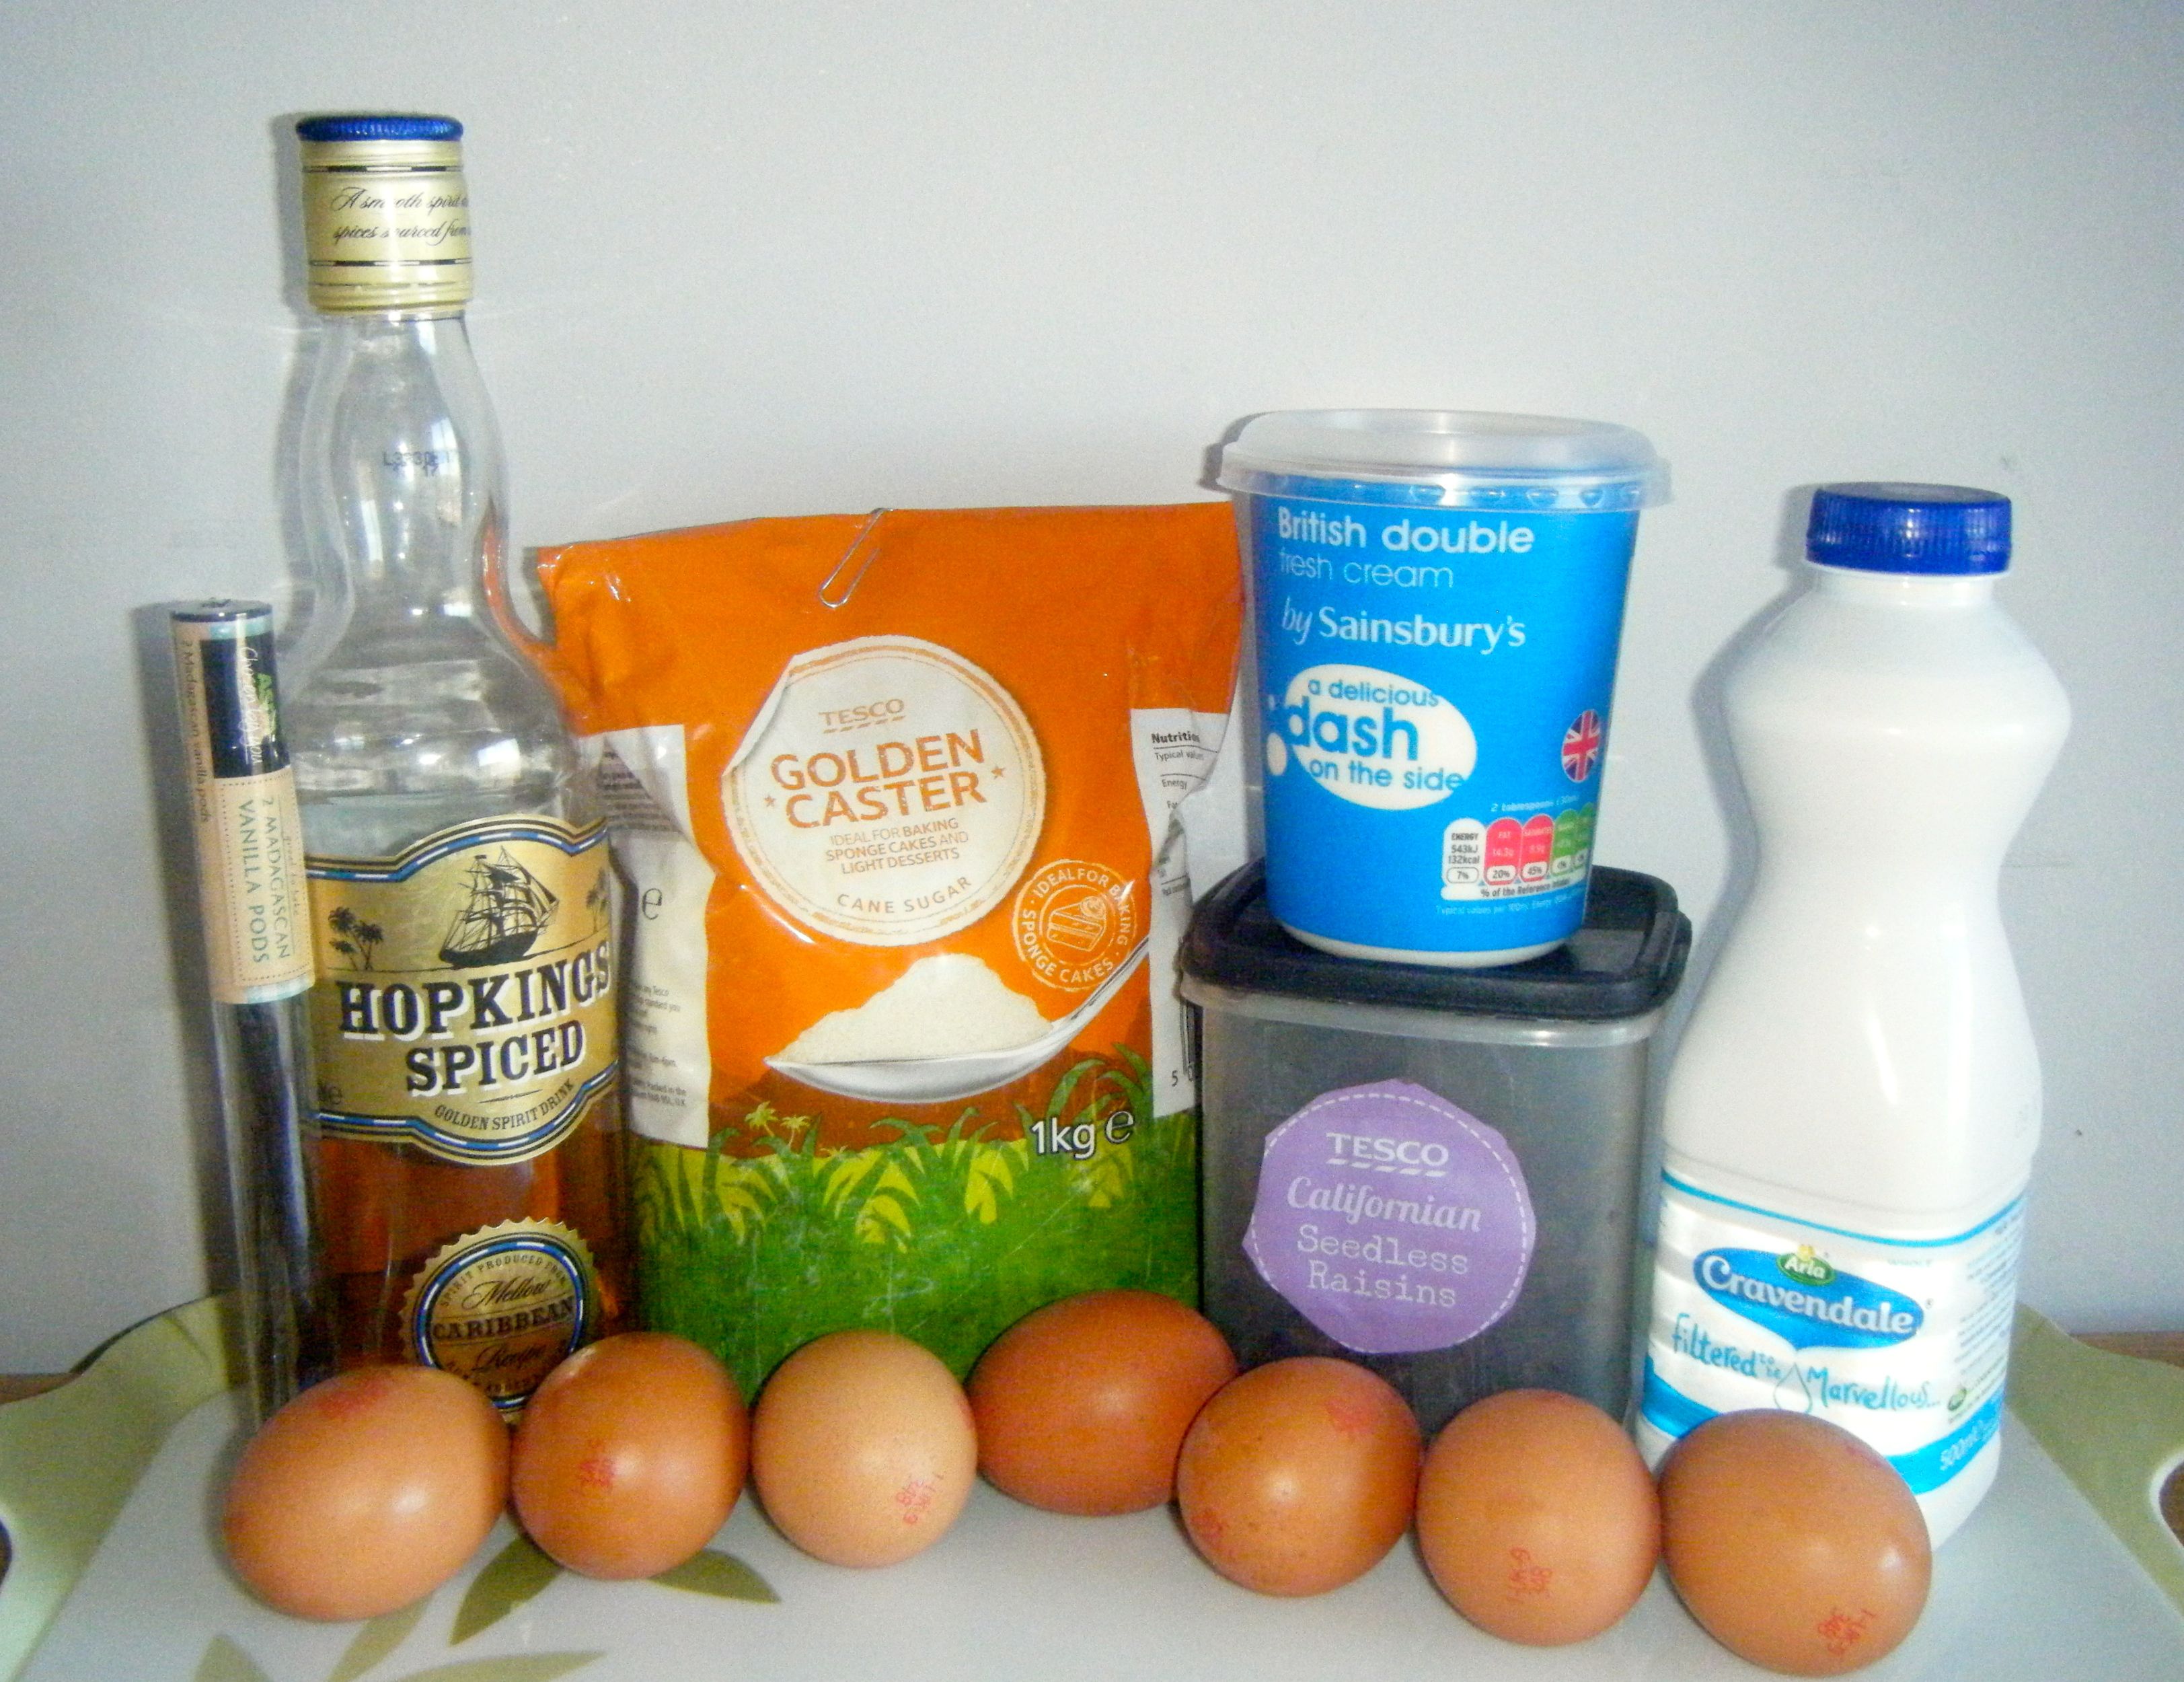
So for the rum raisin ice cream you will need the following ingredients:-

  • 100g raisins
  • 150ml dark spiced rum
  • 2 vanilla pods
  • 500ml whole milk
  • 250ml double cream
  • 7 large eggs
  • 150g golden caster sugar

Edited - ingredients

These quantities make 1 litre of ice cream and Jamie helpfully tells me that 1 scoop is 106 calories.  I however like to believe that anything which is homemade is guilt free, so we don’t need to worry about the calorie content 🙂

Anyway, on with the recipe.  I started off by putting the raisins in a bowl and covering them with the spiced rum.  I covered the bowl with cling film and left it on the side for around a couple of hours.

Edited - rum and raisins

Once I had about half hour left, I got on with making the vanilla ice cream.  I halved the vanilla pods lengthways and scraped out the seeds.  I’ve seen chef’s do this on TV and it looks really simple…it wasn’t! I got in a bit of a mess but I managed to scrape most of the seeds out and get them in the pan.  I added the pods to the seeds and poured over the milk and cream.

Edited - vanilla pods Edited - vanilla cream

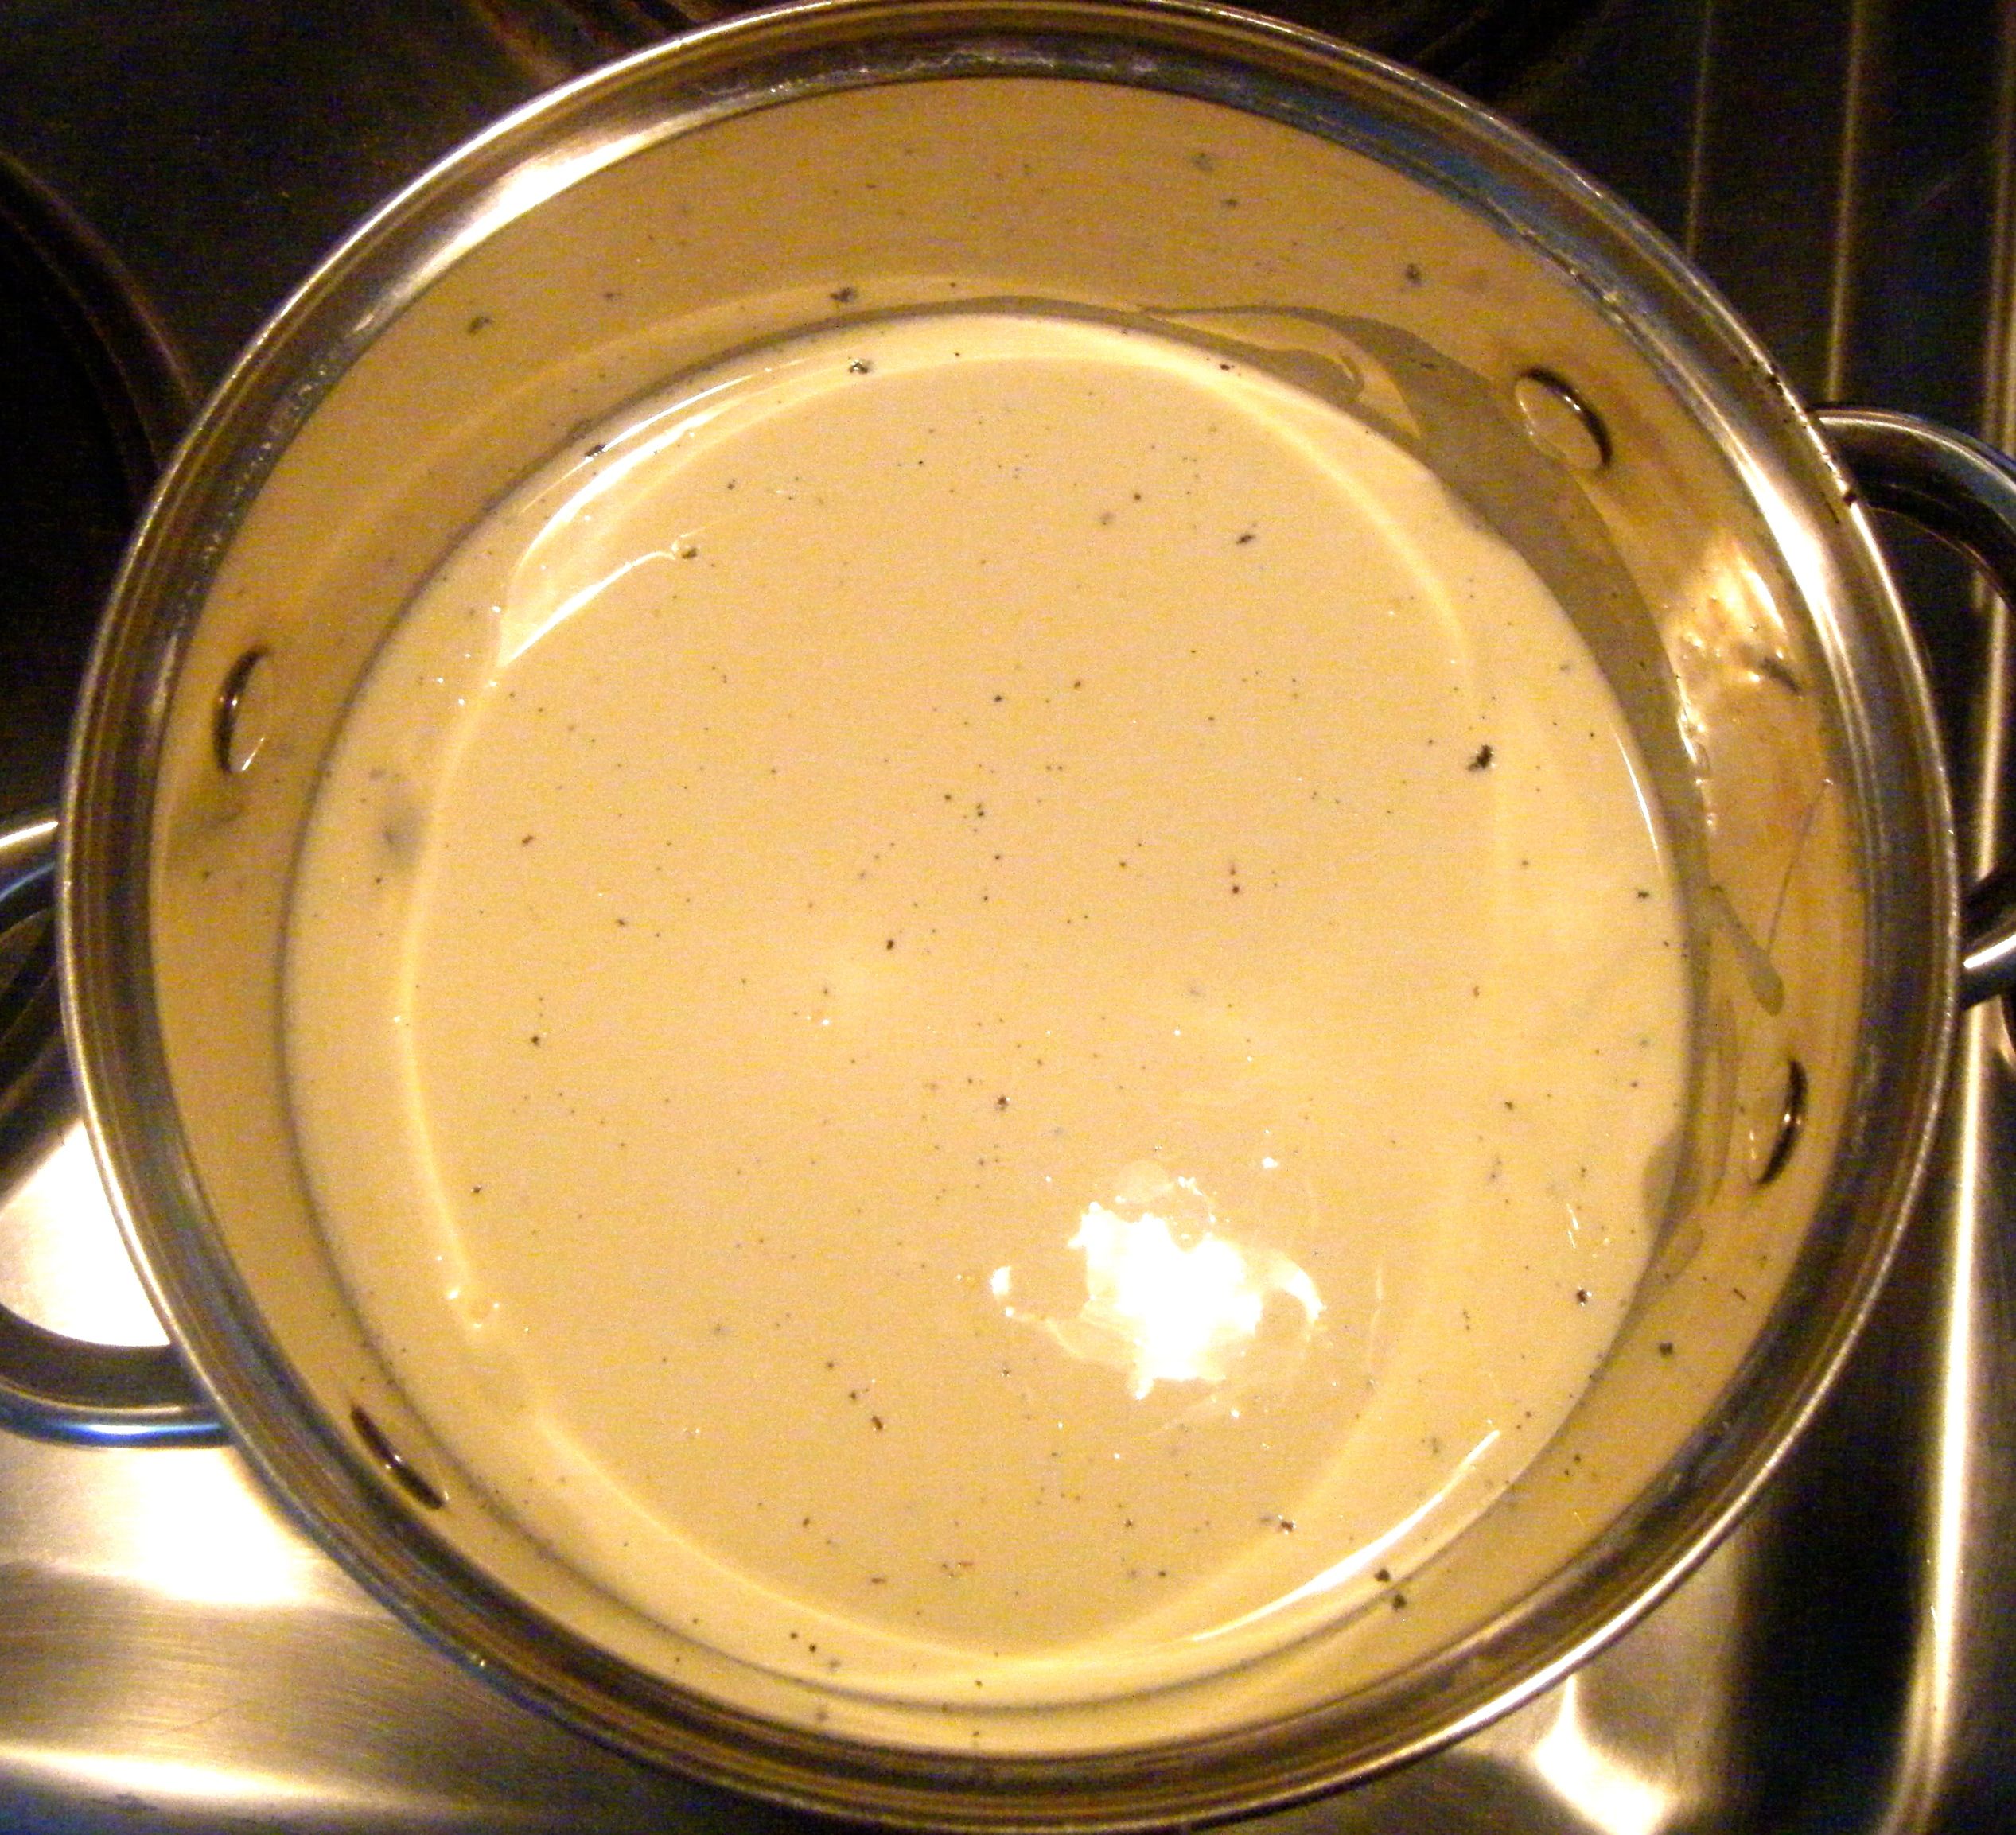
I put the pan on a low heat to gently warm for 15 minutes and then took it off the heat.

Whilst the vanilla cream mixture was cooling slightly, I separated my eggs and put the yolks in a bowl.

Edited - egg yolk 

Practical tip: Jamie advises to freeze the egg whites in a sandwich bag to make meringues for another day.  I therefore dutifully put the whites in a plastic container and put in the fridge so I could later make room for it in the freezer – I then promptly forgot to do this and ended up throwing away the whites! Silly me!

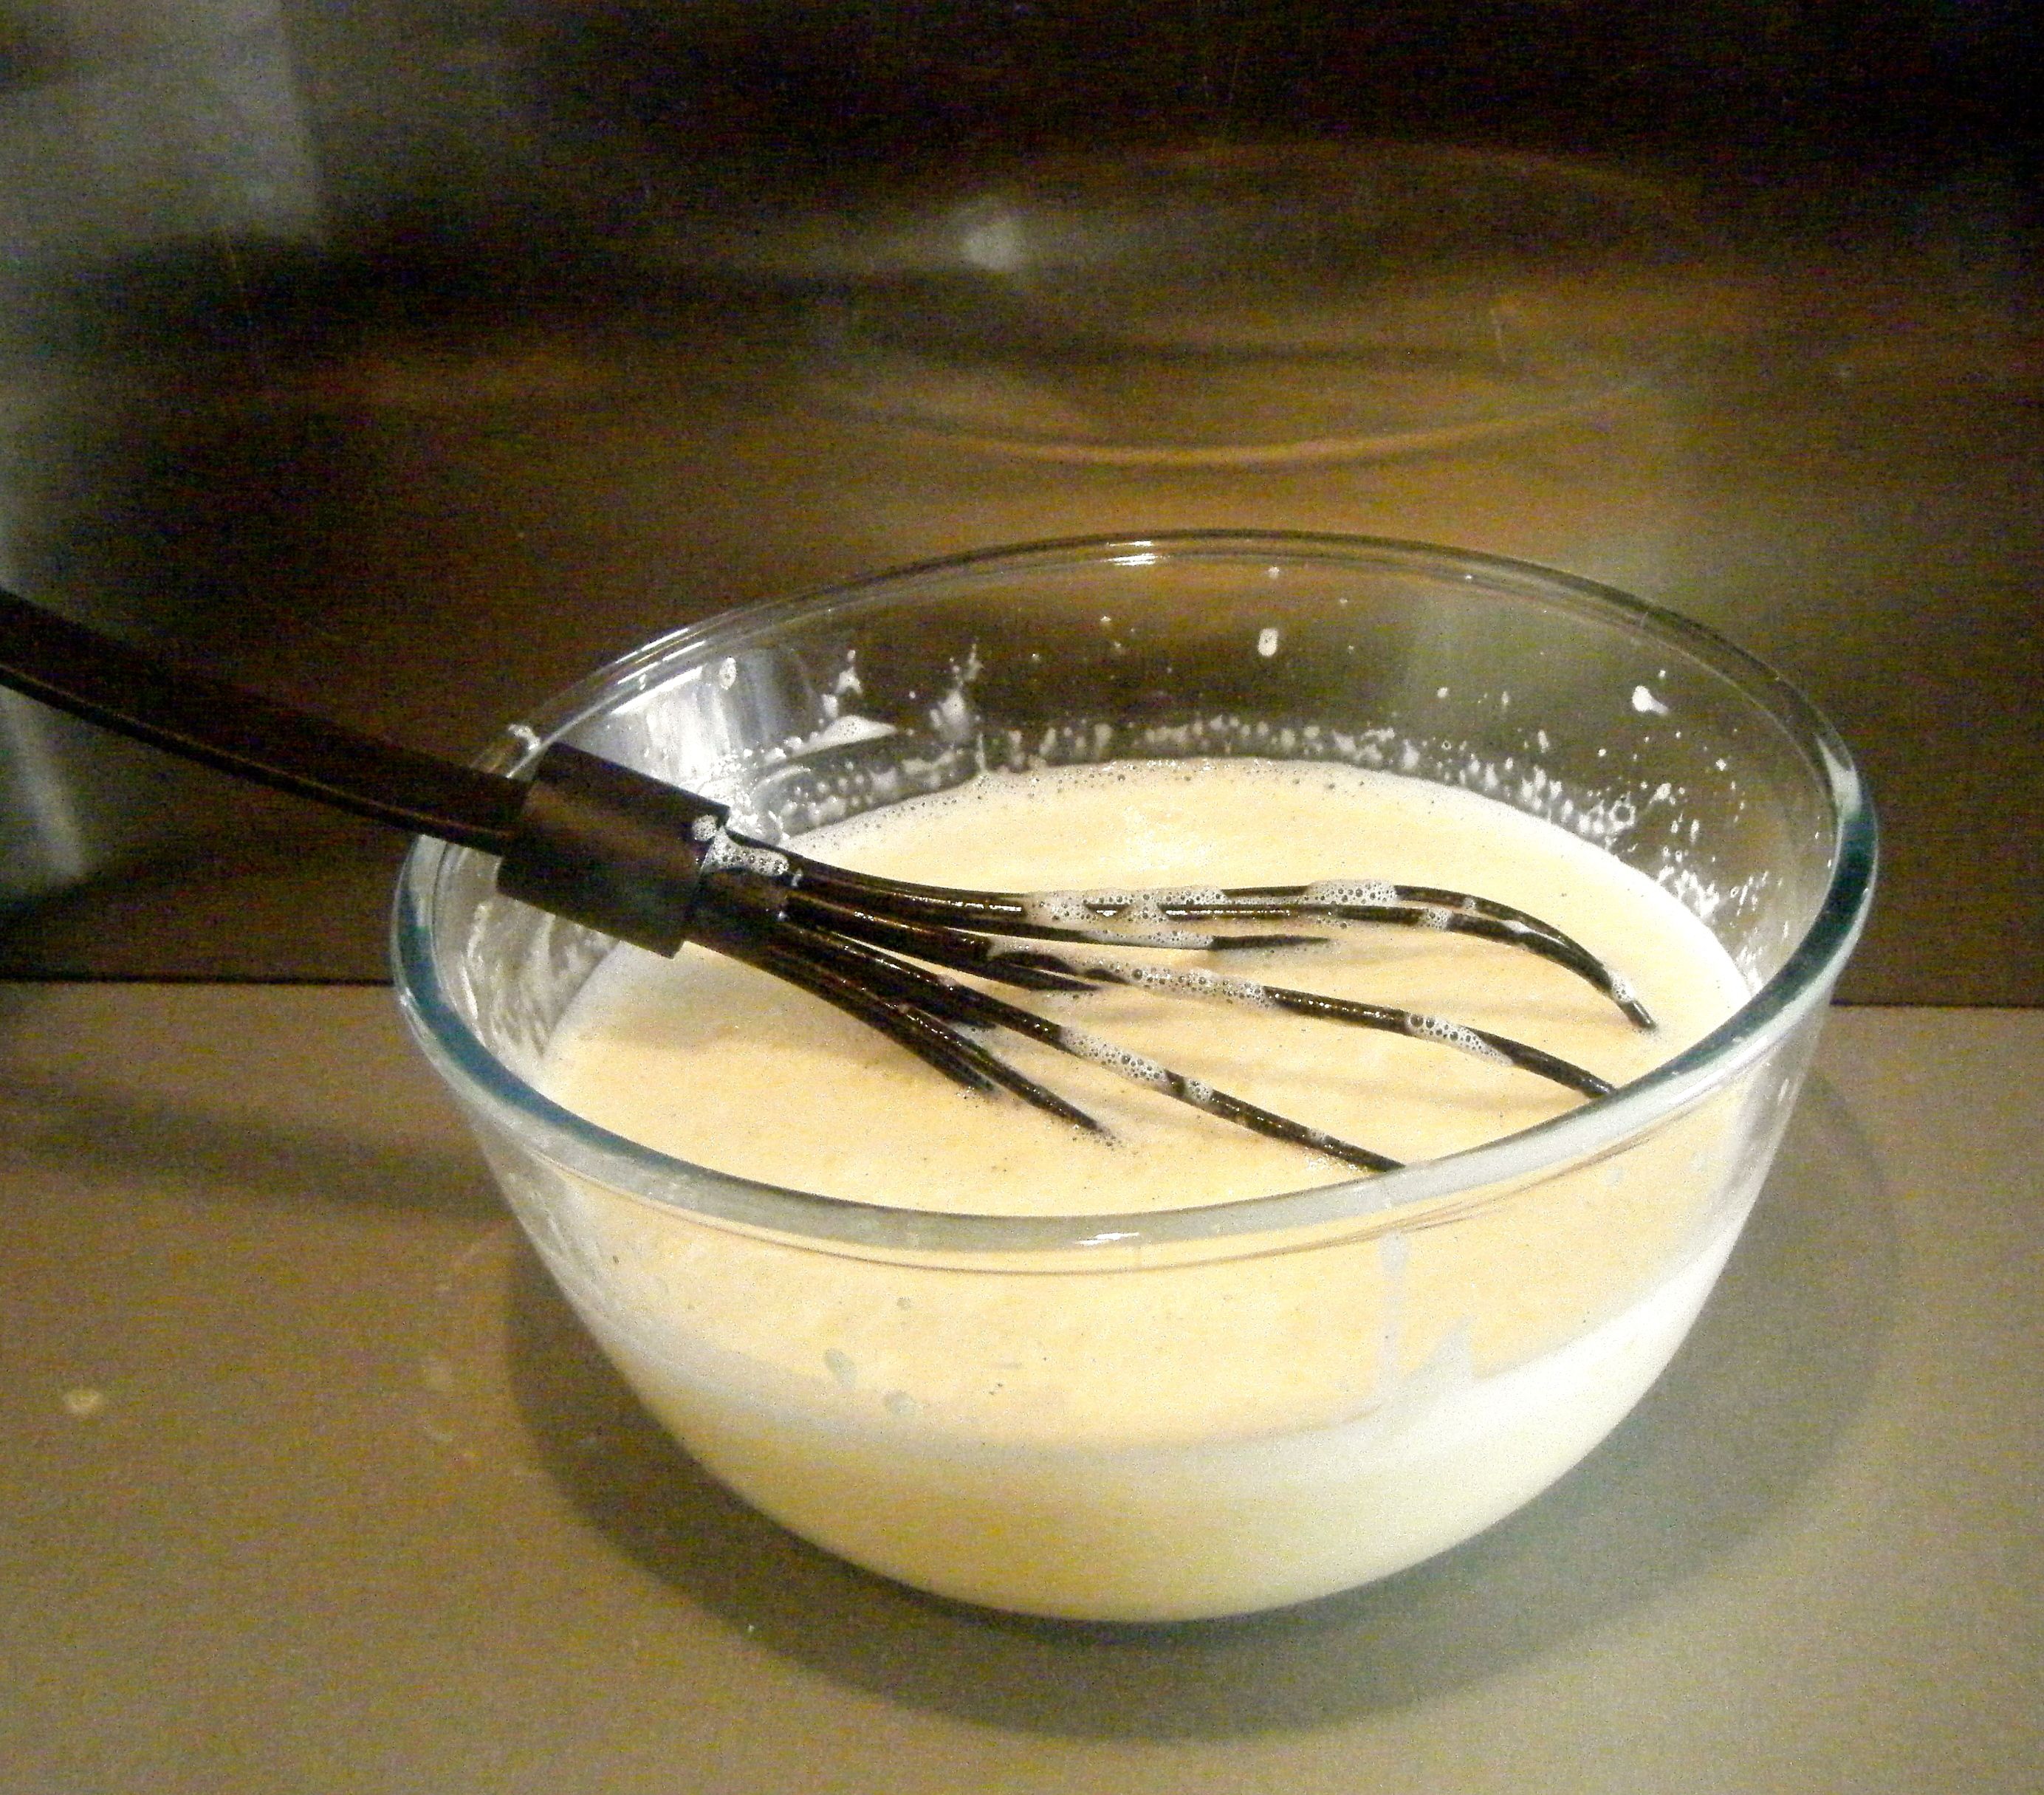
I whisked the yolks and caster sugar with a balloon whisk until pale.

Edited - whisked egg sugar

Before combining the vanilla milk with the egg/sugar mix, I sorted out the soaked raisins.  I took out around half and put them to one side.  I then used a hand blender to blitz the remaining raisins and rum together until it was a smooth purée. 

Edited - purée

I then took the vanilla cream mixture and poured it through a sieve into my egg/sugar mix.  I added a bit at a time and whisked thoroughly between each addition.  At the end, I made sure to push through as many vanilla seeds as possible – I mean come on, the more true vanilla flavour you can get the better!

Edited - combined

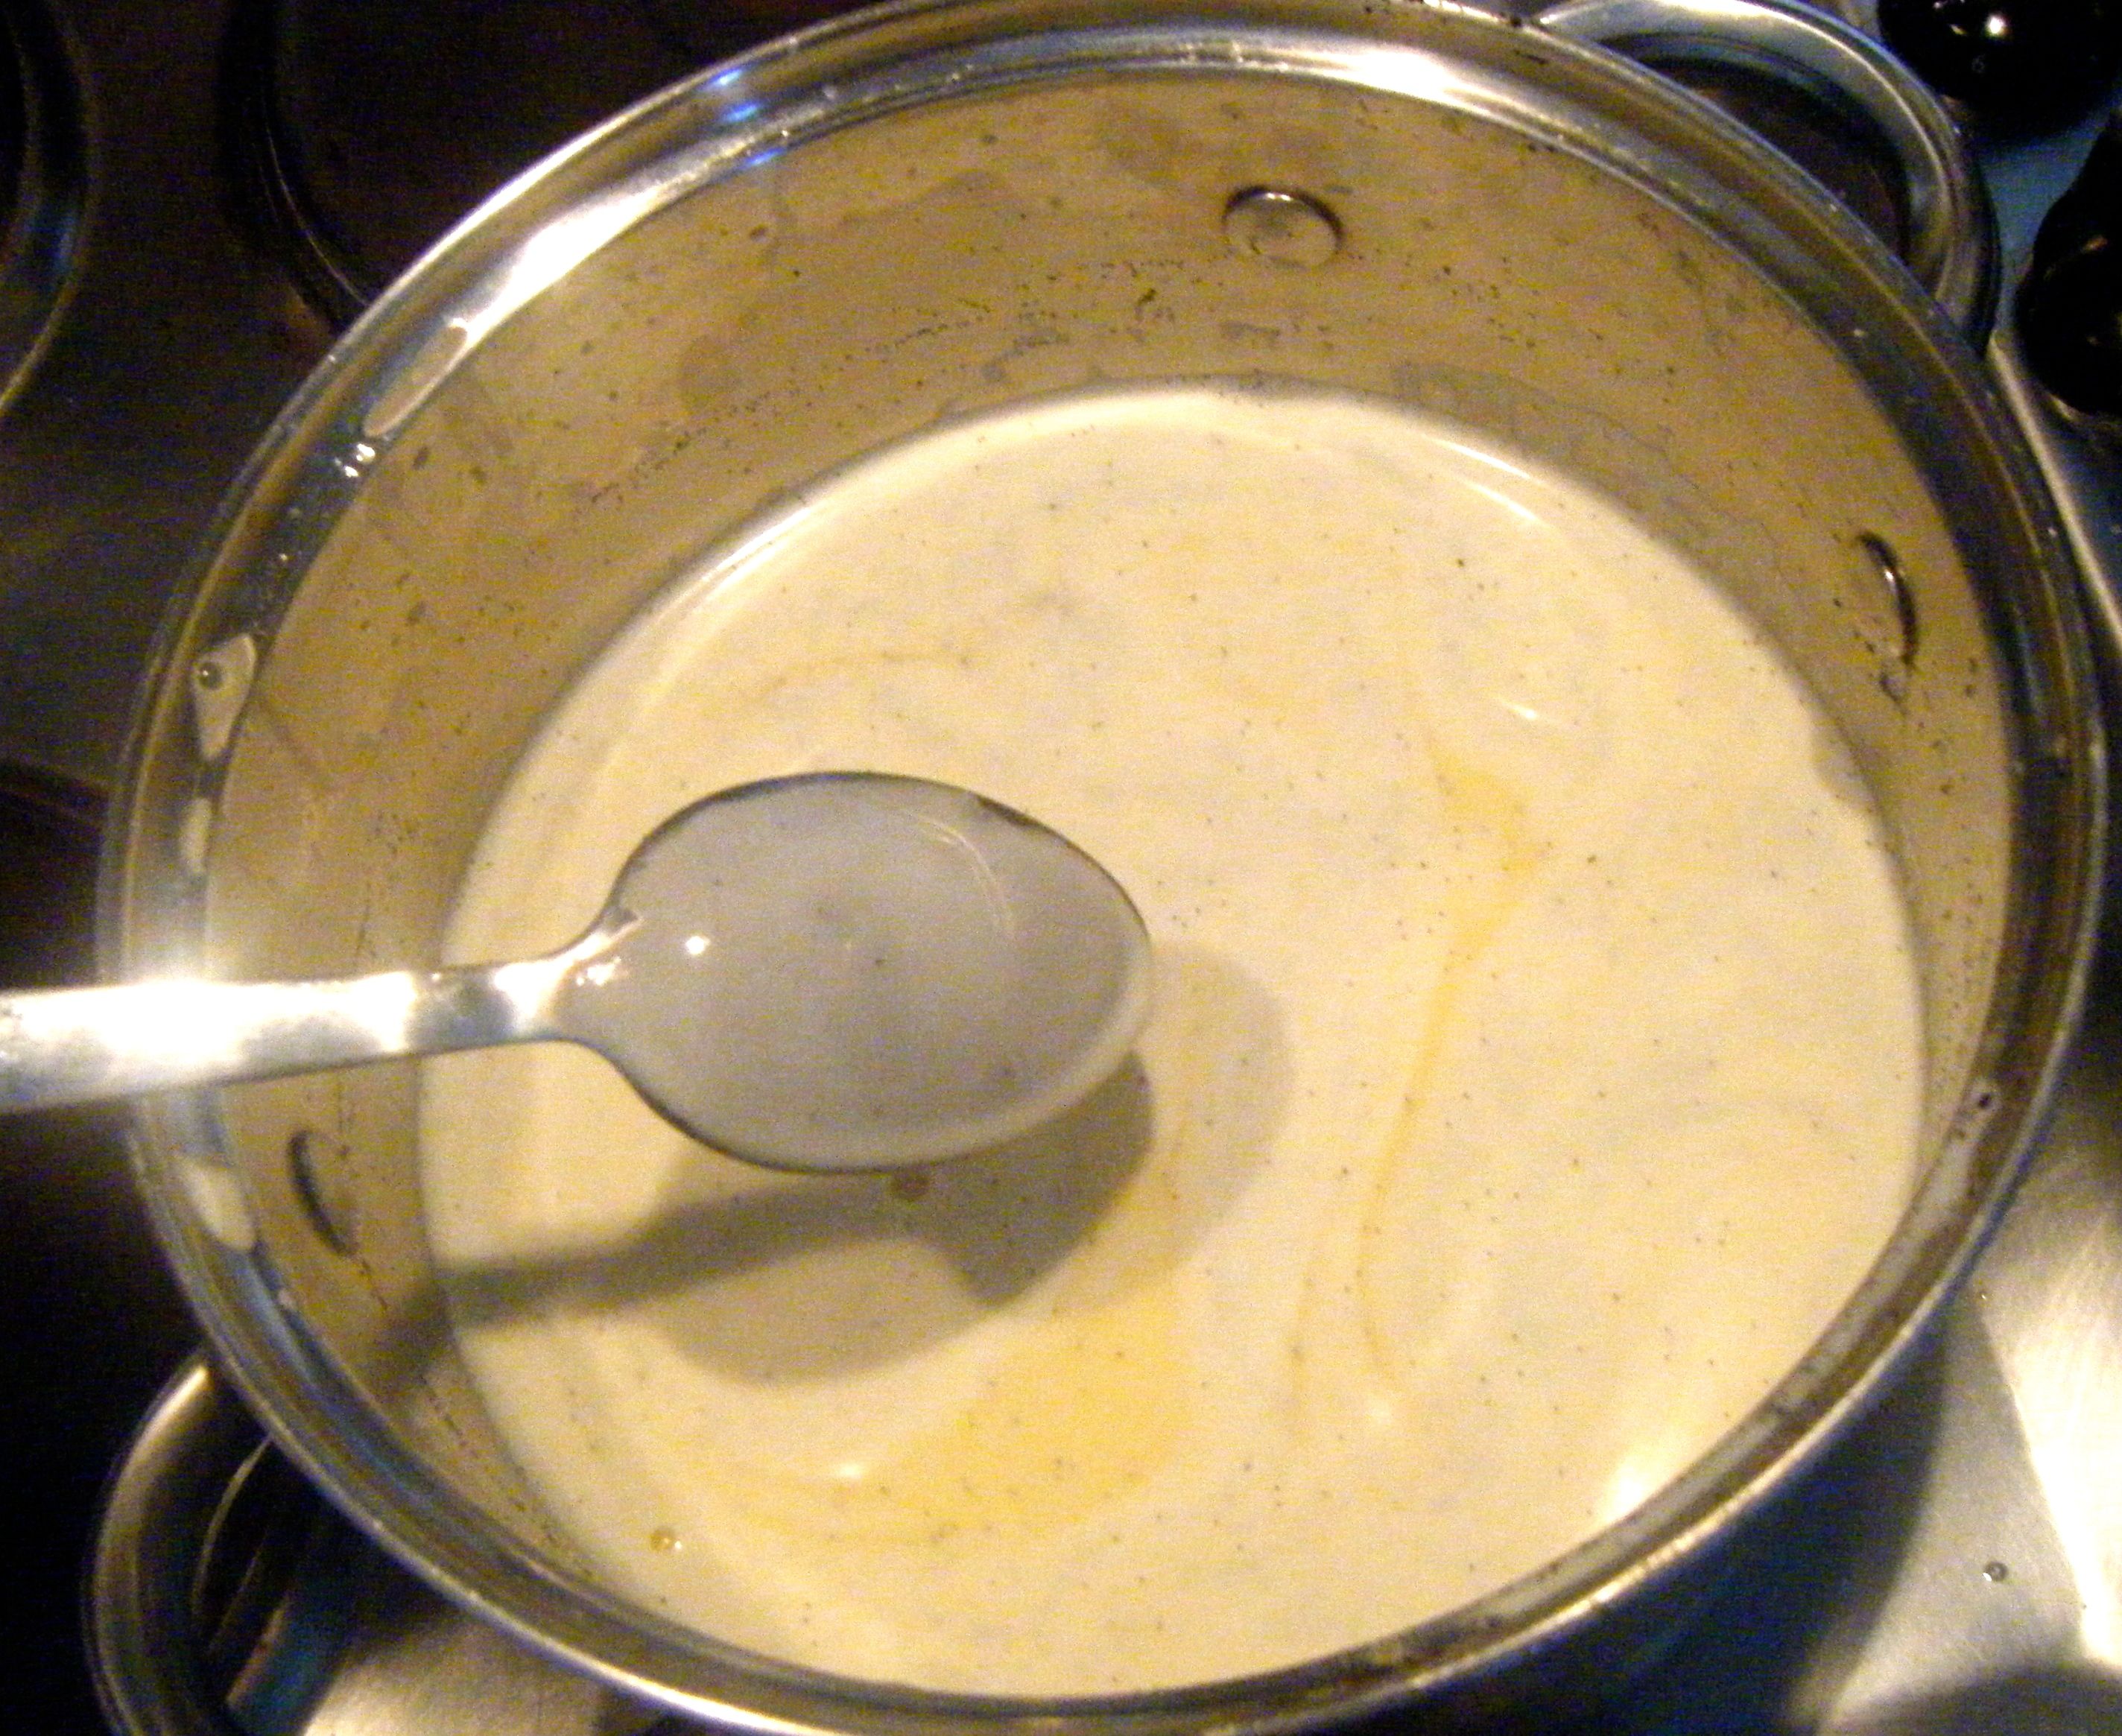
I added the combined mixture back into my pan and put it over a very low heat.  I stirred constantly, patiently waiting for the mixture to thicken.  Jamie’s says this should take about 15 minutes but it took me longer.  I had my pan on a very low heat and perhaps I could have turned it up slightly but I didn’t want to burn it.  When it was finally thick enough to coat the back of a spoon, I was happy it was done.

Edited - spoon

I poured the mixture in to a clean bowl and left it to cool – this took about a couple of hours.

Edited - cooling

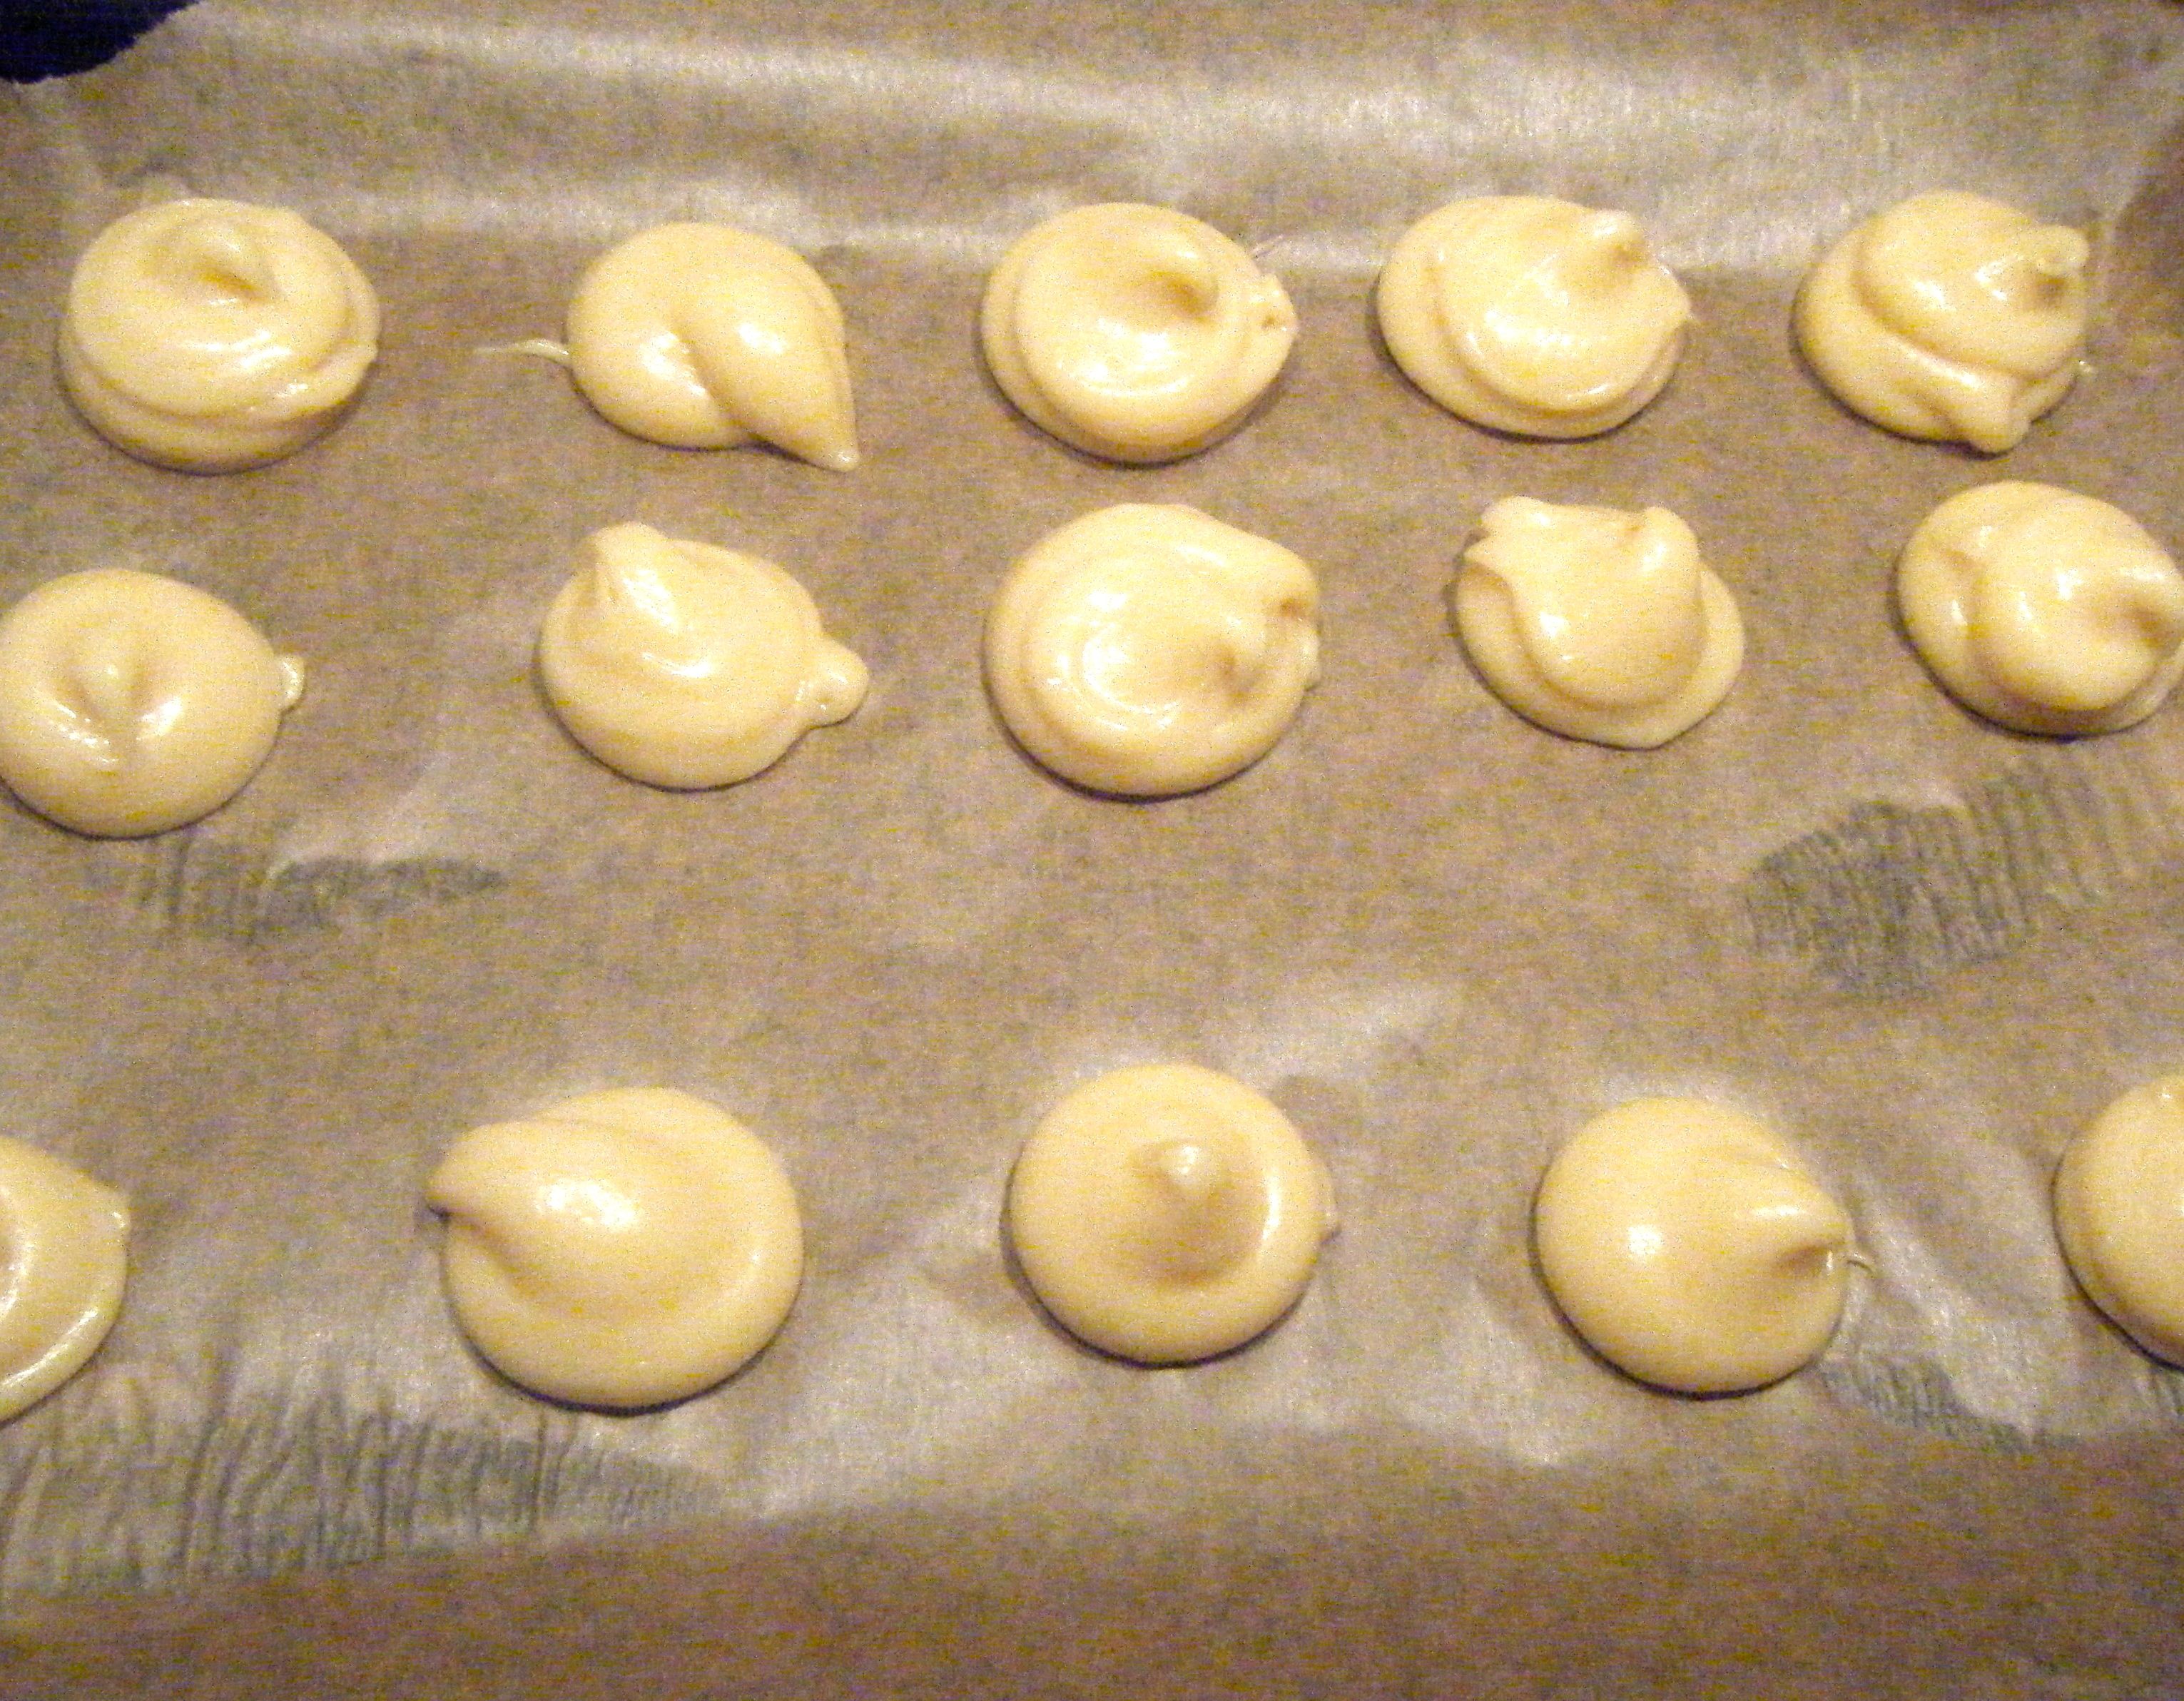
Time to add the rum/raisin to my vanilla ice cream.  I poured in the purée and whole raisins into the cooled ice cream base and gave it a good stir. I then poured it all into my ice cream contained (a simple klick lock storage box).

Edited - in the container

I put the container into my freezer and set the time for 30 minutes.  According to the recipe you need to whisk the ice cream every 30 minutes for about 3 to 4 hours to help break up the ice crystals. The aim is to do this until the ice cream is nicely set. 

When I read Laura’s blog, she mentioned that she stopped stirring too soon and ended up with some ice crystals.  I therefore tried to preserver and when I had reached 4 hours and it still was set, I just kept going with my 30 minutes schedule. 

I got to 5 and a half hours and it still wasn’t set! It was also time for bed so I just left it for the night and hoped it would be okay in the morning.
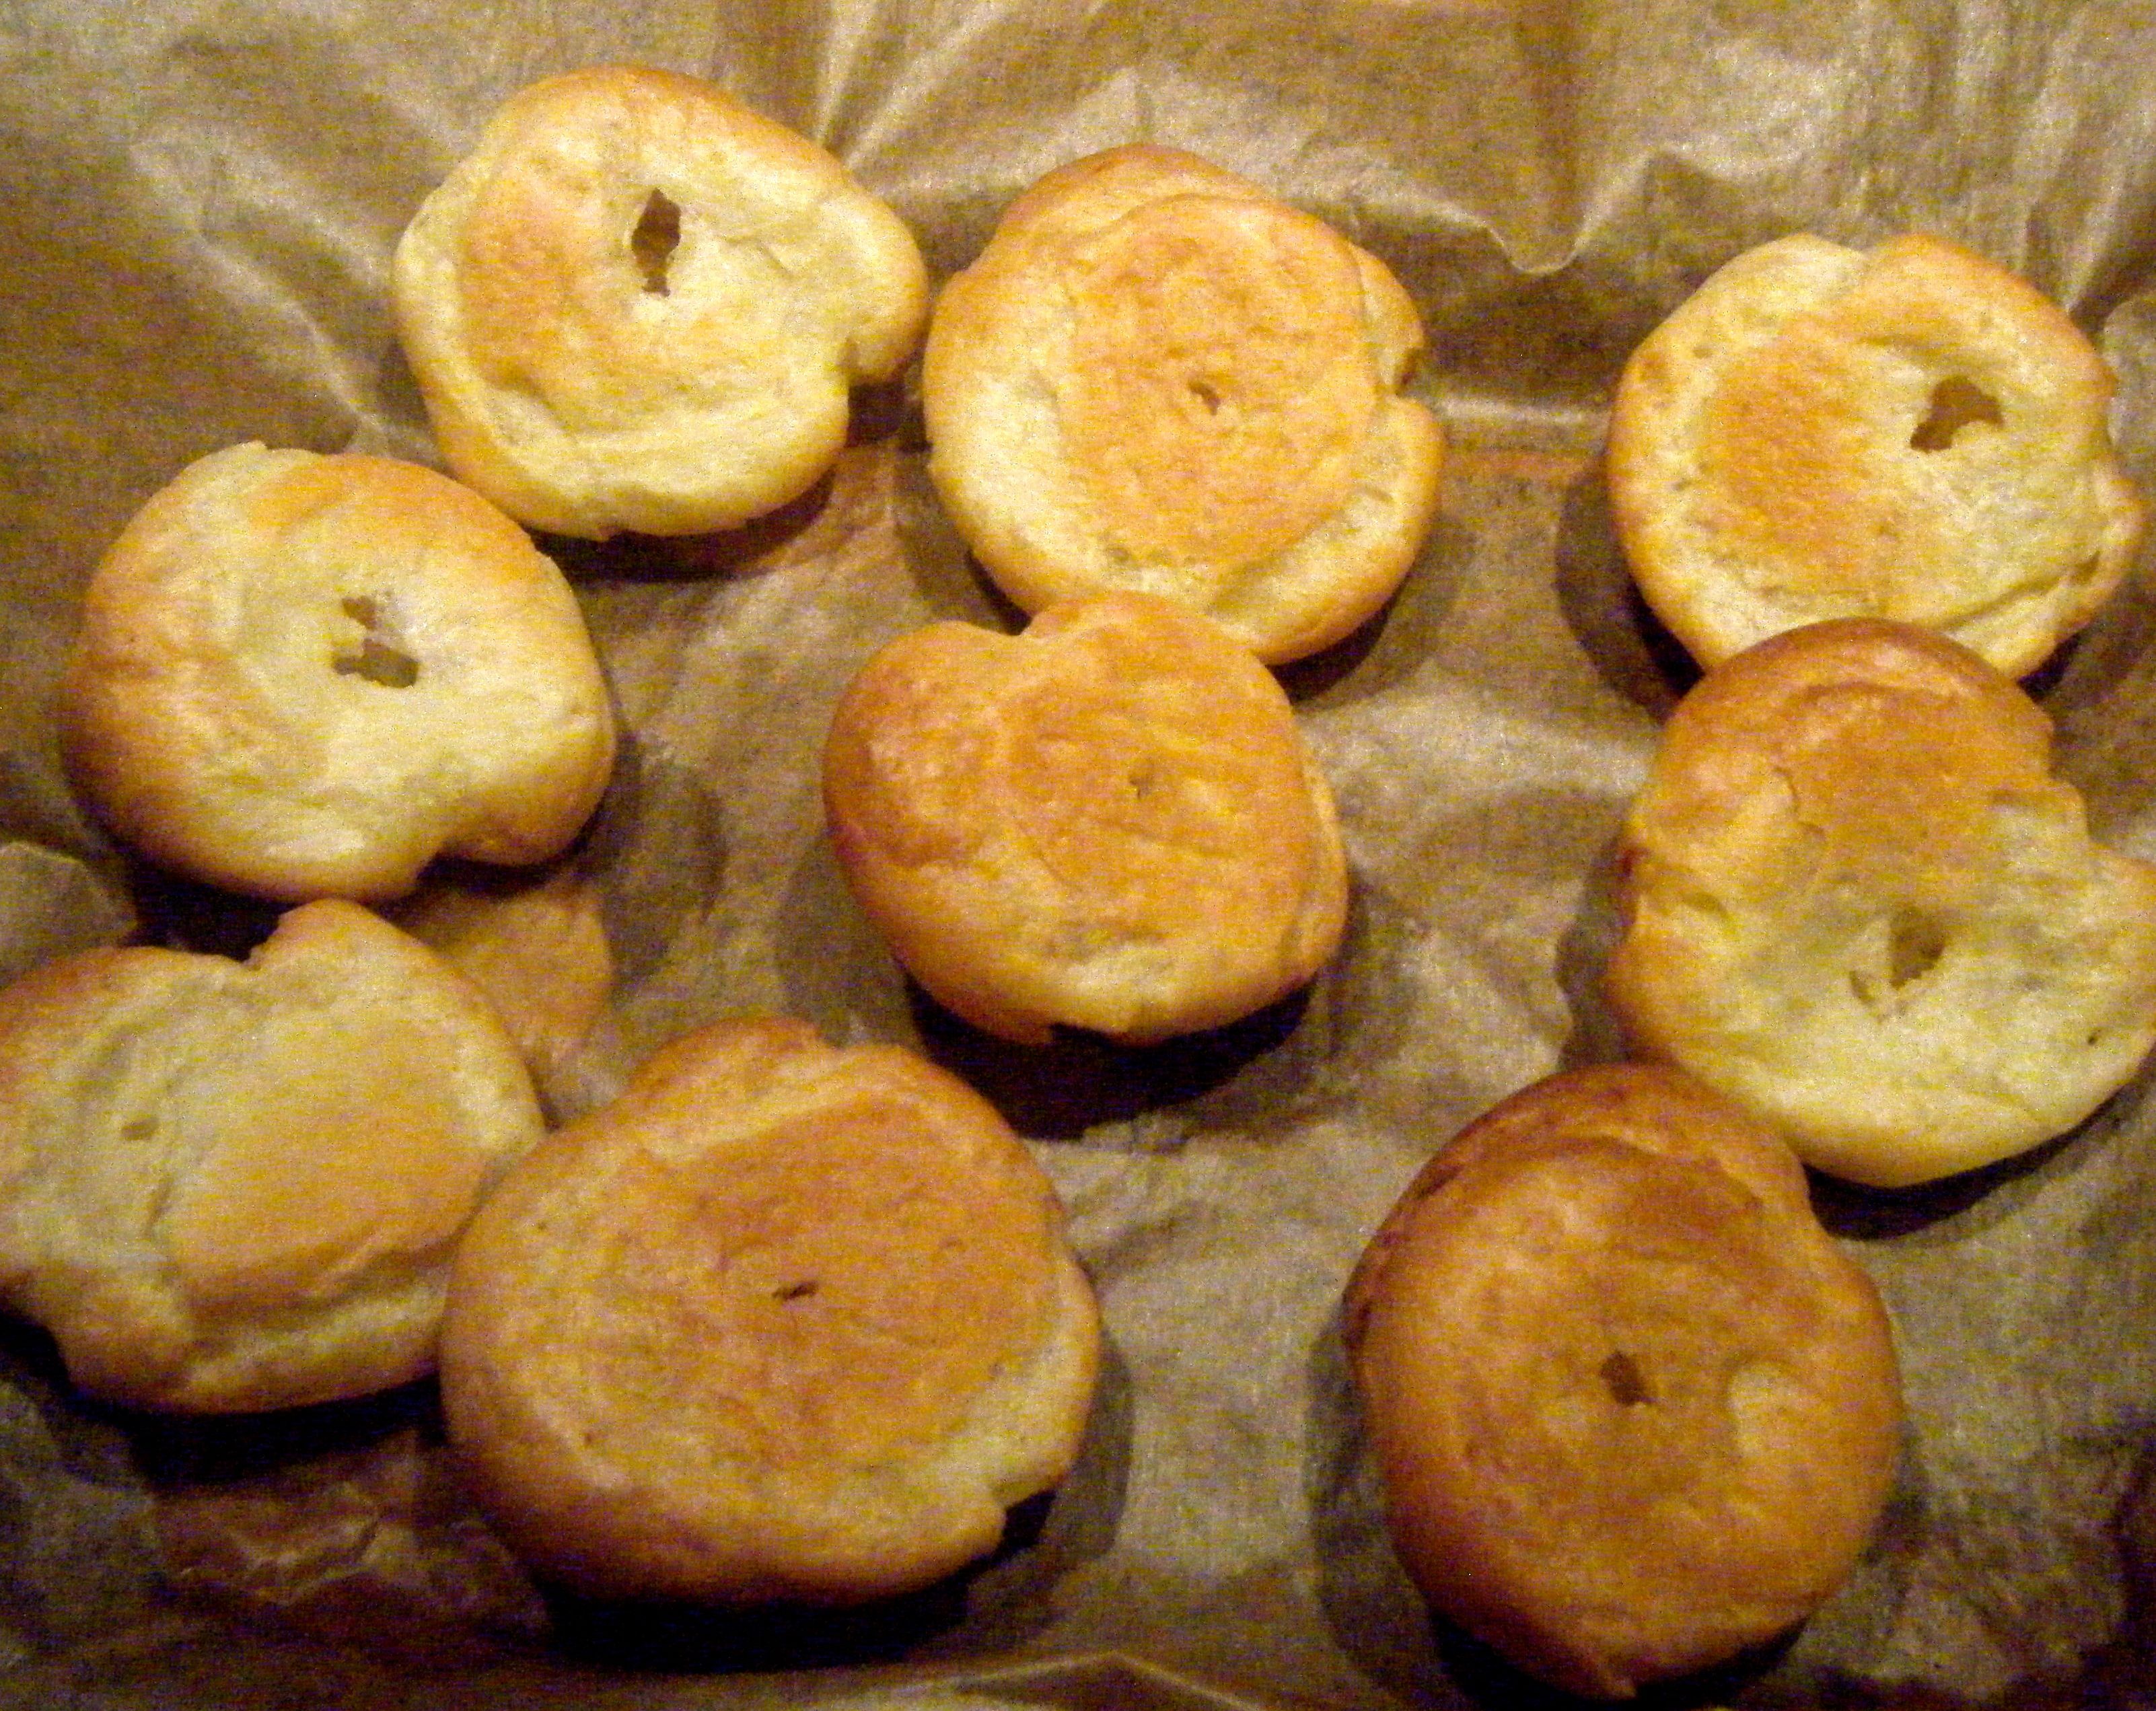
So here it is…

Edited - frozen

It looked okay – except that the whole raisins had definitely all sunk to the bottom of the container!  It’s a nice treat for when you get to the bottom 🙂

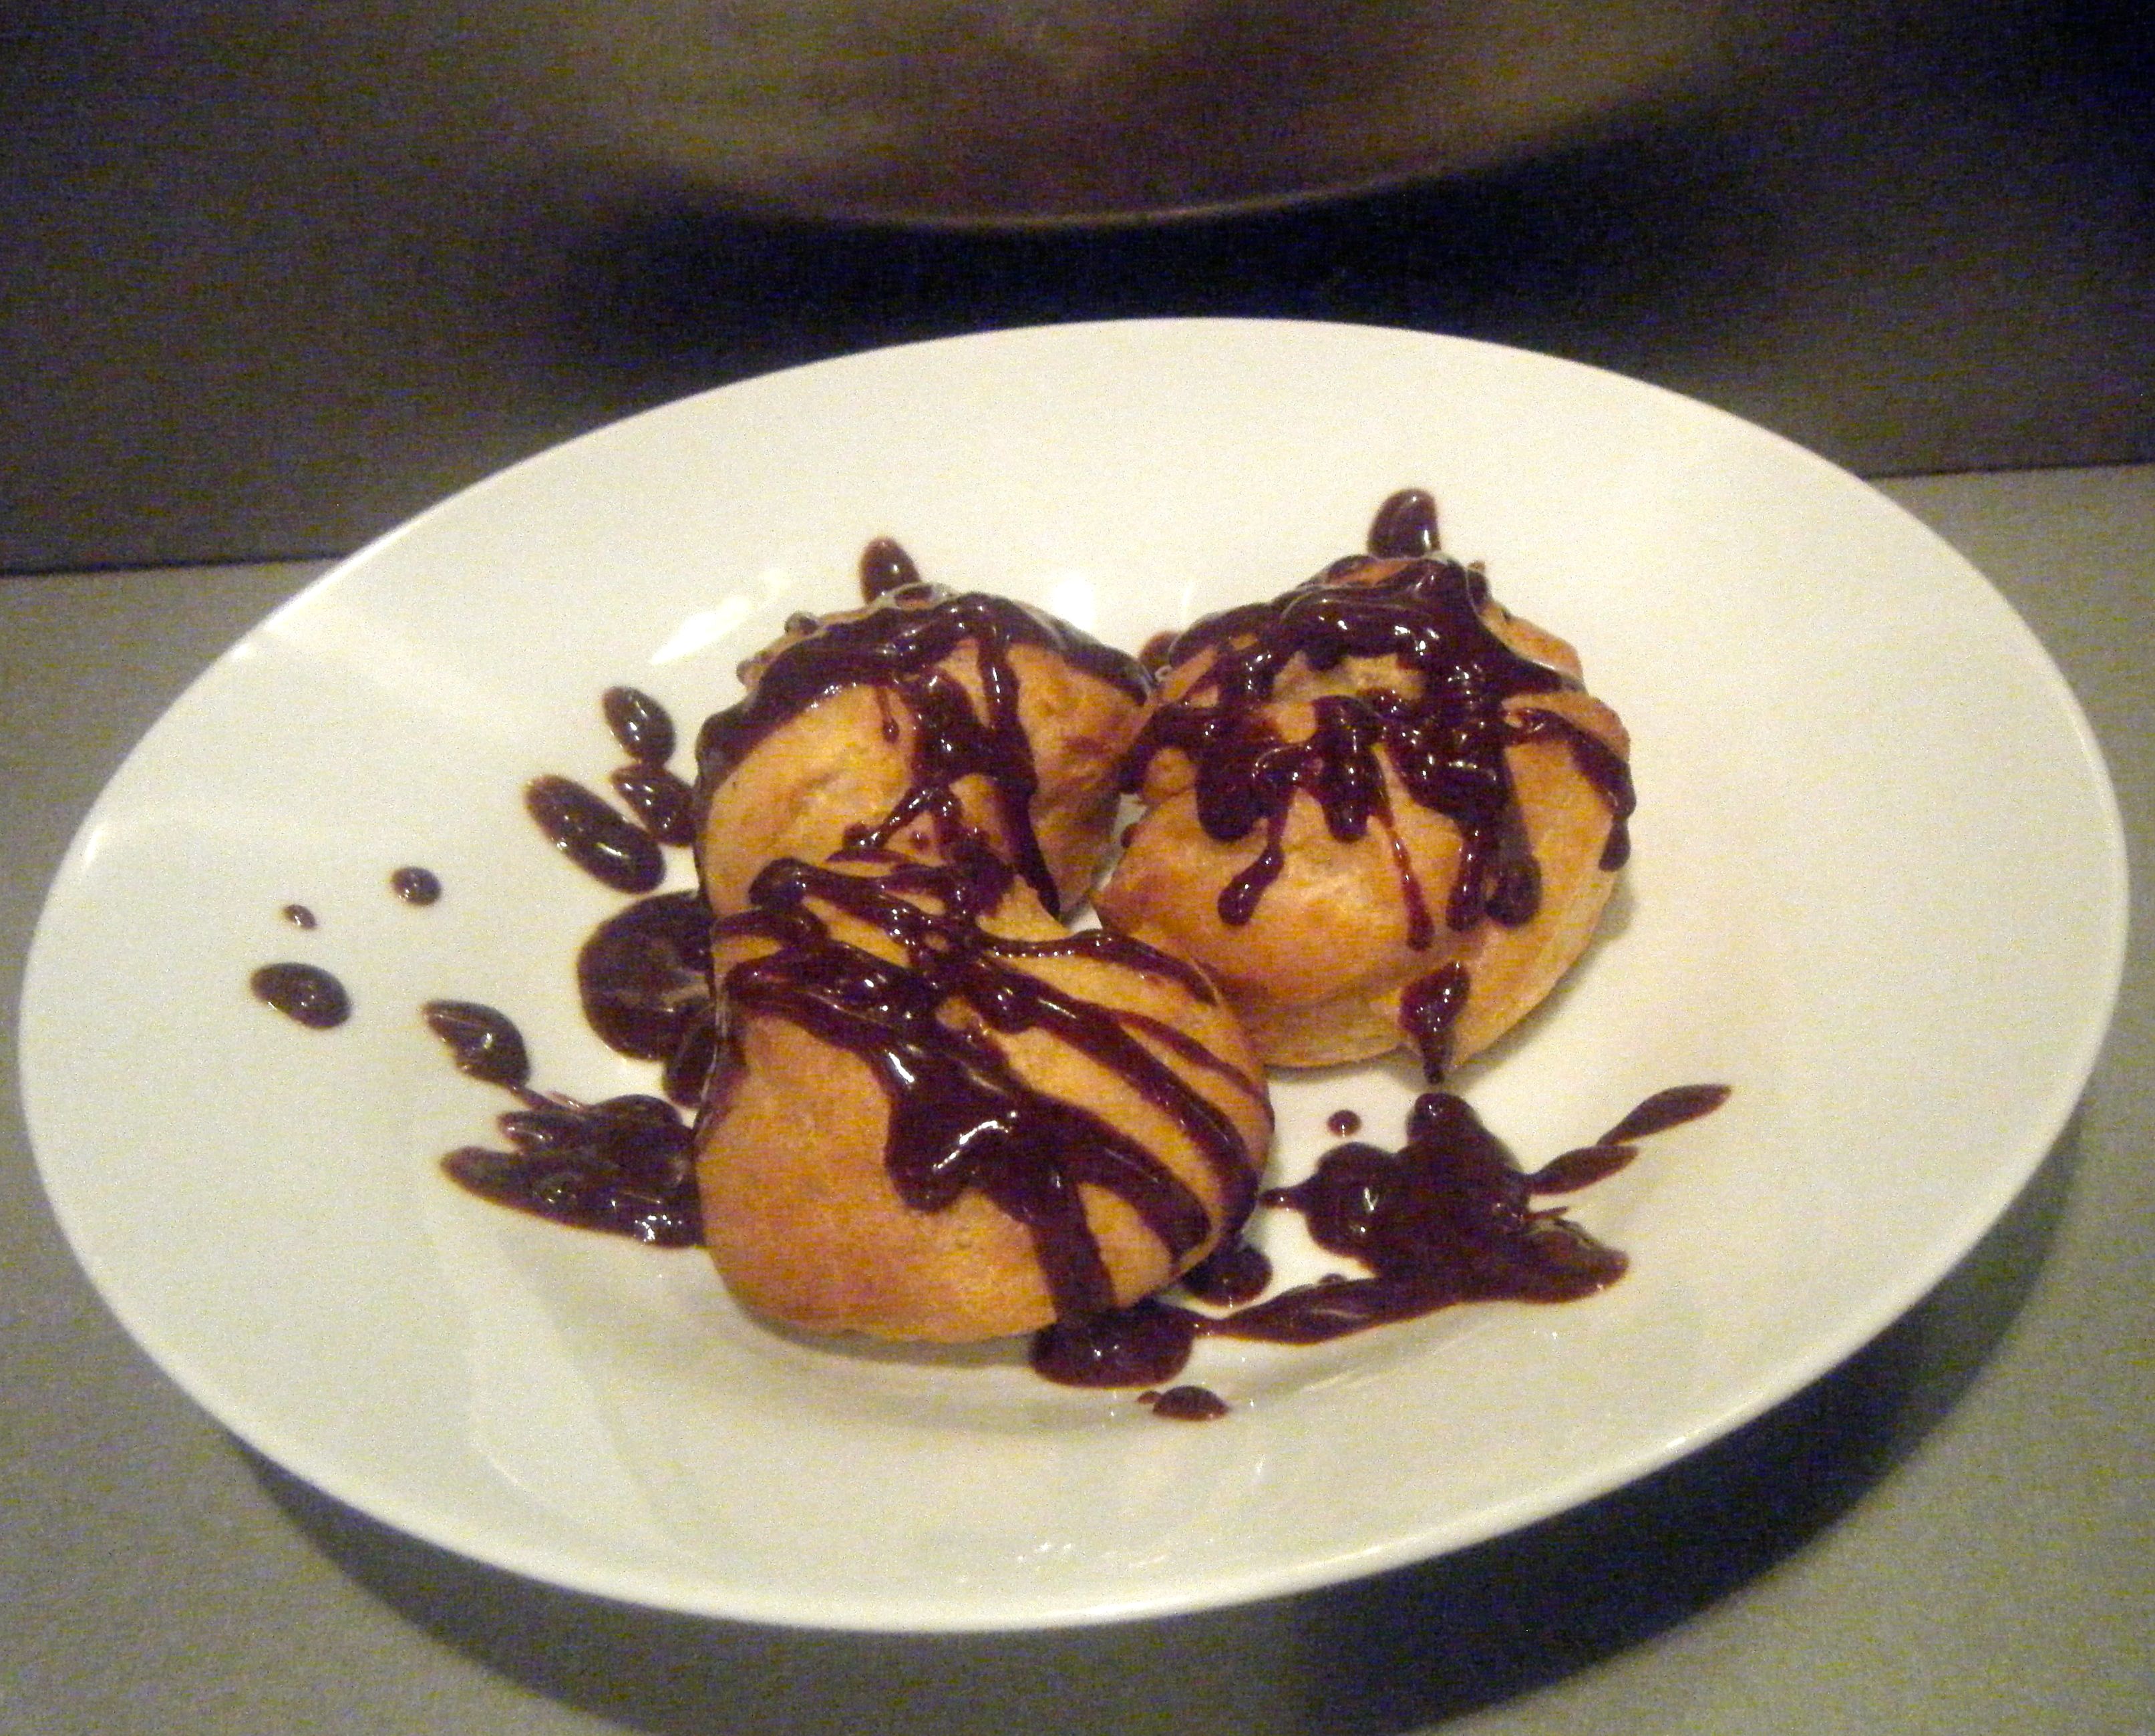
Now, I don’t know about you but if I am going to have ice cream, it clearly has to be served with either hot chocolate fudge cake, a cone or perhaps best of all, cookies!  So I also made some chocolate chip cookies to sandwich together with the ice cream. 

Edited - cookie

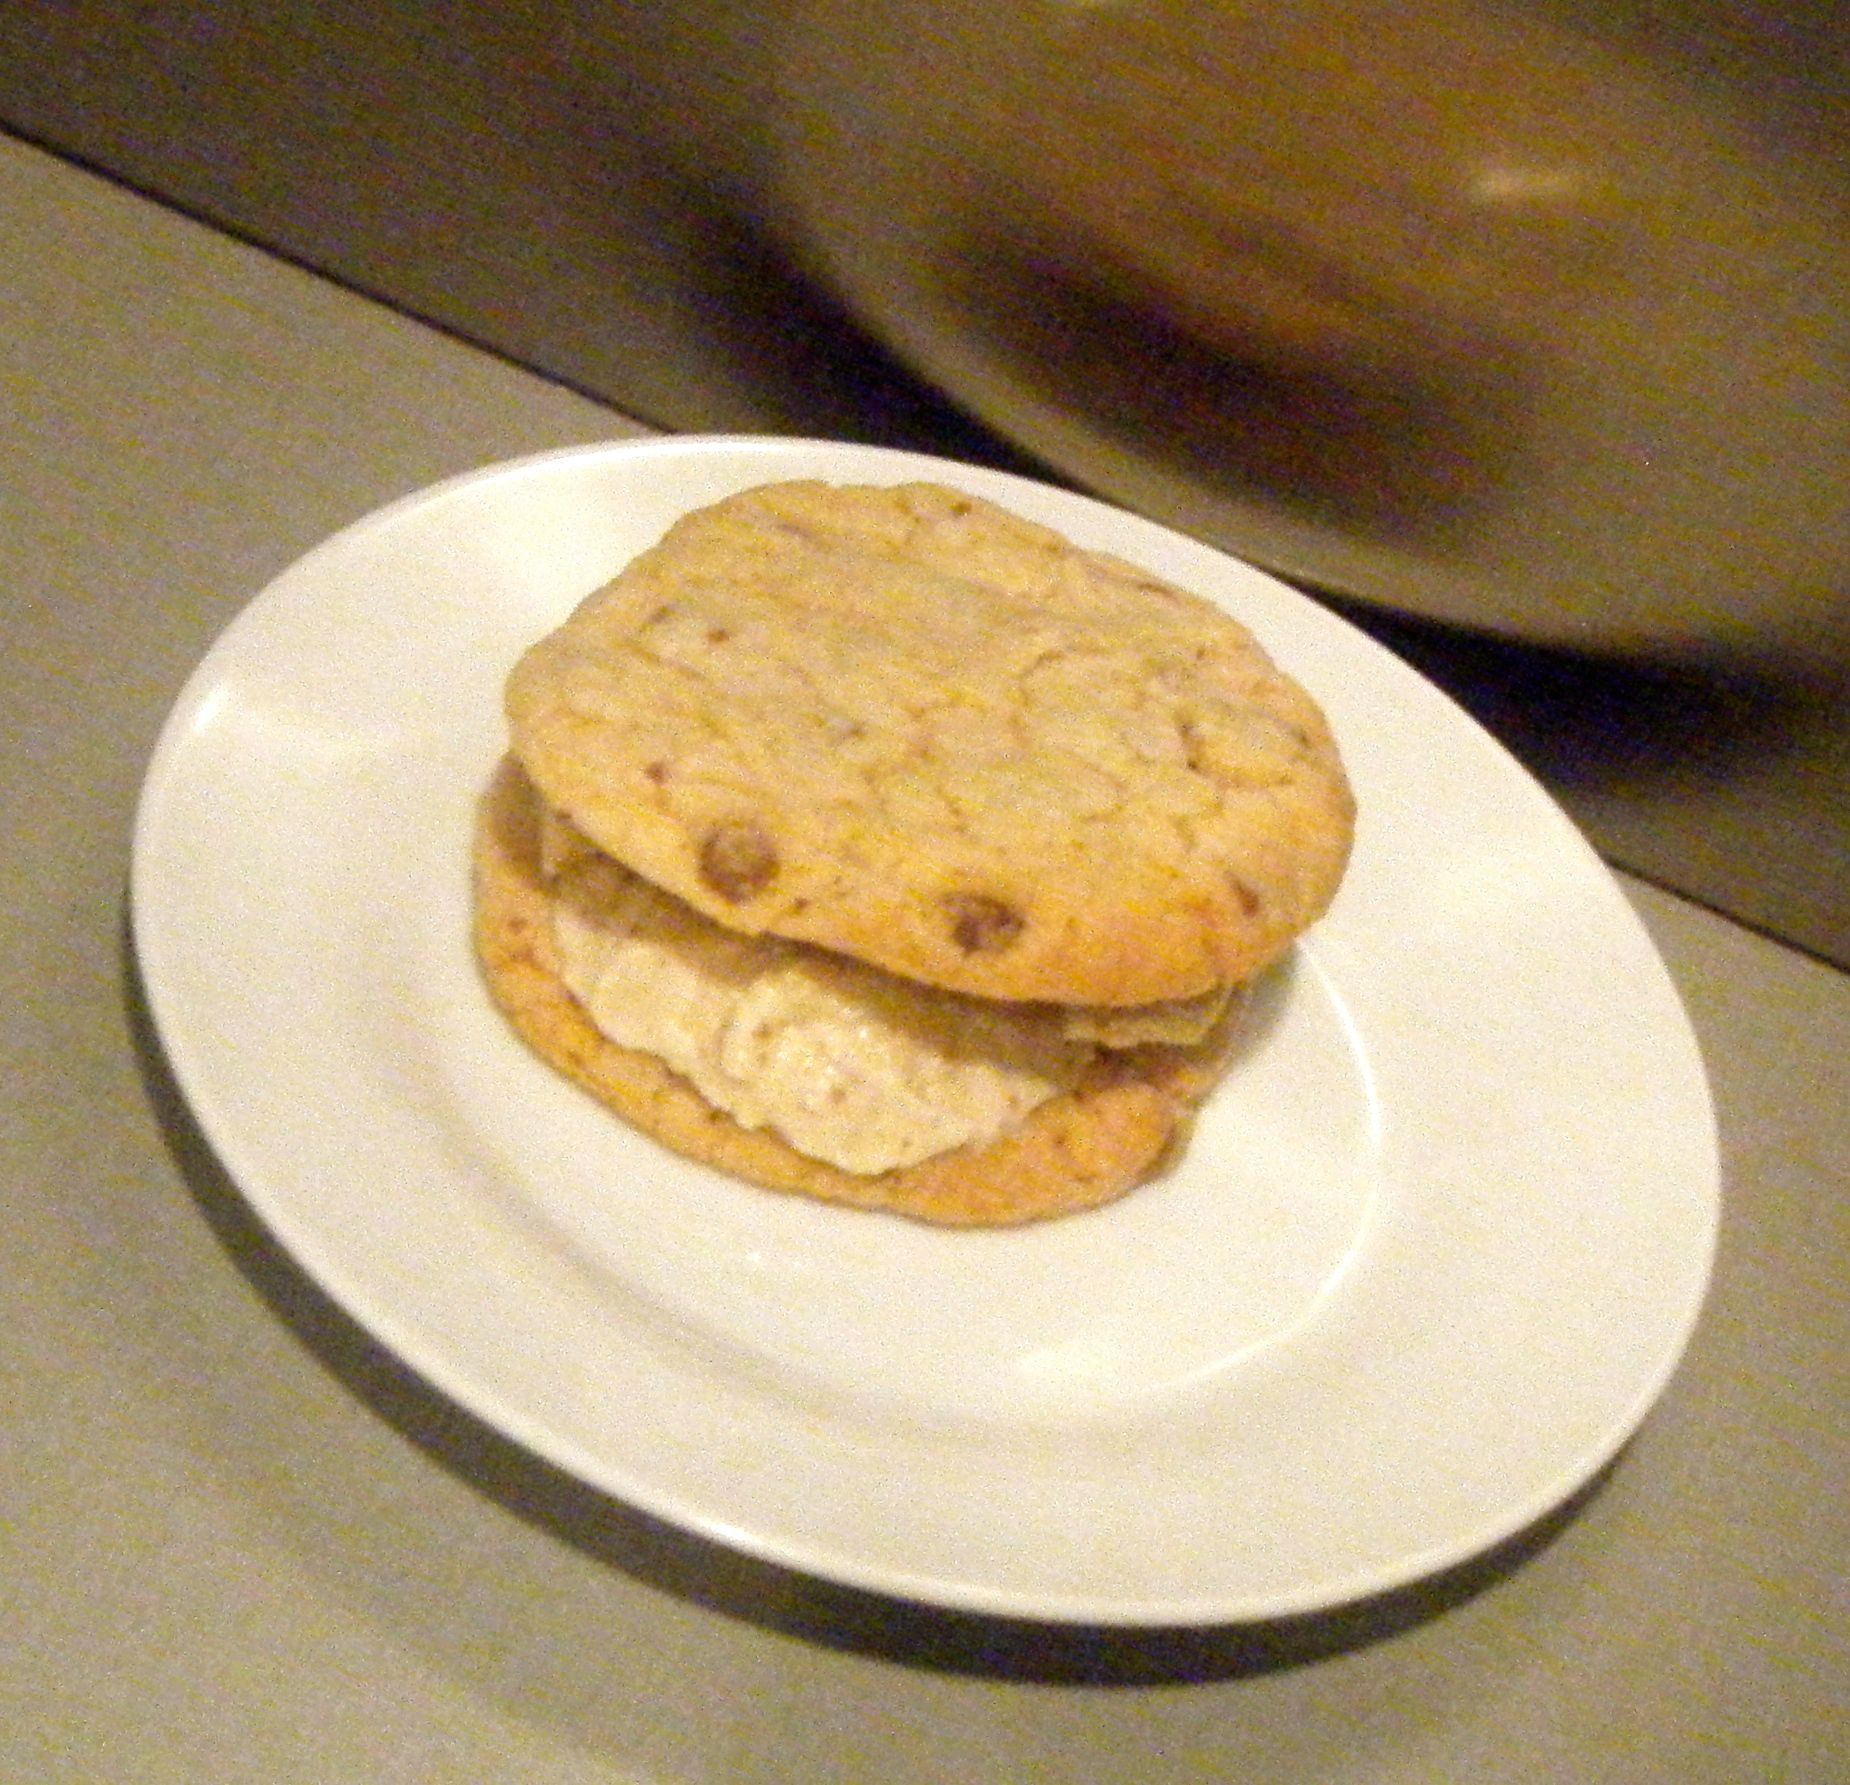
Be sure to come back after the end of Challenge 52 when I will be sharing my foolproof recipe for these delicious cookies.

This was absolutely delicious! Dave tried a TINY bit and said “whoaa, you can taste the rum in that!”.  Well that’s what we want – rum, raisin and vanilla galore.  I’ve now got to be controlled and make sure I don’t eat the whole lot before my mum next comes to visit!

Coming up next week, Challenge No. 20 – maple syrup glazed ham! Hope to see you then. 


Challenge No. 18 – Philly Cheese Steak

This dish was suggested by my brother who is a qualified cross-fit trainer, ex-triathlon athlete and all round fitness fanatic whose love of food sometimes wins out over the desire to be healthy (he’s only human!).  My brother doesn’t abide by the motto of having everything in moderation and if he’s going to do something he does it properly, including cheat days.  And so his suggestions for Challenge 52 include Philly Cheese Steak, BBQ chicken wings and, what he calls, “the mother of all milkshakes”.  Not exactly the picture of health but some great choices from my big brother!

I’ve already made the chicken wings and now its time for the Philly Cheese Steak – a wonderfully cheesy beef mess served on a lovely soft white roll.  Whilst I had heard of of the dish, I actually hadn’t ever eaten one.  I did a bit of searching online and was presented with a plethora of versions.  Some used mushrooms whilst other didn’t, some used leftover roast beef whilst others used fresh beef steak and so on.  The starting point was the beef.  I discussed the options with my boyfriend Dave and we decided to go for left over roast beef.  A common problem with roasts when there are only 2 of you is what to do with the left overs and this seemed like a great solution.

So on Sunday I cooked a roast dinner using beef brisket.  I slow cooked this until it was at a good carving point but not quite at a shredding point.  We had a 1kg joint and I cooked it for around 2hrs 30 minutes at 170 degrees celsius.  Once the leftover beef was cool, I got my sharpest knife and carefully cut it into very thin slices.

Practical tip: slicing the beef as thinly as possible seems to be key to this dish.  If you are using fresh beef steak, most recipes call for the steak to be chilled in the freezer for 30-45 minutes as this makes it easier to slice the beef as thinly as possible.

To make the full dish, I used the following ingredients:-

  • Oil
  • 1/2 onion, thinly sliced
  • 2 sweet red peppers, thinly sliced
  • Leftover roast beef, thinly sliced
  • 5 cheese slices
  • 3 hot dog buns

Edited - ingredients

This is a very simple ingredients list and it could be expanded by adding mushrooms, a bit of garlic and maybe even jalapeños if you like a bit of heat.  However, Dave requested we keep it simple and so I stuck with just the 6 ingredients listed above.

Edited - meat and veg

I started off by frying the onion for a few minutes and then adding the pepper to the pan.  I let this cook away for about 8 minutes over a low-medium temperature until the veg was nice and soft.  I removed it from the pan and added a little more oil before frying the beef. 

At this point I cut my buns in half and popped them under the grill to heat through.  They were under a medium heat for around 5 minutes which was just long enough to add a little crunch to the surface without loosing the fluffiness of the bread.

With the buns almost done and the beef heated through, I returned the onion and peppers to cook for a couple more minutes.  Finally, I added the cheese slices and once these had melted, I gave it a good stir to mix it all together.   I then added the cheesy-beef mix to the heated rolls and added a side of sweet potato fries.   

 Edited - in the bunEdited - served up

All in all, I enjoyed my first Philly Cheese Steak and this really was a perfect Monday night dinner.  It used up the sunday roast leftovers and was so quick to make. I am planning on making this again and next time I’ll give it a go with fresh steak and a few extra ingredients, just to see what its like.         

Coming up next week, Challenge No. 19 – rum raisin ice cream! 🙂

Challenge No. 17 – Profiteroles

This challenge was suggested by my friend Danny and it is a fond favourite of mine.  I’ve made profiteroles before so I thought I’d experiment with a new flavour to make it more of a challenge.  I decided to try passion fruit cream profiteroles with a homemade hot chocolate fudge sauce.

Danny and his girlfriend Kate joined me and Dave for dinner a couple of weeks ago where we enjoyed Kate’s suggestion of moussaka for Challenge No. 14.  I used this opportunity to also make the profiteroles for our pudding and so Kate and Danny got a full evening of My Gastro Adventure eating 🙂

I’ve used a couple of different recipes for this challenge; one for the profiteroles and one for the hot chocolate fudge sauce

I tweaked the cream filling to build in the passion fruit and so to make my version of the recipes you will need the following ingredients:-

  • For the choux pastry
    • 200ml/7fl oz cold water
    • 4 tsp caster sugar
    • 85g/3oz unsalted butter, plus extra for greasing
    • 115g/4oz plain flour
    • pinch salt
    • 3 medium free-range eggs, beaten
  • For the cream filling
    • 600ml/1 pint double cream
    • 3 passion fruits
  • For the chocolate sauce
    • 340g/12oz granulated sugar
    • 85g/3oz brown sugar
    • 100g/3½oz cocoa powder
    • 30g/1oz plain flour
    • ½ tsp salt
    • 1 x 400g/14oz can evaporated milk
    • 250ml/9fl oz water
    • 2 tbsp butter
    • 2 tsp vanilla extract

Edited - ingredients

I started by making the choux pastry and pre-heated my oven to 200 degrees celsius with a roasting tray placed in the bottom.  I put the water, sugar and butter into my saucepan and heated it over a low heat until the butter was melting.

Edited - butter in pan

Whilst the wet ingredients were warming through, I prepared the flour and salt.  I measured out the amount I needed and placed it onto a square of baking paper.  Doing this makes it easier to add the flour smoothly and quickly in one go. 

Edited - flour

Once the butter was melting, I turned the heat up and bought the mixture quickly to a boil.  Once boiling, I tipped in the flour/salt, removed the pan from the heat and beat vigorously with a wooden spoon until it came away from the sides to form a heavy dough. 

Practical tip: make sure you bring the wet ingredients to a boil.  The first time I tried to make profiteroles, the recipe didn’t mention this and I just added the flour once the butter was melted.  I ended up with a very wet mixture which just would not work, no matter how much I beat it.  I looked back at a recipe I had previously used for eclairs (which are also made with choux pastry) and this clearly stated that the wet ingredients should be brought to a boil before the flour is added.  I have followed this bit of advice every time since and it always works 🙂

Edited - dough

Once my dough formed, I put it in a bowl and left it to cool for 15 minutes.  I waited until it was cool enough to touch and then beat in my eggs a little at a time, until I achieved the so called ‘dropping consistency’.  It needs to be runny enough so that it doesn’t clog up the piping bag but not so runny that it will just slip straight out the end.  Ideally, the dough should fall from a spoon when lightly shaken.  Mine was a little runny this time and I’m clearly still perfecting my assessment of the optimum ‘dropping’ point 🙂

Edited - eggs added

I lined two baking trays with baking parchment, using a bit of the choux mixture to stick the parchment to the tray.  I filled my piping bag and piped small balls (a bit randomly) onto my tray.  I then rubbed the top of each ball with a wet finger.

Edited - pipped

I put the trays in the oven and added the water to the roasting tray before shutting the door. I set the timer for 20 minutes and watched the little golden balls rise like the air filled wonders they are.  When the timer went off, I re-set it for another 7 minutes and when golden-brown, I took them out the oven.

I use a skewer to prick the base of each profiterole making a hole for the steam to be released.  I put them back on the baking trays with the holes facing upwards and popped the tray back into the now turned off oven for 5 minutes to dry out.

Edited - bottoms

I then got my flavouring ready.  I pushed the passion fruit filling through a sieve to leave just the juice.  I was amazed at how much juice you actually get out of this fruit.  They don’t seem that juicy when you eat them but there was absolutely loads!

Edited - juicing

I decided I didn’t want to fill the profiteroles too early as I thought the cream would make the pastry go soft.   So at this point I put the profiterole cases and the remaining ingredients to one side whilst our guests arrived and we enjoyed our Greek inspired dinner.

When we were all well fed and watered, I set out to finish this yummy dessert.  I whipped the cream with a balloon whisk until stiff – Kate helped with this as my arm started to ache and she was supper quick!  I then added the passion fruit juice and stirred it through until well combined.

I then put all the chocolate sauce ingredients (except the vanilla extract) into a big pan and popped this over a medium heat to bring slowly to the boil. 

Edited - sauce ingredients

Once it reached boiling point, I set the timer for 5 minutes and whilst the chocolate sauce finished cooking, I piped the passion fruit cream filling into the profiteroles.  I let the sauce cool slightly and then added the vanilla extract. 

Edited - filled profiteroles

Then we reached my favourite bit – time to tuck in! 

Edited - served up

We all agreed that the passion fruit cream profiteroles were delicious and the chocolate sauce was delicious however together they kind of battled each other for centre stage.  What would this adventure be without a little experimenting and I’m glad I tried the different flavour in the cream but it just didn’t quick work with the chocolate sauce. 

The passion fruit cream profiteroles would have been lovely on their own but for me, profiteroles just aren’t quite complete without a lovely hot chocolate sauce!!  Next time I’ll stick to simple vanilla cream profiteroles which this lovely rich sauce 🙂

The chocolate sauce recipe made a HUGE batch for just the four of us and I ended up with loads left over.  Before leaving, Danny suggested I turn the leftover sauce into brownies.  So the next day, I put some of the sauce into a small pot to put to one side and then added some flour (about 65g) and 3 eggs to the rest.  I mixed it up and poured it into a lined tin.  I popped it into the oven for about 15 minutes at 180 degrees celsius.  This definitely was not long enough as it was still wobbly! I left it in the oven for a while longer (I lost track of how much longer) and when it was firm and a skewer came out clean, I took it out the oven.  After 5 minutes cooling in the tin, I turned it out onto a cooking rack.  I’ll be honest, this didn’t really work as a brownie but what I had created was possibly one of the best chocolate fudge cakes I’ve eaten! Warmed in the microwave and served with the reserved chocolate sauce – absolute HEAVEN! 🙂

Edited - fudge cake

Coming up next week, Challenge No. 18 – Philly cheese steak.