Challenge No. 6 – Chicken Kievs

I can’t quite believe we’ve made it to Challenge No. 6 already! 2015 is flying by.  Anyway, on with the Challenge 🙂 This dish was suggested by my other half and I think it is a great mid-week dinner.  I’ve made chicken kievs once before but they didn’t really turn out as I had hoped and so, whilst this is not technically a new dish, it is one I had a lot of room to improve on.

I’ve recently watched a cooking program where chef Tom Kerridge made chicken kievs and they looked delicious.  So when I started looking for a recipe for this week, I knew it had to be this one.

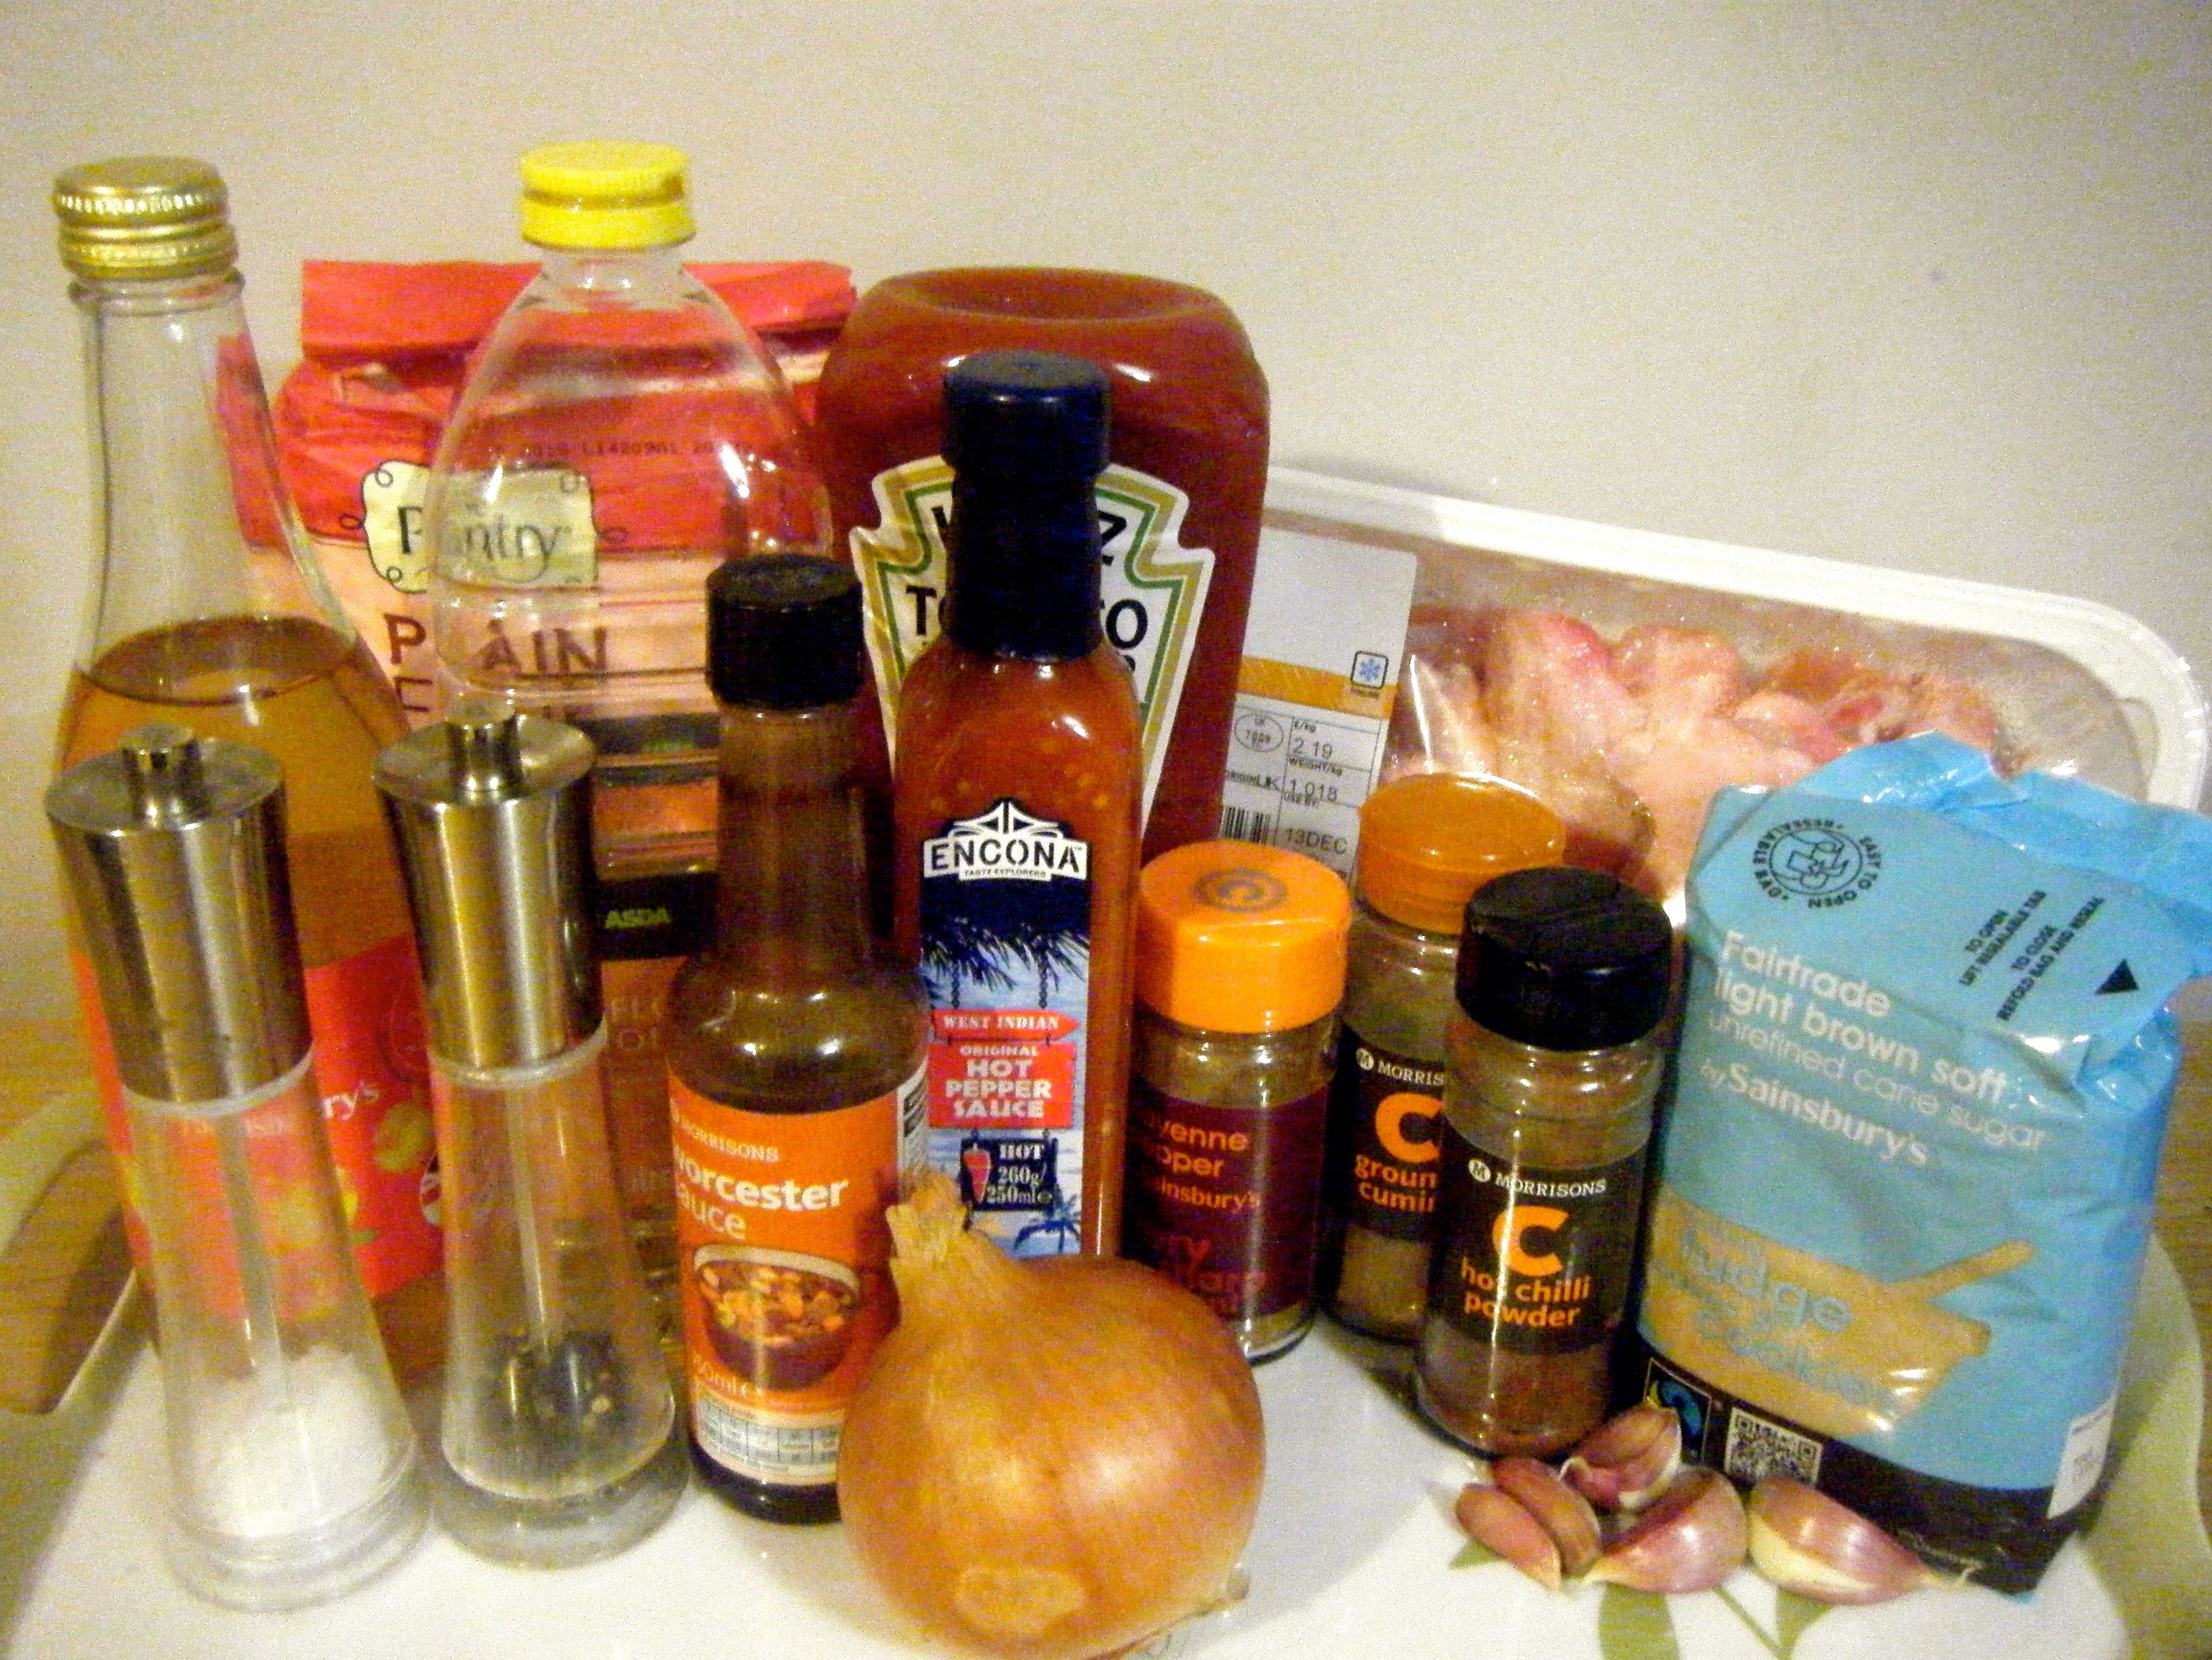
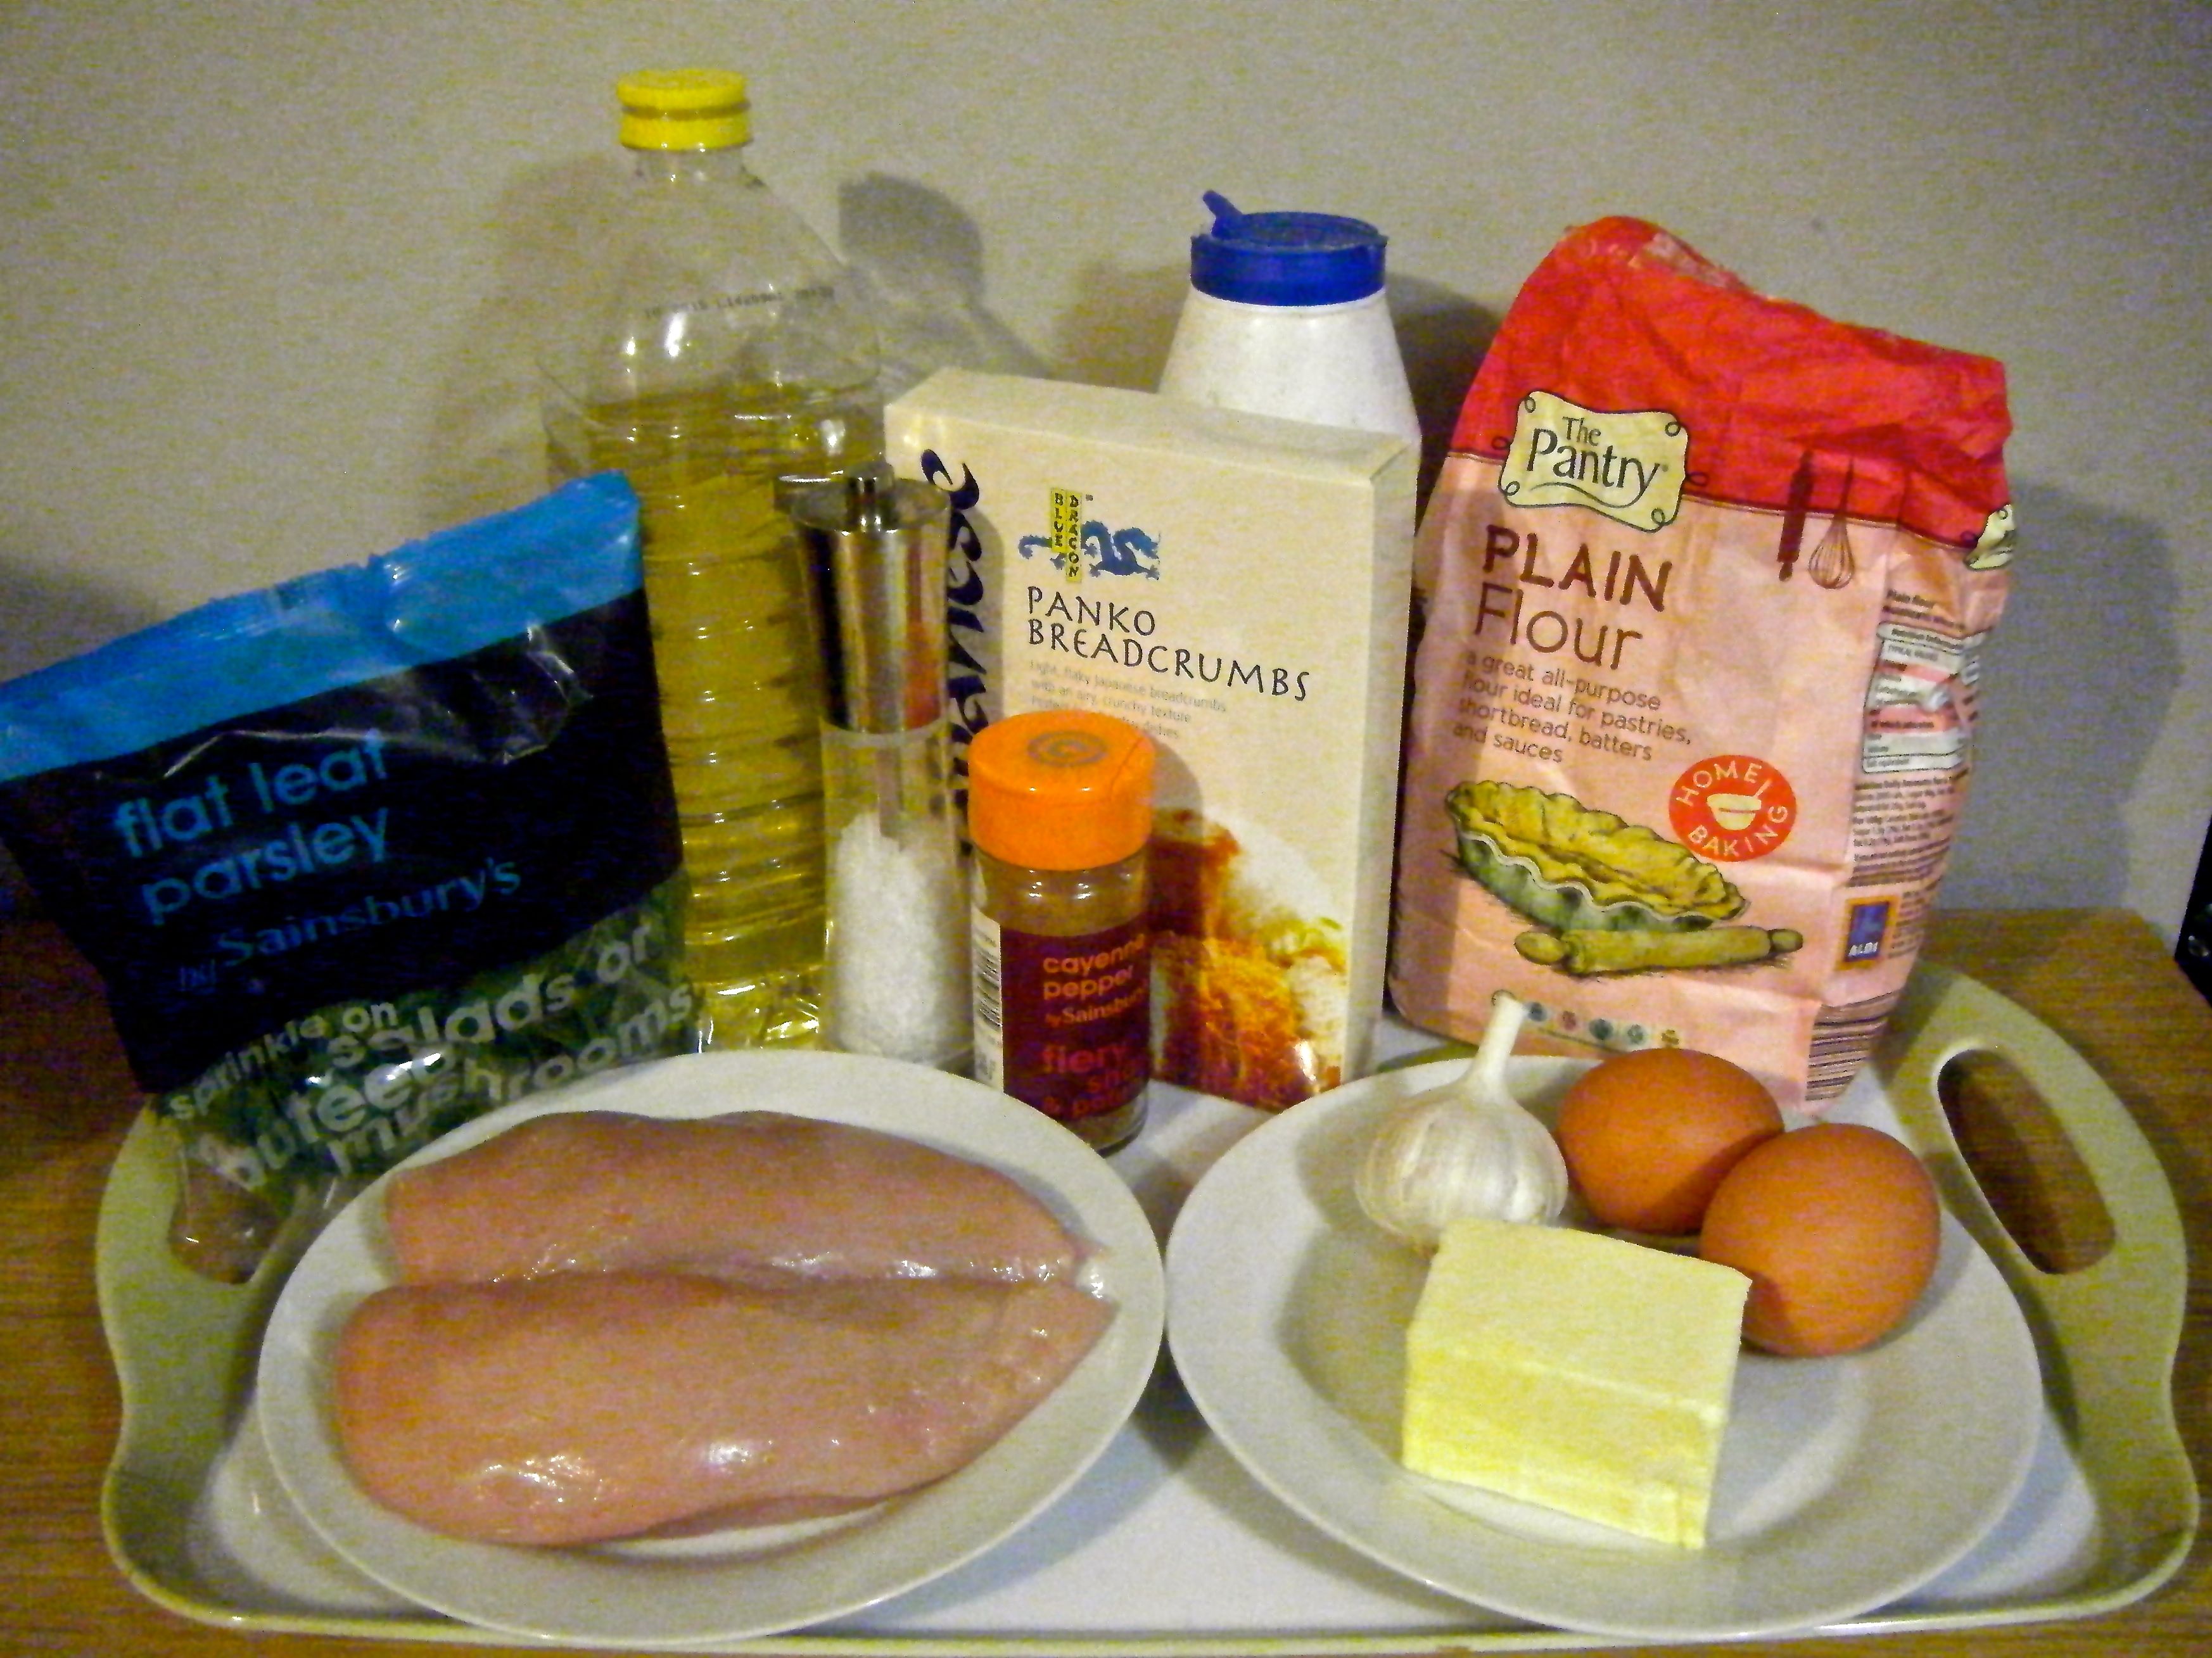
The recipe calls for the following ingredients:-

  • 100g/3½oz butter, softened
  • 2 garlic cloves, peeled and grated
  • 1 tsp table salt
  • ½ tsp cayenne pepper
  • 3 tbsp chopped fresh parsley
  • 2 large skinless chicken breasts
  • 150g/5½oz plain flour*
  • 2 large free-range eggs*
  • 150g/5½oz Japanese panko breadcrumbs*
  • vegetable oil, for shallow frying
  • pinch sea salt flakes

Edited - ingredients

*I found I ended up wasting lots of the flour, eggs and breadcrumbs by using these quantities.  I’d recommend using just 1 egg, 50g flour and 50g breadcrumbs.  If you find you need more, simply add extra to the dipping plates.  You can always add more but you can’t re-use what you’ve put on the plates once the chicken has been dipped in it.

The last time I tried to make chicken kievs, I used chicken breasts bought from a supermarket and I felt they were a bit too small.  Personally, I think you need quite big bits of chicken to make kievs and so, this time, I decided to take a trip to my local butchers.  The result was some humungous bits of chicken and super sized chicken kievs.

With all my ingredients ready to go, I started by combining the butter sauce ingredients and mixed them with my handheld mixer until well combined.

Edited - butter

I then filed a piping bag with the butter sauce and got my chicken prepared.  Now most chicken kiev recipes say to slice the chicken in half (but not all the way through) so as to create a top and bottom which are connected on one side.  You then normally spoon in the butter and fold the top back over to create a chicken parcel.  However, Tom Kerridge recommends a different approach and I thought it was just brilliant. I don’t think the online recipe is overly clear about what needs to be done but the TV program showed it really well and I’ll do my best to explain it here for you! 

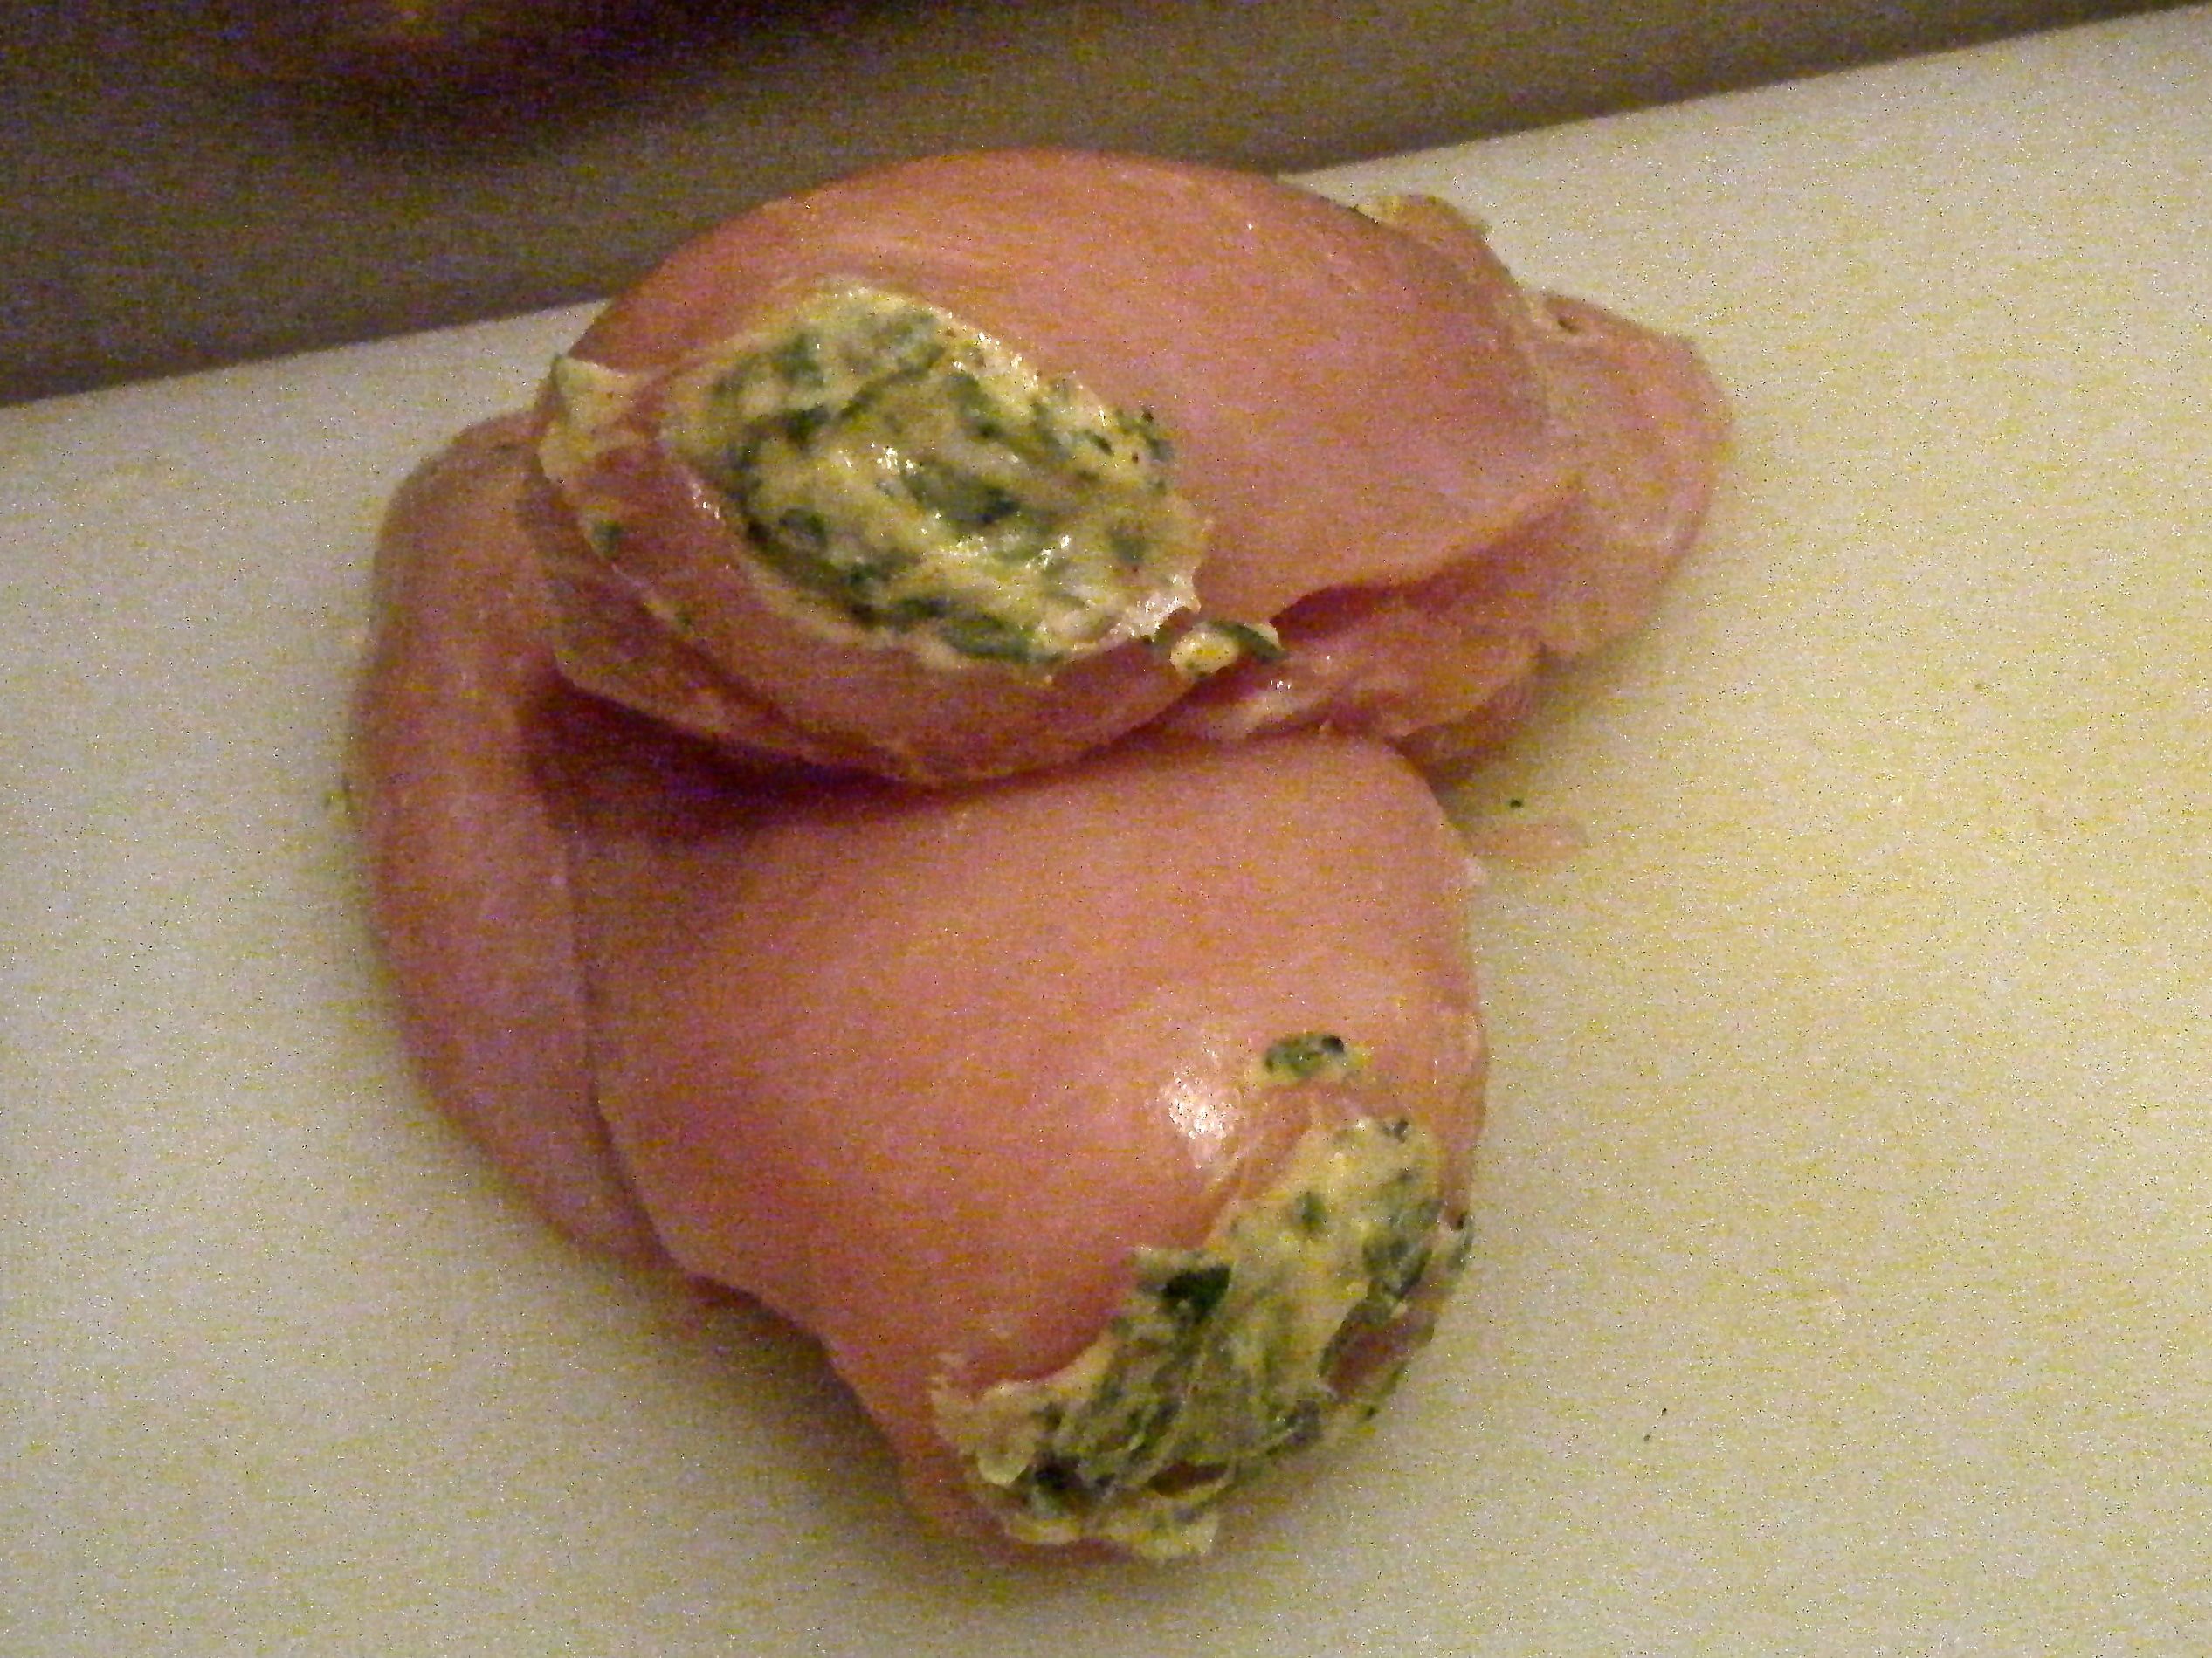
With the the TV program fresh in my mind, I tried to replicate Tom’s approach.  I got my knife and pushed it tip first into the thickest end of the chicken, pushing along the length of the chicken to make a pocket.  Using this approach helps stop the butter just melting and spilling out of the kiev.

Practical Tip: you need to make the pocket as deep as possible but be careful not to push the knife through so that it comes out the other side of the chicken.  The pocket should have only one exposed area, being the point where the tip of the knife went into the chicken.

I then got my piping bag, pushed the nozzle into the split in the end of the chicken and pipped in the butter.  The result was a very strange feeling!  I could feel the chicken breast expanding in my hand as it filled up with butter.  I piped in as much as possible, however, I found the pocket on one of the breasts wasn’t quite deep enough to fill it fully.  I therefore made a second pocket from the other end of the chicken and piped in a bit more.

Edited - filled chicken2 Edited - filled chicken

Once the chicken was filled with the butter, I got my flour, eggs and breadcrumbs ready.  I placed the eggs in a shallow bowl and the flour and breadcrumbs onto a plate.  As I’ve said above, the quantities ended up being a bit too much for just 2 chicken breasts.  I made the mistake of trying to use the full amounts and this ended up being a bit of a waste.  It was also really messy as loads of the breadcrumbs ended up falling off the side of the plate as I tried to cover the chicken!

Edited - coating ingredients

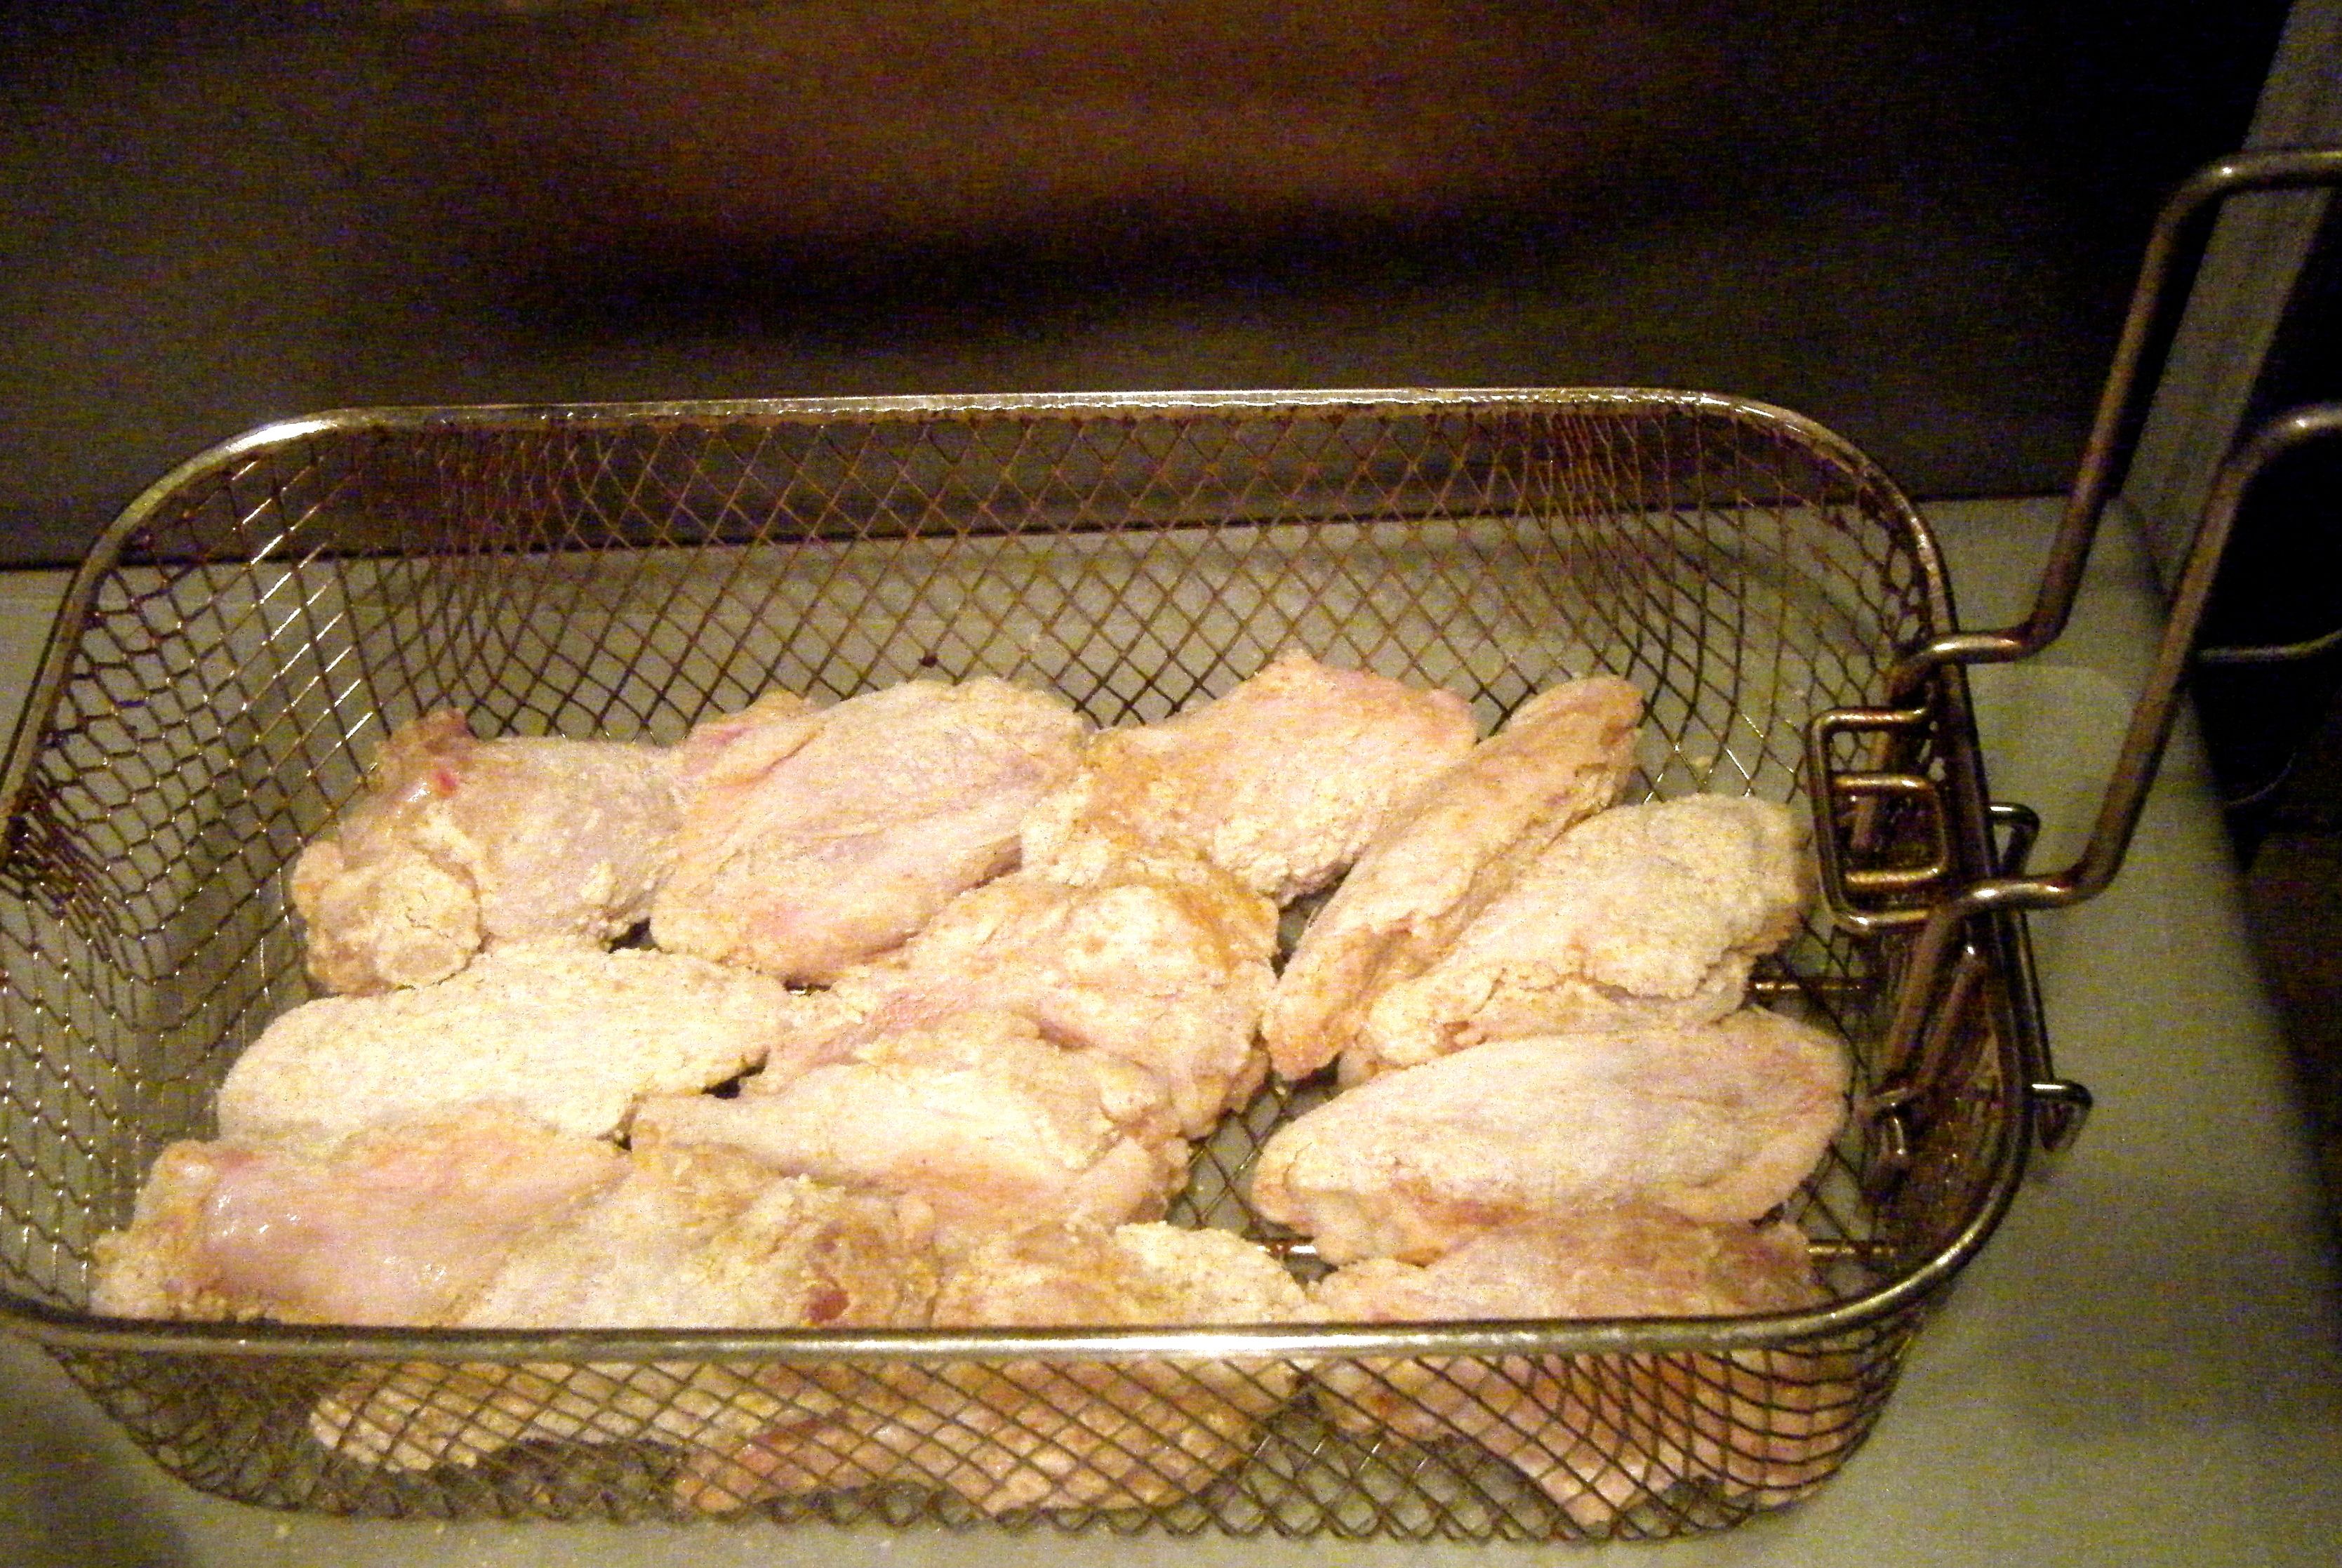
So with my coating ingredients ready. I dipped the chicken breasts in turn into the flour, then the egg and finally the breadcrumbs.  I placed them onto a plate, covered them with cling film and popped them in the fridge and set the timer for 20 minutes.

Edited coated chicken

After the 20 minutes was up, I got my frying pan out and heated the oil.  The recipe says to use “a little of the vegetable oil”, however, when I watched it on TV it looked more like the chicken was shallow fried.  I therefore added quite a lot to my pan and got it nice and hot.

Practical Tip: to test whether the oil is hot enough, just drop some of the breadcrumbs into the oil and if they sizzle, the oil is hot enough to fry the chicken. 

 Edited in the pan 1Edited - in the pan 3

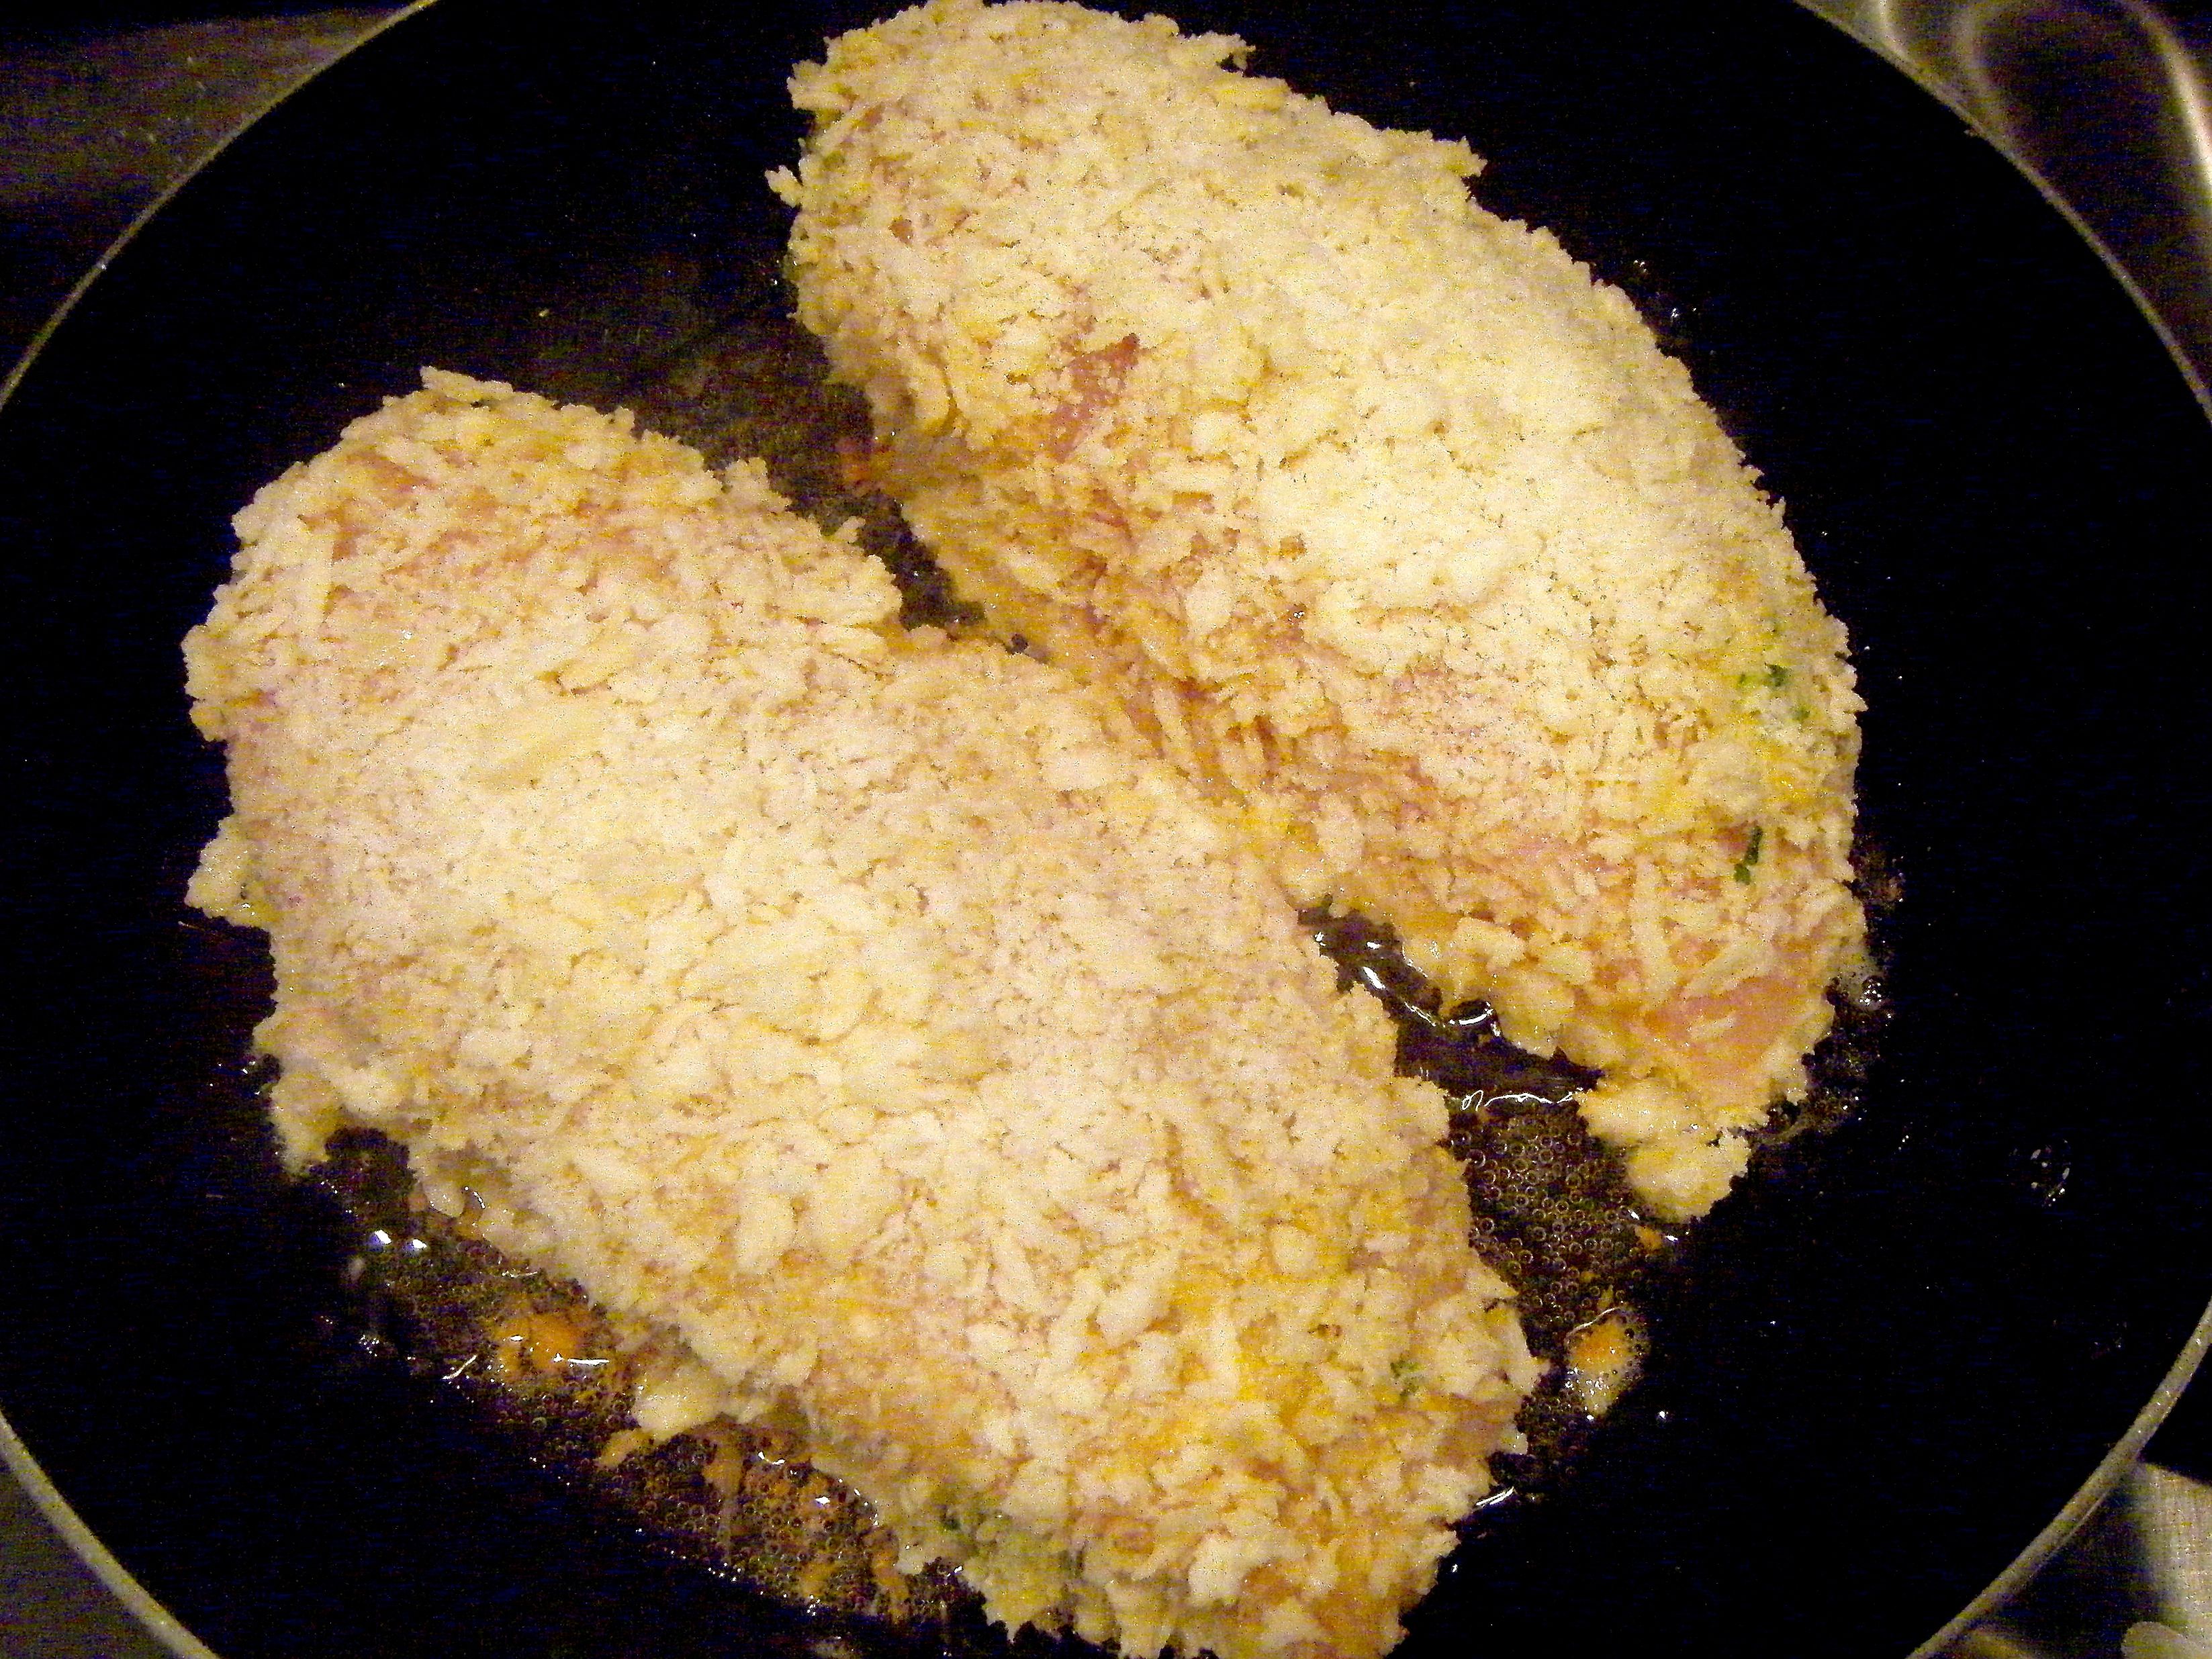
I fried the chicken in the oil for 3-4 minutes on each side until golden brown and then popped it in the oven for 15 minutes.  I still found some of the butter ran out of the pocket but it was a lot better than when I used the other technique of creating a chicken parcel.

 Edited - out the oven

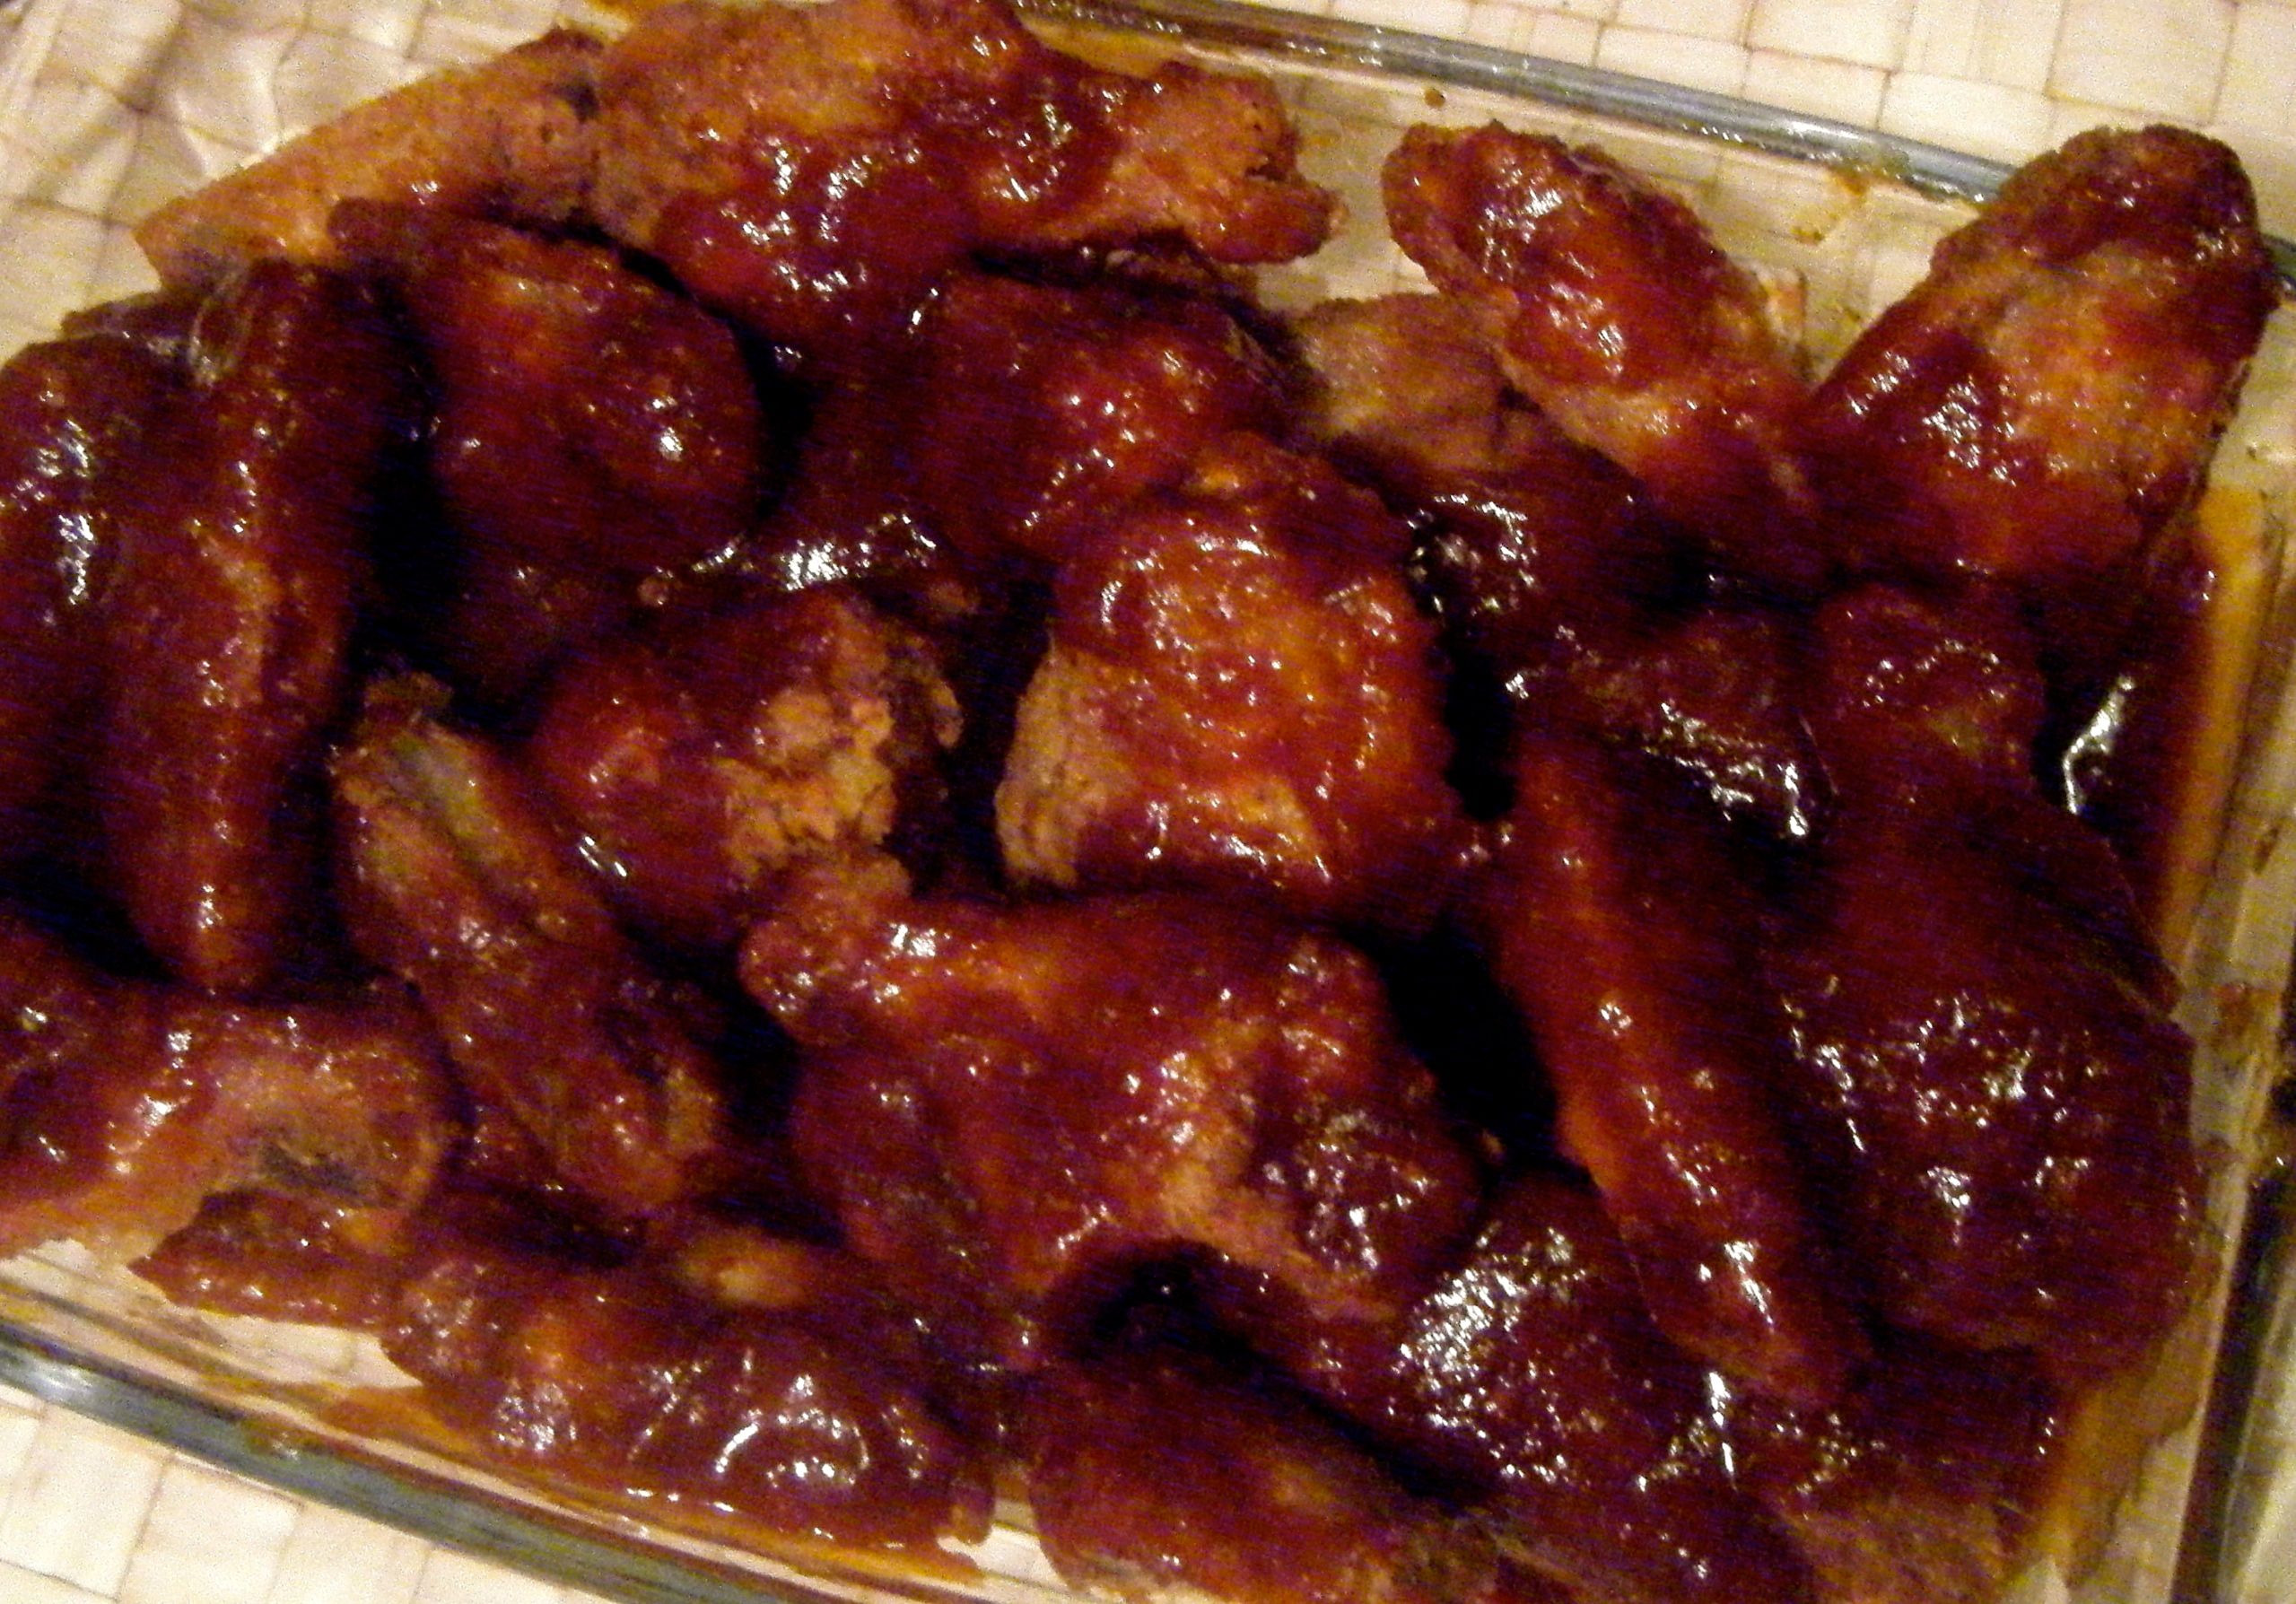
Once the chicken was cooked, it was time to serve up.  Now, I had really good intentions of serving my kiev up with salad but I ran out of side space to prepare the salad (terrible excuse I know!) and so I ended up just giving in and having homemade chips which I was already making for my other half.

Edited - on the plate

My boyfriend and I both really liked the flavour and texture (the panko breadcrumbs worked really well!), however, we both said there was actually too much chicken.  I like my kievs to be really buttery and I felt I didn’t quite get the ratio of butter to chicken quite right.  I think this is simply because my butchers chicken breasts were so big –  so big in fact, neither of us could finish them.  Overall I would say my second attempt at chicken kievs was a success and it was definitely a lot better than my first!

Coming up next week, Challenge No. 07 – viennese fingers. 

Challenge No. 5 – Chocolate Fudge Cake

This recipe was suggested by my colleague Alison, who, as it happens, has a massive sweet tooth.  I think any chocolate lover has a weak spot for chocolate fudge cake.  In fact, when I showed my chocaholic boyfriend the Challenge 52 recipe list, he eye’s lit up at the sight of this suggestion – it is one of his favourites.  Whether you like your chocolate cake warm or cold, with ice cream or normal cream, in my opinion there is always a careful balance to be struck.  The cake needs to be moist (I hate this word!!) and rich but also light and not stodgy.

With this in mind, I searched for a chocolate fudge cake recipe online.  A few different ones came up and I decided to go with this one by Mary Berry.  Those of you who know me will already know how much I like Mary Berry.  I love watching all her programs, I have read her autobiography and every time I try one of her recipes, it always comes out a success (this one was no different!) and this was therefore a natural choice for me.

The recipes requires the following ingredients:-

  • Cake
    • 50 g (2 oz) sifted cocoa powder
    • 6 tablespoons boiling water
    • 3 large eggs
    • 50 ml (2 fl oz) milk
    • 175 g (6 oz) self-raising flour
    • 1 rounded teaspoon baking powder
    • 100 g (4 oz) softened butter
    • 275 g (10 oz) caster sugar
  • Icing and filing
    • 3 tablespoons apricot jam
    • 150 g (5 oz) plain chocolate
    • (39 per cent cocoa solids)
    • 150 ml (¼ pint) double cream

Edited - ingredients

Practical Tip: to soften the butter, cut it into cubes and put it in a sandwich bag in a bowl of lukewarm water for between 5 to 10 minutes until soft.  This can be a lot quicker than leaving the butter at room temperature, especially in the winter when your kitchen may not be so warm!

Before I got started with the cake mix, I prepared my tins.  I only have one deep cake tin which is 20cm/8inch and so I decided to use my other tins which are also 20cm/8inch but they aren’t deep.  From the looks of the picture on the recipe, I had a feeling I didn’t really need the deep tin and I turned out to be right 🙂

Practical Tip: to line the cake tin, get a bit of kitchen roll, add a small knob of softened butter into you tin and use the kitchen roll to wipe it around the base and side.  Ensure all areas are nicely covered but be sure to avoid leaving big lumps of butter. Once you have buttered the tin, pour in a small amount of flour, shake to coat the bottom and then turn at an angle to cover the sides, rotating the tin until all the side has been covered. 

For this recipe, Mary tells you to line the base of the tin and so, as instructed, I also added some baking paper.  I used my tin to draw two circles on the baking paper, cut them out and pressed them neatly into the tins.

With my tins ready, I got started on the recipe.  I mixed the cocoa and boiling water with a spoon.  The result was a delicious smelling thick chocolatey mix which I could have just eaten without going any further.  But I resisted temptation and carried on adding the rest of the cake ingredients. 

Edited - melted chocolate

The cocoa powder mix was very hot from the boiling water and I therefore decided to add my eggs right at the end to make sure they didn’t begin to cook from the heat.  The order I added the ingredients – milk, butter, flour, baking powder, caster sugar and eggs. 

I mixed the rest of the ingredients with my handheld mixer until it was well combined and then added the ingredients to the lined cake tins.

Practical Tip: to get even sized cakes, you need to make sure you put an equal amount of cake mix into each one.  Weigh your lined tins to make sure they are coming out the same and then add approximately half the mix to each tin.  Re-weigh the tins and transfer the mix from one to another until both weigh the same again.  If your tins don’t weigh the same to start with, just make a note of the difference and use this to calculate whether the tins have the same weight of mix in them at the end.

Edited - weigh mixEdited - in the tin

I popped the tins into the oven, ensuring they both went on the same shelf.  The recipe calls for a bake time of 25 to 30 minutes but I set my timer for just 10 minutes.  This is because my oven, like most out there, doesn’t cook evenly at the front and back or on the left and right.  So after 10 minutes I took out my tins and swapped them around so the one at the front right went in at the back left and vice versa.  I set the timer for another 10 minutes and did the same again.  I then set the timer for 5 minutes and checked the cakes.  At this point I felt they needed a bit longer, swapped them over again and left them for the final 5 minutes until they were ready. 

Practical Tip: to test whether the cake is cooked there are two methods and personally I like to use a combination of the two.  Firstly, gently press the top of the cake with your finger; if it is done it will be springy to touch and bounce back into place.  Secondly, take a tooth pick (or cake tester if you have one) and slide it into the centre of the cake; if the cake is done the tester will come out clean.  If you think it’s not quite done return the cake to the oven but keep an eye on it.  Towards the end of a bake, I will sometimes return a cake to the oven for only 1 minute but that 1 minute can make all the difference!

Edited - cooked in the tin

Once the cakes were ready I took them out the oven and set the timer for 5 minutes.  I then took a knife and very carefully ran it round the edge of the tin to loosen the cake.  With the 5 minutes gone, I then turned out the cakes onto a cooling rack and removed the baking paper. 

Edited - cooked

Practical Tip: if you don’t have a cooling rack, simply take a shelf out of the oven when it is cool, make sure it is clean and use two things of equal size (bowls or plastic pots work well) and put one underneath each end of the shelf.  Hey presto, you have a cooling rack!

Once the cakes were completely cooled, I got started on the icing.  I began by warming through my apricot jam and then popped this onto the cakes.  The recipe specifically states to cover “the base of one and the top of the other”.  This is what I did, however, I didn’t do it this way because the recipe told me to.  Instead, I worked out how I wanted my cakes to sit on top of each other (i.e. base up or top up) and then made sure the final top sides of both were covered.

Edited - glazed

Whilst my jam was warming, I got started on the chocolate icing.  In hindsight, I wish I had started this a lot sooner – probably at the point I took the cakes out the oven.  Before you add the icing to the cake, you need to let it cool enough to reach setting point.  This is where patience becomes extremely important.  Unfortunately I was not as patient as I should have been and my initial covering of the bottom layer was too runny so that when I put the top on, a lot of the icing ran down the side of the cake.  The cause of my impatience, I didn’t start this bake until 8pm on a Sunday evening and by the time I got to the point of trying to put the icing on the cake, I just wanted to get in bed to watch a film before having to get up for work on a depressingly dreary Monday morning! 

Anyway, back to how I made the icing I broke up the chocolate and put it in a bowl with the cream and then placed this over a pan of simmering water.  When doing this, I made sure the bottom of the bowl didn’t touch the water as this can burn the chocolate.  I gave the chocolate and cream a mix every now and again and once the chocolate was completely melted, I took the bowl off the simmering pan.  As I mentioned above, the trick was then to let the icing reach setting point before adding it to the cake, something I didn’t too too well!

Edited - icing meltedEdited - icing 1

Practical Tip: if you are in a hurry, the icing can be put in the fridge to speed up the cooling process.  Putting the mix straight into the fridge can cause the chocolate and cream to separate and you should let it cool at room temperature before transferring to the fridge.  Even by letting it cool slightly at room temperature, using the fridge to speed up the process can affect the shininess of the icing but I still think it looks good and it is worth doing it if you are in a bit of a hurry.  In my opinion, it is better to have a more ‘matt’ finished icing which stays where you want it than a shiny one which ends up on the serving plate because it runs straight off the cake!

With the icing (nearly) ready, I started by icing the bottom layer, put the top cake on and then added the remaining icing (after desperately trying to let it cool for another 5 minutes in the fridge).  Given that the icing was running down the sides of the cake slightly, I decided to cover the cake fully.  I used a spatula to make the icing as smooth as possible and then used a small fork to make a pattern on the top of the cake.

Edited - whole iced Edited - iced top

The final product was absolutely beautiful.  Mary Berry strikes again! The cake was so light but full of chocolately goodness.  I had mine cold with cream, whilst my other half had his warm with ice-cream.  For the sake of completeness, I obviously had to try some of my boyfriends warm/ice-cream combo and I can confirm that this was just a nice as my cold/cream serving 🙂

 Edited - ice cream Edited - cream

Coming up next week, Challenge No. 6 – chicken kievs. 

Challenge No. 4 – BBQ Chicken Wings

This is a real finger food favourite of mine but it is one which can be a bit of a let down if it’s not done well.  There are a number of factors to consider when making wings – you need the right size and texture for the chicken, the right level of sweetness and hotness in the sauce and, of course, the right amount of sauce on the wings.

My whole family shares my love of BBQ chicken wings and over the years we have had some great tasting wings.  One of my favourites was at a bar in Goderich, Canada.  This is a small and extremely beautiful town in Ontario where my Great Uncle settled to start his family.  It was my lovely family in Goderich who introduced me to the wings at Paddy O’Neils – quite simply AMAZING!  With my family’s love of chicken wings, it is somewhat unsurprising that this recipe was suggested by my big brother.

I have been regularly making chicken wings since we returned from a trip to Vegas in 2013 and my boyfriend and I quickly got withdrawal symptoms from the yummy food we enjoyed on holiday. I searched online and found a great recipe which has been a regular treat every since.  I’ve always made my wings with a buttery hot sauce and I therefore had to find a BBQ sauce recipe to use for this challenge.

A quick search online revealed lots to choose from and eventually I opted for this one from tasteofhome.com

When combined with my existing recipe for the wings, you will need the following:-

  • Wings
    • Chicken wings (1 pack of approximately 700g)
    • 60g flour
    • 0.4g cayenne pepper
    • 0.6g paprika
    • 2g salt
    • Oil for frying
  • Sauce
    • 1/4 onion (finely chopped)
    • Oil for frying
    • 2 medium-large garlic cloves (crushed)
    • 250ml ketchup
    • 120ml cider vinegar
    • 66g light brown soft sugar
    • 60ml worcestershire sauce
    • 1tsp hot chilli powder
    • 1/2 tsp cayenne pepper
    • 1/2 tsp ground cumin
    • 1/4 tsp hot pepper sauce

WARNING – in case you haven’t realised already, this recipe is not a healthy one but my gosh, it is worth the guilt!

Edited - Ingredients

Practical Tip: trying to weigh 0.4g of cayenne pepper and 0.6g of paprika is a bit of a nightmare!  So I weighed out 4g of cayenne pepper, mixed this with 6g of paprika and stored it in an airtight container on my spice shelf.  Each time I want to make the wings, I just weigh out 1g of the mixed spice.  Trust me, once you have made these wings the first time, you’ll come back again and those leftover 9g will most definitely get used up.

With my ingredients ready I set out preparing my chicken wings.  I chopped off the tip of each wing first (and discard this bit) then separated the wing and drumette.  Once this was done I placed the chicken wings and drumettes in a nonporous dish and in a separate jug mixed the flour, cayenne pepper, paprika and salt.   Then I carefully coated the chicken in the flour mix and popped it in the fridge for 90 minutes

Practical Tip: add a small amount of the flour mix to your chicken and stir with a spoon.  Then add a bit more and give it another stir. Finally, tightly cover the dish with cling film and give the chicken a good toss. The cling film will keep the kitchen (and your clothes) tidy but this helps make sure you get those chicken bits fully coated!

Edited - Coated wings

With the chicken in the fridge it was time to start thinking about the fryer.  Now I have a deep fat fryer and, in complete honesty, I was dreading using it the first time.  I’ve heard plenty of horror stories of fires from deep fat frying and I was completely against having one in the flat.  However, my in-laws bought one for us as a present and as it was in the flat I had no choice but to give it a go (my boyfriend likes his chips homemade and deep fried – nice and healthy!).  If you don’t have a deep fat fryer, this recipe will no doubt work with a deep pan and frying basket; but please be very careful and make sure you control the temperature. 

Whichever method you are using, you want to get your oil nice and hot to around 190 degrees celsius.

Practical Tip: make sure your oil is very hot before you add the chicken wings.  If you add them before the oil has reached the right temperature the flour coating will simply absorb the fat and you will end up with very greasy and slightly soggy wings rather then nice crispy ones.

Whilst the oil was heating up, I got started on the sauce.  I fried my onions until soft (this took about 8 minutes) and I added my garlic for a further minute.  Next, in went the rest of the ingredients, except the hot sauce which got added right near the end.  The recipe said to simmer the sauce uncovered for 8-10 minutes, however, I left mine a lot longer than this as it took a while to thicken up.  In fact, I let the sauce simmer for somewhere between 20 and 30 minutes.

Edited - Bubbling sauce

With the sauce on the go and the oil ready I placed half my chicken in the basket and popped it into the fryer.  Actually, I always get my boyfriend to do this bit – I’m still scared of my fryer!  The chicken takes about 15 minutes to cook.  Once done, I placed the cooked chicken in an overproof dish, covered it with foil and put it into a warm oven while the second batch went in the fryer.  Depending on the size of your fryer you may be able to do the whole lot in one go but you must be careful not to overcrowd the chicken.

Edited - basket shot

When I put the the second lot of chicken into the fryer I took my sauce off the heat.  It was looking quite lumpy because of the onion (despite my best attempt to chop finely!) and so I decided to blitz it with my handheld blender.  I let it cool for about 5 minutes before I did this, then added the hot sauce and returned the sauce to the heat for the final 5 or so minutes until the chicken was ready.  I put it all together and served up with some sweet potato fries. 

Practical Tip: I covered the chicken in a bit of sauce then gave it a mix before adding the rest.  This helped make sure every bit had a good coating of the yummy BBQ sauce.

Pre-sauce coating - nice and crispy wings!

Pre-sauce coating – nice and crispy wings!

Smothered in yummy sauce!

Smothered in yummy sauce!

And so the verdict – best BBQ sauce my boyfriend and I have ever had! It was delicious! Challenge No. 4 was a success 🙂

Next up, I’ll be turning my hand to chocolate fudge cake so make sure you come back next week for Challenge No. 05.